Tutorial
How To Install and Secure phpMyAdmin on Ubuntu 16.04

Not using Ubuntu 16.04?Choose a different version or distribution.
Introduction
While many users need the functionality of a database management system like MySQL, they may not feel comfortable interacting with the system solely from the MySQL prompt.
phpMyAdmin was created so that users can interact with MySQL through a web interface. In this guide, we’ll discuss how to install and secure phpMyAdmin so that you can safely use it to manage your databases from an Ubuntu 16.04 system.
Prerequisites
Before you get started with this guide, you need to have some basic steps completed.
First, we’ll assume that you are using a non-root user with sudo privileges, as described in steps 1-4 in the initial server setup of Ubuntu 16.04.
We’re also going to assume that you’ve completed a LAMP (Linux, Apache, MySQL, and PHP) installation on your Ubuntu 16.04 server. If this is not completed yet, you can follow this guide on installing a LAMP stack on Ubuntu 16.04.
Finally, there are important security considerations when using software like phpMyAdmin, since it:
- Communicates directly with your MySQL installation
- Handles authentication using MySQL credentials
- Executes and returns results for arbitrary SQL queries
For these reasons, and because it is a widely-deployed PHP application which is frequently targeted for attack, you should never run phpMyAdmin on remote systems over a plain HTTP connection. If you do not have an existing domain configured with an SSL/TLS certificate, you can follow this guide on securing Apache with Let’s Encrypt on Ubuntu 16.04.
Once you are finished with these steps, you’re ready to get started with this guide.
Step One — Install phpMyAdmin
To get started, we will install phpMyAdmin from the default Ubuntu repositories.
We can do this by updating our local package index and then using the apt packaging system to pull down the files and install them on our system:
This will ask you a few questions in order to configure your installation correctly.
Warning: When the first prompt appears, apache2 is highlighted, but not selected. If you do not hit Space to select Apache, the installer will not move the necessary files during installation. Hit Space, Tab, and then Enter to select Apache.
- For the server selection, choose apache2.
- Select yes when asked whether to use
dbconfig-commonto set up the database - You will be prompted for your database administrator’s password
- You will then be asked to choose and confirm a password for the
phpMyAdminapplication itself
The installation process actually adds the phpMyAdmin Apache configuration file into the /etc/apache2/conf-enabled/ directory, where it is automatically read.
The only thing we need to do is explicitly enable the PHP mcrypt and mbstring extensions, which we can do by typing:
Afterwards, you’ll need to restart Apache for your changes to be recognized:
You can now access the web interface by visiting your server’s domain name or public IP address followed by /phpmyadmin:
https://domain_name_or_IP/phpmyadmin
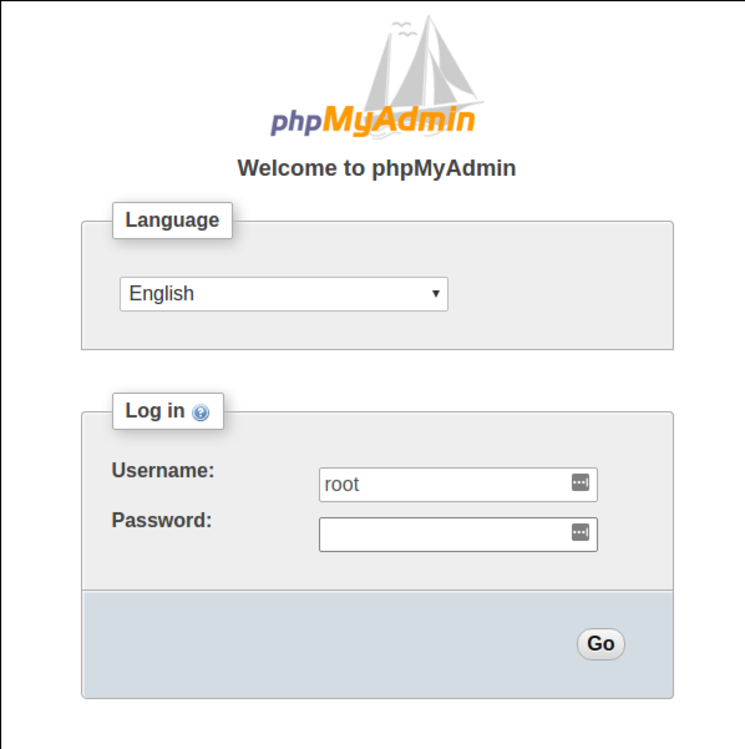
You can now log into the interface using the root username and the administrative password you set up during the MySQL installation.
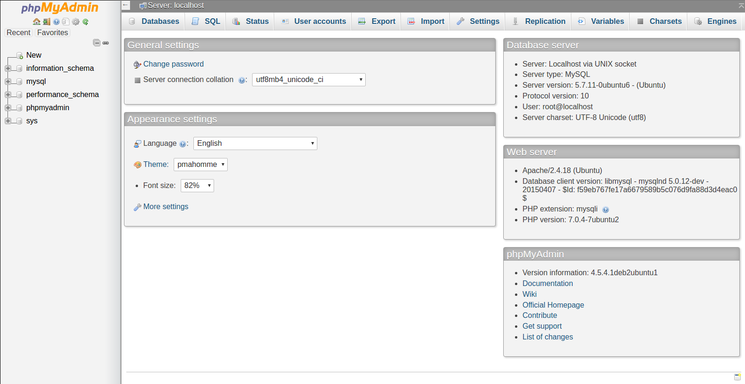
When you log in, you’ll see the user interface, which will look something like this:
Step Two — Secure your phpMyAdmin Instance
We were able to get our phpMyAdmin interface up and running fairly easily. However, we are not done yet. Because of its ubiquity, phpMyAdmin is a popular target for attackers. We should take extra steps to prevent unauthorized access.
One of the easiest way of doing this is to place a gateway in front of the entire application. We can do this using Apache’s built-in .htaccess authentication and authorization functionalities.
Configure Apache to Allow .htaccess Overrides
First, we need to enable the use of .htaccess file overrides by editing our Apache configuration file.
We will edit the linked file that has been placed in our Apache configuration directory:
We need to add an AllowOverride All directive within the <Directory /usr/share/phpmyadmin> section of the configuration file, like this:
<Directory /usr/share/phpmyadmin>
    Options FollowSymLinks
    DirectoryIndex index.php
    AllowOverride All
    . . .
When you have added this line, save and close the file.
To implement the changes you made, restart Apache:
Create an .htaccess File
Now that we have enabled .htaccess use for our application, we need to create one to actually implement some security.
In order for this to be successful, the file must be created within the application directory. We can create the necessary file and open it in our text editor with root privileges by typing:
Within this file, we need to enter the following information:
AuthType Basic
AuthName "Restricted Files"
AuthUserFile /etc/phpmyadmin/.htpasswd
Require valid-user
Let’s go over what each of these lines mean:
AuthType Basic: This line specifies the authentication type that we are implementing. This type will implement password authentication using a password file.AuthName: This sets the message for the authentication dialog box. You should keep this generic so that unauthorized users won’t gain any information about what is being protected.AuthUserFile: This sets the location of the password file that will be used for authentication. This should be outside of the directories that are being served. We will create this file shortly.Require valid-user: This specifies that only authenticated users should be given access to this resource. This is what actually stops unauthorized users from entering.
When you are finished, save and close the file.
Create the .htpasswd file for Authentication
The location that we selected for our password file was “/etc/phpmyadmin/.htpasswd”. We can now create this file and pass it an initial user with the htpasswd utility:
You will be prompted to select and confirm a password for the user you are creating. Afterwards, the file is created with the hashed password that you entered.
If you want to enter an additional user, you need to do so without the -c flag, like this:
Now, when you access your phpMyAdmin subdirectory, you will be prompted for the additional account name and password that you just configured:
https://domain_name_or_IP/phpmyadmin
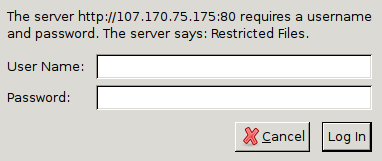
After entering the Apache authentication, you’ll be taken to the regular phpMyAdmin authentication page to enter your other credentials. This will add an additional layer of security since phpMyAdmin has suffered from vulnerabilities in the past.
Conclusion
You should now have phpMyAdmin configured and ready to use on your Ubuntu 16.04 server. Using this interface, you can easily create databases, users, tables, etc., and perform the usual operations like deleting and modifying structures and data.
Thanks for learning with the DigitalOcean Community. Check out our offerings for compute, storage, networking, and managed databases.
About the author(s)
This textbox defaults to using Markdown to format your answer.
You can type !ref in this text area to quickly search our full set of tutorials, documentation & marketplace offerings and insert the link!

Become a contributor for community
Get paid to write technical tutorials and select a tech-focused charity to receive a matching donation.

DigitalOcean Documentation
Full documentation for every DigitalOcean product.

Resources for startups and SMBs
The Wave has everything you need to know about building a business, from raising funding to marketing your product.
The developer cloud
Scale up as you grow — whether you're running one virtual machine or ten thousand.

Get started for free
Sign up and get $200 in credit for your first 60 days with DigitalOcean.*

*This promotional offer applies to new accounts only.
Hello;
Anyone for Nginx? also will it work with PHP7?
We have a guide for phpMyAdmin + Nginx on an Ubuntu 14.04 system. I won’t make any promises about how soon, but it’s on our list of things to port to 16.04.
It should, yes. This guide uses PHP 7.
alright…
thanks
Hello;
I was able to install it but i got this error
For me, what helped was restarting all php services. You can find those starting with PHP by running
service --status-all | grep php.Then restart them one by one (there might be a better way) with
sudo service php... restart.You might also want to restart nginx:
sudo service nginx restart.Hey @jonasjancarik you use Ubuntu 16 too? how did you install the phpmyadmin?
@iamkingsleyf: I mostly followed the guide for Nginx and phpMyAdmin on Ubuntu 14.04. In short:
Restart them one by one, e.g.:
@jonasjancarik Thanks its working.
@jonasjancarik, thanks, it still works! If you follow the default setup like I did, your second point will probably look like this:
sudo ln -s /usr/share/phpmyadmin /var/www/html/phpmyadmin. Why don’t you publish a rewritten guide for 16.04 since its been a long time and still not out yet?It’s quite easy if you are on ubuntu 16.04 which comes with default php7.0 and you are working on php5.6 go to /etc/php/7.1/mods-available/ and copy mbstring.ini from there and paste it in following directory /etc/php/5.6/mods-available/ and paste there. A simple script to do this is:
Run this command
sudo phpenmod mcryptto enable mcrypt Runsudo phpenmod mbstringto enable mbstring Restart apache server withsudo service apache2 restartRefresh phpmyadmin page or open in new browser (or incognito mode) clearing cache and all.
I couldn’t find a guide anywhere online for installing phpMyAdmin for Nginx on Ubuntu 16.04 so I wrote one myself.
http://devanswers.co/installing-phpmyadmin-nginx-ubuntu-16-04-17-04/
Hope this helps someone.
nano /etc/apache2/apache2.conf
Add the following to the bottom of the file:
phpMyAdmin Configuration
Include /etc/phpmyadmin/apache.conf
Thanks. There seems to be a missing hash before the “phpMyAdmin Configuration” comment, but the include line got it up and working.
Yes, This is totally right.
Including Digital Ocean’s droplet and AWS Ubuntu(16.04), it should be added or
https://domain_name_or_IP/phpmyadmingoes to site’s default ‘Not Found’ page.Yes this comment is totally right.
Including Digital Ocean’s Droplet and AWS Ubuntu (16.04), it should be added or
https://domain_name_or_IP/phpmyadmingoes to site’s default 404 page.Thanks. This one was missing in Step 1.
The requested URL /phpmyadmin/ was not found on this server.
Then add the following line to the end of the file: Include /etc/phpmyadmin/apache.conf
Then restart apache
Would be great to see a tute on Nginx + php7 + phpMyAdmin soon!
“The installation process actually adds the phpMyAdmin Apache configuration file into the /etc/apache2/conf-enabled/ directory, where it is automatically read.”
Nope, usually he does not.
U must copy: sudo cp /etc/phpmyadmin/apache.conf /etc/apache2/conf-enabled/phpmyadmin.conf Than open it: sudo nano /etc/apache2/conf-enabled/phpmyadmin.conf Add line after “DirectoryIndex index.php”: AllowOverride All
Example: <Directory /usr/share/phpmyadmin> Options FollowSymLinks DirectoryIndex index.php AllowOverride All
It should, if you tick the box beside apache2 during installation. Unfortunately many people (myself included) have pressed continue thinking it was selected because it was highlighted. If you don’t see an asterik* beside apache2 then you haven’t actually told the installer to configure apache.
I already had an asterisk in mine, and it still did not copy. YMMV
Doesn’t work even I do manually copy and edit as suggested. If you remove and reinstall however will do the trick.
sudo apt-get purge --auto-remove phpmyadmin php-mbstring php-gettext
Hello,
Recently MySQL changed their code so that you could not leave a blank port when installing phpmyadmin so I keep getting an error when I try to install PHP my admin.
"An error occurred while installing the database:
mysql: [ERROR] mysql: Empty value for ‘port’ specified"
https://i.gyazo.com/ae194827faac9ff839e6c64b3c1fd4c8.png
Hi! I’ve followed the guide but i got an error while installing phpmyadmin. The error says: "Empty value for ‘port’ specified. " How can i fix it?
This comment has been deleted
everythings fine, but `` sudo phpenmod mcrypt sudo phpenmod mbstring
Hi,
I dont know what’s happend… but I cant log in phpmyadmin. I tried with user and my pass, root and pass of phpmyadmin. Display this message: #1045 - Access denied for user ‘root’@‘localhost’ (using password: YES)
Try logging in the with the user “phpmyadmin”
hi there guys, i have tried that and it did work, but did not showed the wordpress table that was installed on it… should i need to login as root right? but as root it is giving the msg: #1045 - Access denied for user ‘root’@‘localhost’ (using password: YES)
could somebody help me please? thanks!
thank you very much! i had the same problem
That worked for me! Thank you!
Why am I getting php code instead of the gui? I’m using php 7.0 Thanks
For those of you who didn’t select apache2 in the first step, you may want to re-install.
First uninstall:
Then start the installation process again.
I couldn’t load phpmyadmin because I didn’t select apache2 from the beginning. If there is a better way, please share.
There actually is a better way in that you don’t need to uninstall phpmyadmin! Well, hopefully that’s the case. For some people, an uninstall may be required. But this is what solved it for me (took me back through the configuration screen where I was able to select apache2 after missing it the first time):
I’m going to try this and redearmedia’s response too. I was disconnected from my server during installation and couldn’t figure out how to get back to the installation prompt.
Apache fails to restart after installing phpMyAdmin. Output of config file is 'Segmentation fault (core dumped). Any ideas? Thanks
Hi. If anyone is facing this issue I do have fix.
It seems to be problem if the only installed php version is PHP 7. (No PHP 5 as addition).
cd /etc/apache2/mods-enabledEdit php5.load in your favourite editor
sudo vim php5.loadComment out the only line inside
#LoadModule php5_module /usr/lib/apache2/modules/libphp5.soSave and exit. Restart apache.
sudo service apache2 restartI used this tutorial for installing phpmyadmin; but didn’t work after executing all instructions in step 01 I had this error message when trying to access phpmyadmin:
After some research in the Internet I found the solution: I had to add the following instruction in /etc/apache2/apache2.conf
then restart my apache2.
When I try to access my php admin www.mysite.com.br/phpmyadmin, it keeps redirecting me to www.mysite.com.br
Do I need to change anything on DNS ??
Hi, I’ve tried to install phpmyadmin following this guide. But I rushed and didn’t read the first warning in red color about hitting space to select Apache2. Now when I try to go to http://my.server.ip/phpmyadmin it trows a 404.
I tried doing a
sudo apt-get removeand install it again to hit space this time, but that promp didn’t appear again, and it still gives me a 404.How can I correct this mistake? Thanks
Nevermind. I saw a comment here explaining how… I always rush
For anyone that makes it this far down the list wondering about “skipping” apache2 (like I did), first try running:
This may fix it without having to uninstall it as it takes you through the configuration again.
Hello I can’t create additional Authentication at phpmyadmin.
I am following this tutorial in creating phpmyadmin.
The last section is to create secure authentication.
I followed exactly. I have .htaccess file inside
/usr/share/phpmyadmin/.htaccess
I have .htpasswd file inside /etc/phpmyadmin/.htpasswd. When I look inside .htpasswd file, I saw username:password line inside the file. Those are credentials I have given.
I used the same user name as in the original credential to phpmyadmin.
But when I login to my phpmyadmin, that additional login window doesn’t appear.
Why it doesn’t appear?
Thanks
Hi, I am having the same problem. Did you get it to work ?
I’m also having this exact same issue, did you manage to get it to work?
Needed to insert “AllowOverride All” after “DirectoryIndex index.php” in the /etc/apache2/conf-available/phpmyadmin.conf (at least for me this solved it). Maybe it helps to somebody else too.
this link helped: https://www.digitalocean.com/community/questions/problem-securing-phpmyadmin-with-htaccess-htpasswd
I have taken over running a website built on WordPress 4.6.1 which is running on Ubuntu 16.04 and using Apache2 webserver. It appears that phpMyAdmin was installed somewhere along the way, most likely when WordPress was installed on the server, but I haven’t been able to access it. The fellow who owns the server is not overly computer literate, so I have been fairly much on my own.
Searching the entire hard drive reveals that the phpmyadmin files are all located in the same area of the directory structure as the WordPress files. I tried following the directions you give verbatim, but I am informed that all the particular phpmyadmin files are already installed. By enabling mcrypt and mbstring I was finally able to reach the login screen for phpMyAdmin and login successfully (YAY)!
However, as I proceeded to follow you direction to further secure access to the server’s phpMyAdmin, I was unable to find the file phpmyadmin.conf where you indicated it ought to be found. Again, performing a search of the entire hard drive, I found two instances of that file. Comparing both of them, they are identical, but nowhere in them did I find a reference to a directory /usr/share/phpmyadmin. Now I’m really stumped and I hesitate to proceed with the directions any further because I am unable to execute this part of the instructions! Can someone please direct me on how to proceed to further secure access to phpMyAdmin on our server?
hi there, may i get some help with this? i’m getting this error: #1045 - Access denied for user ‘root’@‘localhost’ (using password: YES) when i try to login for the first time as showed in this tutorial Thank you!
use this username instead of root: “phpmyadmin”
Thanks!
This went well for me as written except for one thing. You forgot “apt-get install php-mcrypt”.
why do you need that?
I’m not sure, honestly. But I followed the procedure to the letter and the received an error telling me I needed it, so I installed it.
Thank you, all your guides are helpful
Thank you, It worked for me.
For me, there was a need to once again restart apache after creating the .htpasswd file, so $ sudo systemctl restart apache2
I have to say, Brennen, your tutorials are spectacularly clear, well written, and easy to follow. After, admittedly, some user feedback, what ended up here worked the first time, and every time!
Signed - very happy user !
complementing
sudo ln -s /etc/phpmyadmin/apache.conf /etc/apache2/conf-available/phpmyadmin.conf sudo a2enconf phpmyadmin.conf sudo systemctl reload apache2.service
souce
https://help.ubuntu.com/lts/serverguide/phpmyadmin.html
Thank you! This helped me a lot. It just wouldn’t work without this.
After I login with the “phpmyadmin” user, I then go to try to create a datbase and I see the words: “No Privileges” with a red x next to them. What is going on? How can this be the default scenario after installation, that just doesn’t seem right. Anyone know what I should do? thanks in advance…
ok this is no longer a problem … so nobody needs to reply to my comment above … thanks
I needed to add
after installing phpmyadmin
Step One — Install phpMyAdmin almost completed
but when i run this command > sudo systemctl restart apache2
it says Faild to restart apache2.service: Unit apache2.service not found
any help?
Cleanly written tutorial easy to follow steps…I wish more people write this way!
Hello everyone,
Great Tutorial, it’s very clear and to the point. After I have installed phpmyadmin, when clicking on the Databases tab at the top I see No Permission, when I try to create ( New User / Database ), update or grant privileges, I get Access Denied for the user “phpmyadmin”. Turns out I should have been using the root user and the password DO creates automatically, which is found by using sudo cat /root/.digitalocean_password. Thanks to the article https://www.digitalocean.com/community/questions/mysql-root-password my 3 days of suffering has ended.
At part one when visiting “https://domain_name_or_IP/phpmyadmin” I get the Unable to connect message. Anyone knows what to do?
Thanks in advance!
Brennen Bearnes!!! you are really an expert!!! thanks a lot!!!
Hi, how can I install a phpmyadmin on a Virtual Hosts? I’m using Ubuntu 16.04 I want that for every site on the Virtual Host will be a unique “phpmyadmin”
Thanks
thanks a lot for this - easy to follow and also offers context as to why some things are required during configuration (I’ve never actually used phpmyadmin before)
Everything works with PHP 7 fine! Thank You!
I’m having an issue with installing phpmyadmin after mysql server being already installed. Something about one port not being defined althoug I define the port 3306 in /etc/my.cnf. Is there any solution? (Error #2002)
https://domain_name_or_IP/phpmyadmin
No, I can’t! I get this on the page
Not Found
The requested URL /phpmyadmin was not found on this server. Apache/2.4.18 (Ubuntu) Server at ******.com Port 80
Good article and steps. Security appreciated. Thx!
i installed Koha from (http://kohageek.blogspot.in/search/label/Koha) on Linux Mint 18.1 and it is working in 127.0.1.1:8000 and 127.0.1.1:8001 ports. i use mariadb as mysql database. then i installed phpmyadmin. but phpmyadmin not open and not working, then i add these line in /etc/apache2/apache2.conf Include /etc/phpmyadmin/apache.conf but still phpmyadmin not working. without installing koha, phpmyadmin works well pls help
Why do I have to login as phpmyadmin? Is there any way I can login as root or any other user?
Did not work for me. I get a 404 error like it’s not installed. Will try again later. Using Ubuntu v16 droplet.
Hey, I had followed all steps from above article
Same steps working for my beta domain on separate droplet, while for live its not working, live is on separate high config droplet. I also had compare beta and live files for auth functionality but all are identical, still live phpmyadmin is not securing by auth (while beta domain is secure by auth)
Below are my config files and code,
/etc/apache2/conf-available/phpmyadmin.conf <Directory /usr/share/phpmyadmin> Options FollowSymLinks DirectoryIndex index.php AllowOverride All </Directory>
/usr/share/phpmyadmin/.htaccess AuthType Basic AuthName “Restricted Files” AuthUserFile /etc/phpmyadmin/.htpasswd Require valid-user
/etc/phpmyadmin/.htpasswd MyPass:$apr3435/iI$33%DSMK7K//cdfff5ncy.YZh1
I also had restart apache (also restarted droplet), but its not working.
Do anyone had idea what could be the wrong/misconfigured?
Thanks.
Note:
I had installed Maria DB 10 on 16.04 before following this guide and had a problem with logging in as root as I followed the instructions to say “Yes” to dbconfig-common. I then added a phpmyadmin user with a separate password and could log in as phpmyadmin with no create privileges but not as root.
Found out by trial and error that saying “No” to dbconfig-common worked correctly and I was able to login as root.
Please add this step in this tutorial
cp /etc/phpmyadmin/apache.conf /etc/apache2/conf-enabled/phpmyadmin.conf
Without this conf fix phpmyadmin doesn’t show up even after successful installation.
Hi,
I managed to miss this warmning
“Warning: When the first prompt appears, apache2 is highlighted, but not selected. If you do not hit Space to select Apache, the installer will not move the necessary files during installation. Hit Space, Tab, and then Enter to select Apache.”
Now I cannot access phpmyadmin. What should I do now?
Missing: sudo ln -s /usr/share/phpmyadmin
Othercase I could not reach phpmyadmin
not working ez
once i log in as “phpmyadmin” username, i cant create new database. it says no privileges shouldn’t above user should be by default a root user?
I was getting 404 errors when I visit https://domain_name_or_IP/phpmyadmin
The fix was:
Credit: https://www.digitalocean.com/community/questions/phpmyadmin-404-error-on-nginx-ubuntu-configuration?answer=22288
Dear Brennen Bearnes, Good job.The steps yoy have given were clear. But while following the process, i was stuck up at 2nd step, i.e. Configuring PHP Myadmin. After installing PHPMyadmin, i didn’t get any screen aasking to select Apache. So please guide if any solution for that. The last lines i was getting are
Running newaliases newaliases: warning: valid_hostname: misplaced delimiter: suryamubuntu…name newaliases: fatal: file /etc/postfix/main.cf: parameter myhostname: bad parameter value: suryamubuntu…name dpkg: error processing package postfix (–configure): installed postfix package post-installation script subprocess returned error exit status 75 Processing triggers for libc-bin (2.27-3ubuntu1) … Errors were encountered while processing: postfix E: Sub-process /usr/bin/dpkg returned an error code (1) suryam@suryamubuntu:~$ sudo phpenmod mcrypt WARNING: Module mcrypt ini file doesn’t exist under /etc/php/7.2/mods-available WARNING: Module mcrypt ini file doesn’t exist under /etc/php/7.2/mods-available
I think you missed one thing.
You will need to configure your apache2.conf to make phpMyAdmin works.
nano /etc/apache2/apache2.conf
Then add the following line to the end of the file.
Include /etc/phpmyadmin/apache.conf
Then restart the apache2
sudo systemctl restart apache2
After reinstalling phpmyadmin, the installation doesn’t mention dbconfig-common. So that I can’t do anything since phpmyadmin tables are missing. dpkg-reconfigure phpmyadmin doesn’t work as it only asks for selecting between apache 2 and lighttpd. Any insights?
Thanks for this - really helpful!
I just see plain php code, i have 7.2 php version, any help?
you should make it bigger the part where you mentioned Hit Space, Tab, and then Enter to select Apache. it’s a critical one
Hi All,
I was following this tutorial and after the restart, I am unable to access my website I am getting 404, urgent help required, please advise
Sir during installation I closed the terminal as I not aware of that so any solution for this or what I can do install phymhadmin