Tutorial
How To Install and Secure phpMyAdmin with Nginx on an Ubuntu 14.04 Server

Not using Ubuntu 14.04?Choose a different version or distribution.
Introduction
Relational database management systems like MySQL are needed for a significant portion of web sites and applications. However, not all users feel comfortable administering their data from the command line.
To solve this problem, a project called phpMyAdmin was created in order to offer an alternative in the form of a web-based management interface. In this guide, we will demonstrate how to install and secure a phpMyAdmin configuration on an Ubuntu 14.04 server. We will build this setup on top of the Nginx web server, which has a good performance profile and can handle heavy loads better than some other web servers.
Prerequisites
Before we begin, there are a few requirements that need to be settled.
To ensure that you have a solid base to build this system upon, you should run through our initial server setup guide for Ubuntu 14.04. Among other things, this will walk you through setting up a non-root user with sudo access for administrative commands.
The second prerequisite that must be fulfilled in order to start on this guide is to install a LEMP (Linux, Nginx, MySQL, and PHP) stack on your Ubuntu 14.04 server. This is the platform that we will use to serve our phpMyAdmin interface (MySQL is also the database management software that we are wishing to manage). If you do not yet have a LEMP installation on your server, follow our tutorial on installing LEMP on Ubuntu 14.04.
When your server is in a properly functioning state after following these guides, you can continue on with the rest of this page.
Step One — Install phpMyAdmin
With our LEMP platform already in place, we can begin right away with installing the phpMyAdmin software. This is available within Ubuntu’s default repositories, so the installation process is simple.
First, update the server’s local package index to make sure it has a fresh set of references to available packages. Then, we can use the apt packaging tools to pull the software down from the repositories and install it on our system:
sudo apt-get update
sudo apt-get install phpmyadmin
During the installation, you will be prompted for some information. It will ask you which web server you would like the software to automatically configure. Since Nginx, the web server we are using, is not one of the available options, you can just hit TAB to bypass this prompt.
The next prompt will ask if you would like dbconfig-common to configure a database for phpmyadmin to use. Select “Yes” to continue.
You will need to enter the database administrative password that you configured during the MySQL installation to allow these changes. Afterward, you will be asked to select and confirm a password for a new database that will hold phpMyAdmin’s own data.
The installation will now complete. For the Nginx web server to find and serve the phpMyAdmin files correctly, we just need to create a symbolic link from the installation files to our Nginx document root directory by typing this:
sudo ln -s /usr/share/phpmyadmin /usr/share/nginx/html
A final item that we need to address is enabling the mcrypt PHP module, which phpMyAdmin relies on. This was installed with phpMyAdmin so we just need to toggle it on and restart our PHP processor:
sudo php5enmod mcrypt
sudo service php5-fpm restart
With that, our phpMyAdmin installation is now operational. To access the interface, go to your server’s domain name or public IP address followed by /phpmyadmin, in your web browser:
http://server_domain_or_IP/phpmyadmin
To sign in, use a username/password pair of a valid MySQL user. The root user and the MySQL administrative password is a good choice to get started. You will then be able to access the administrative interface:
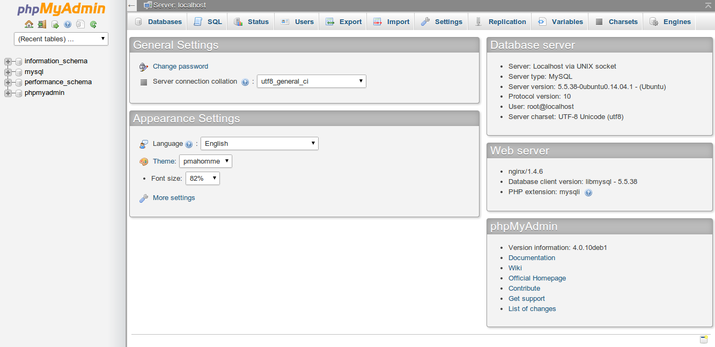
Click around to get familiar with the interface. In the next section, we will take steps to secure our new interface.
Step Two — Secure your phpMyAdmin Instance
The phpMyAdmin instance installed on our server should be completely usable at this point. However, by installing a web interface, we have exposed our MySQL system to the outside world.
Even with the included authentication screen, this is quite a problem. Because of phpMyAdmin’s popularity combined with the large amount of data it provides access to, installations like these are common targets for attackers.
We will implement two simple strategies to lessen the chances of our installation being targeted and compromised. We will change the location of the interface from /phpmyadmin to something else to sidestep some of the automated bot brute-force attempts. We will also create an additional, web server-level authentication gateway that must be passed before even getting to the phpMyAdmin login screen.
Changing the Application’s Access Location
In order for our Nginx web server to find and serve our phpMyAdmin files, we created a symbolic link from the phpMyAdmin directory to our document root in an earlier step.
To change the URL where our phpMyAdmin interface can be accessed, we simply need to rename the symbolic link. Move into the Nginx document root directory to get a better idea of what we are doing:
cd /usr/share/nginx/html
ls -l
total 8
-rw-r--r-- 1 root root 537 Mar  4 06:46 50x.html
-rw-r--r-- 1 root root 612 Mar  4 06:46 index.html
lrwxrwxrwx 1 root root  21 Aug  6 10:50 phpmyadmin -> /usr/share/phpmyadmin
As you can see, we have a symbolic link called phpmyadmin in this directory. We can change this link name to whatever we would like. This will change the location where phpMyAdmin can be accessed from a browser, which can help obscure the access point from hard-coded bots.
Choose a name that does not indicate the purpose of the location. In this guide, we will name our access location /nothingtosee. To accomplish this, we will just rename the link:
sudo mv phpmyadmin nothingtosee
ls -l
total 8
-rw-r--r-- 1 root root 537 Mar  4 06:46 50x.html
-rw-r--r-- 1 root root 612 Mar  4 06:46 index.html
lrwxrwxrwx 1 root root  21 Aug  6 10:50 nothingtosee -> /usr/share/phpmyadmin
Now, if you go to the previous location of your phpMyAdmin installation, you will get a 404 error:
http://server_domain_or_IP/phpmyadmin
However, your phpMyAdmin interface will be available at the new location we selected:
http://server_domain_or_IP/nothingtosee
Setting up a Web Server Authentication Gate
The next feature we wanted for our installation was an authentication prompt that a user would be required to pass before ever seeing the phpMyAdmin login screen.
Fortunately, most web servers, including Nginx, provide this capability natively. We will just need to modify our Nginx configuration file with the details.
Before we do this, we will create a password file that will store our the authentication credentials. Nginx requires that passwords be encrypted using the crypt() function. The OpenSSL suite, which should already be installed on your server, includes this functionality.
To create an encrypted password, type:
openssl passwd
You will be prompted to enter and confirm the password that you wish to use. The utility will then display an encrypted version of the password that will look something like this:
O5az.RSPzd.HE
Copy this value, as you will need to paste it into the authentication file we will be creating.
Now, create an authentication file. We will call this file pma_pass and place it in the Nginx configuration directory:
sudo nano /etc/nginx/pma_pass
Within this file, you simply need to specify the username you would like to use, followed by a colon (:), followed by the encrypted version of your password you received from the openssl passwd utility.
We are going to name our user demo, but you should choose a different username. The file for this guide looks like this:
demo:O5az.RSPzd.HE
Save and close the file when you are finished.
Now, we are ready to modify our Nginx configuration file. Open this file in your text editor to get started:
sudo nano /etc/nginx/sites-available/default
Within this file, we need to add a new location section. This will target the location we chose for our phpMyAdmin interface (we selected /nothingtosee in this guide).
Create this section within the server block, but outside of any other blocks. We will put our new location block below the location / block in our example:
server {
    . . .

    location / {
        try_files $uri $uri/ =404;
    }

    location /nothingtosee {
    }

    . . .
}
Within this block, we need to set the value of a directive called auth_basic to an authentication message that our prompt will display to users. We do not want to indicate to unauthenticated users what we are protecting, so do not give specific details. We will just use “Admin Login” in our example.
We then need to use a directive called auth_basic_user_file to point our web server to the authentication file that we created. Nginx will prompt the user for authentication details and check that the inputted values match what it finds in the specified file.
After we are finished, the file should look like this:
server {
    . . .

    location / {
        try_files $uri $uri/ =404;
    }

    location /nothingtosee {
        auth_basic "Admin Login";
        auth_basic_user_file /etc/nginx/pma_pass;
    }

    . . .
}
Save and close the file when you are finished.
To implement our new authentication gate, we must restart the web server:
sudo service nginx restart
Now, if we visit our phpMyAdmin location in our web browser (you may have to clear your cache or use a different browser session if you have already been using phpMyAdmin), you should be prompted for the username and password you added to the pma_pass file:
http://server_domain_or_IP/nothingtosee

Once you enter your credentials, you will be taken to the normal phpMyAdmin login page. This added layer of protection will help keep your MySQL logs clean of authentication attempts in addition to the added security benefit.
Conclusion
You can now manage your MySQL databases from a reasonably secure web interface. This UI exposes most of the functionality that is available from the MySQL command prompt. You can view databases and schema, execute queries, and create new data sets and structures.
Thanks for learning with the DigitalOcean Community. Check out our offerings for compute, storage, networking, and managed databases.
About the author(s)
This textbox defaults to using Markdown to format your answer.
You can type !ref in this text area to quickly search our full set of tutorials, documentation & marketplace offerings and insert the link!

Become a contributor for community
Get paid to write technical tutorials and select a tech-focused charity to receive a matching donation.

DigitalOcean Documentation
Full documentation for every DigitalOcean product.

Resources for startups and SMBs
The Wave has everything you need to know about building a business, from raising funding to marketing your product.
The developer cloud
Scale up as you grow — whether you're running one virtual machine or ten thousand.

Get started for free
Sign up and get $200 in credit for your first 60 days with DigitalOcean.*

*This promotional offer applies to new accounts only.
You could also use MySQL Workbench (I have used it for a year +), it can be setup to use a ssh tunnel so you don’t need to expose your server to a phpmyadmin and the need for an ssl cert.
Another option (for OSX users) would be: http://www.sequelpro.com/
You can setup a SSL connection and connect to MySQL using socket or localhost. If it’s your own droplet and only you (and/or some colleagues) have to access MySQL, I’d prefer Sequel Pro.
When you need phpMyAdmin? Please use this tutorial to make the internet a safer place ;)
I followed this tutorial and configured phpmyadmin successfully. Then I followed the following article to add a second domain to my Droplet by creating a virtual host ready for two separate Wordpress installs.
https://www.digitalocean.com/community/tutorials/how-to-configure-single-and-multiple-wordpress-site-settings-with-nginx
After I configured the server blocks to create a virtual server to host multiple sites on the server. I lost access to phpmyadmin via the url (ie. domain.com/nothingtosee). Now all that it returns is a 404 error.
Is there a quick fix to this?
You have to create a symlink to phpMyAdmin from the root of your virtualhost.
So in your html dir you do:
sudo ln -s /usr/share/phpmyadmin phpmyadminNow you can access phpmyadmin at example.com/phpmyadmin
Hi, how come after I typed sudo
apt-get install phpmyadminthe first question it asked was whether I wanted it to be installed in Apache2 or Lighttd? I’m in Nginx(LEMP) and it’s not even an option for an answer. So I reluctantly selected Apache2. Would that be a problem? Should I uninstall it and start over? If it needs to be uninstalled, how to do that properly? Thanks!If you read the explanations in between the text, you will see that you can press Tab to bypass that prompt. The phpmyadmin package knows how to do some things automatically for those two Web servers that we do manually in this guide. I don’t believe that it will be much of a problem if you accidentally choose one of those options, but I could be wrong.
Thank you! It works now by pressing Tab to bypass it. Staying up too late for coding can do funny things to your focus :P
Hi, your tutorial was great. I did have a problem. After accessing phpmyadmin (with htaccess password ), the next time I connected I didn’t get prompted for a password. I didn’t save the password in the browser (chrome and firefox) and I didn’t save cookies (cleared on close). Not sure where it is being saved.
I wanted to try a little more security rather than password protecting access to PhpMyadmin.
I wanted to secure it so that I could only access it from either localhost or my local private network 192.168.100.0.
I made the following changes:
Now nobody can access phpmyadmin???
Alias /phpmyadmin /usr/share/phpmyadmin
<Directory /usr/share/phpmyadmin> Options FollowSymLinks DirectoryIndex index.php
BT Sept 6,2014
AllowOverride All
BT trying to block PhpMyadmin from Internet
</Directory>
Authorize for setup
<Directory /usr/share/phpmyadmin/setup> <IfModule mod_authn_file.c> AuthType Basic AuthName “phpMyAdmin Setup” AuthUserFile /etc/phpmyadmin/htpasswd.setup </IfModule> Require valid-user </Directory>
Disallow web access to directories that don’t need it
<Directory /usr/share/phpmyadmin/libraries> Order Deny,Allow Deny from All </Directory> <Directory /usr/share/phpmyadmin/setup/lib> Order Deny,Allow Deny from All </Directory>
Can you see what’s wrong? thanks
In the above code example:
should be:
Note the highlighted ‘s’, else NginX could not apply your changes and your server block will cause a parse error.
Nice catch, @averysphere! I’ve corrected it. Thanks :)
Hi, Thank you for an excellent tutorial.
Could you please tell us what the right permission should be for the phpmyadmin symbolic link folder in the document root? [ :/ Eh, assuming that’s what it’s called. ]
The current permission for the same folder on my server is 777, should I be changing it to 755?
Thanks and Regards.
I’d like to know, too this since my phpmyadmin folder is also 777. Isn’t this unsecured?
From apt Nginx we can installed 1.2.1 version, so the html should be changed to www, like this line:
only in later version(1.4) the path contains /html
PS: all html lines should be replaced by www
Hi, how to force SSL / HTTPS when you access http://server_domain_or_ip/nothingtosee (the phpmyadmin folder) ?
I’d rather not access phpmyadmin in http mode. Https is more secured
Check out this article for all the info on setting up SSL on Nginx: How To Create an SSL Certificate on Nginx for Ubuntu 14.04
Once you have basic SSL support working, you can force HTTPS for phpMyAdmin by adding something like the following you your Nginx server block:
I’m new to Nginx so I’m probably missing something obvious but Andrew’s example returns the following message in Chrome when I try to access that folder.
(edit)
I’m not sure if it’s correct but the following worked for me:
Thanks for this awesome post … could not get into securing my phpadmin installation as I get stuck with a 403 Forbidden error after trying to reach it …;
I set the link as stated :
then upon request to http://www.mydomain.net/phpmyadmin
I get a 403 Forbidden result…
in the log I can see : 2014/11/01 15:55:23 [error] 13195#0: *3 directory index of “/var/www/html/phpmyadmin/” is forbidden, client: XX.XX.XXX.XX, server: _, request: “GET /phpmyadmin”
php-fpm is running fine as I can get http://www.mydomain.net/info.php with the info.php file added into /var/www/html
HOWEVER if I request http://www.mydomain.net/phpmyadmin/index.php then I get the login panel…
what am I missing
See https://www.digitalocean.com/community/tutorials/how-to-install-and-secure-phpmyadmin-with-nginx-on-an-ubuntu-14-04-server?comment=36631
I cannot get to the phpmyadmin program after following all of these steps. Here’s what I did:
When I go to http://server_domain_or_IP/phpmyadmin I get a 404 error.
I wonder…in the example above, the public-facing directory is at /var/www/html but with the Drupal image the public-facing directory is at /var/www/html/drupal. I tried modifying the symlink command to this:
sudo ln -s /usr/share/phpmyadmin /usr/share/nginx/html/drupalbut it didn’t help. Any ideas?
Are there any errors in nginx’s error log?
Does
/usr/share/nginx/html/drupal/wordpressexist? What’s the output of:Hi kamain7 and thanks for responding. I checked the things you asked about, here are the results:
The nginx error.log is empty.
The directory
/usr/share/nginx/html/drupal/wordpressdoes not exist.The result of
sudo ls -lah /usr/share/nginx/html/drupalis:lrwxrwxrwx 1 root root 21 Nov 5 11:14 /usr/share/nginx/html/drupal -> /usr/share/phpmyadmin
You didn’t ask but the result of
sudo ls -lah /usr/share/nginx/htmlis:drwxr-xr-x 2 root root 4.0K Nov 5 11:14 . drwxr-xr-x 3 root root 4.0K Oct 15 17:12 … -rw-r–r-- 1 root root 537 Mar 4 2014 50x.html lrwxrwxrwx 1 root root 21 Nov 5 11:14 drupal -> /usr/share/phpmyadmin -rw-r–r-- 1 root root 612 Mar 4 2014 index.html lrwxrwxrwx 1 root root 21 Nov 3 20:59 phpmyadmin -> /usr/share/phpmyadmin
The 1-click Drupal image installs Drupal in
/var/www/html/drupal. Try creating the symlink in that directory:Hi kamain7,
I created a fresh droplet again, followed all the steps described above but this time I used the
lncommand you suggested:sudo ln -s /usr/share/phpmyadmin /var/www/html/drupal/phpmyadminbut it did not work.If I set the browser to either http://ip_address/phpmyadmin or http://domain_name.com/phpmyadmin it returns the standard nginx “An error occurred…blah blah blah…Faithfully yours, nginx” page.
If I add the www and set the browser to http://www.domain_name.com/phpmyadmin it returns a HTTP 404 error.
Thanks for trying to help but I’m still stuck. Any other ideas?
Sorry to keep asking but does any one have any ideas on how to access phpMyAdmin or any thoughts on why I can’t? I’m still stuck. Thanks.
I have same problem too.
Same issue. Don’t create a symlink in your root directory at all, it’s a bad way to do it. Delete those symlinks (go into the folder and rm them), and then do this:
server { listen 30303; server_name localhost; root /usr/share/phpmyadmin; index index.php index.html index.htm; if (!-e $request_filename) { rewrite ^/(.+)$ /index.php?url=$1 last; break; } location ~ .php$ { try_files $uri =404; fastcgi_pass unix:/var/run/php5-fpm.sock; fastcgi_index index.php; include /etc/nginx/fastcgi_params; } }
Access phpmyadmin via: whatever.com:30303. Better, safer.
Here is a solution that you can try.
Nginx wont start after adding the configuration files
here am stuck: cd /usr/share/nginx/html ls -l
total 8 -rw-r–r-- 1 root root 537 Mar 4 06:46 50x.html -rw-r–r-- 1 root root 612 Mar 4 06:46 index.html lrwxrwxrwx 1 root root 21 Aug 6 10:50 phpmyadmin -> /usr/share/phpmyadmin
i don’t have a phpmyadmin, just a phpmyadmin.css.php, and when i try on mydomain.com/phpmyadmin nothing hapened, my site apare on this adress too. Help pls.
What if you cd into /ust/share/phpmyadmin? Cane you see if there’s all the files? Maybe the symbolic link is wrong and you should create it again. I’ve tried placing the whole path in the ln command.
Now i am getting
403 Forbidden
nginx/1.4.6 (Ubuntu)
Replace
with
and restart nginx.
Done but now when i go to my ip/phpmyadmin it downloads a file to my system
any idea how i can export my database from old server then import in new server? the tutorials i found are not easy to understand
Uncomment php in /etc/nginx/sites-enabled/default
This comment has been deleted
Please what if i want phpmyadmin to be in the root of one of my site? how do i set the configuration?
Good day, Thank you for the good work. Please can i install this phpMyAdmin with Nginx on an Ubuntu 14.04 Server on Windows 7 OS with the above steps. I will appreciate your feedback
i installed phpmyadmin with nginx but when i go to http://95.85.39.84/phpmyadmin i still can see just my index.html from http://qbfweb.com/.
Having the same problem. How to solve?
Why is it that when I do apt-get install phpmyadmin it also wants to install a bunch of other things like apache? I don’t want apache, I use nginx. Can I make it just download what is required somehow?
After I made a symbolic link:
I am trying to acces my phpmyadmin interface through http://my.ip.address.com/phpmyadmin But the only thing I get is a 404 not found page: http://prntscr.com/6e20xe
What now? Do I need to make a seperate conf file for this extension?
Thanks in advance!
For me I used this command
instead of
Im need add this lines to complete installation.
Hi Justin, I followed this tutorial and everything worked just fine but the i followed your other tutorial about installing wordpress and now for some reason that has totally flumuxed me i am no long able to access phpmyadmin.
Hope you can help
I followed the instructions, and after installing phpmyadmin, I went to myserverip/phpmyadmin and nothing happens, it just showing the index of the only website that I have installed in my server.
That’s the same for me. it’s driving me 😜
I found a way to make it work but not sure if it’s the correct way.
I reran
sudo ln -s /usr/share/phpmyadmin /usr/share/nginx/html but switch the end to sudo ln -s /usr/share/phpmyadmin /var/www/html
then "cd /var/www/html and ran sudo mv phpmyadmin nothingtosee
that allowed me to then see phpmyadmin
Hope this helps
I installed successfully phpmyadmin and yesterday was working. Today I woke up, tried to get access and I’m just getting a 404 not found.
In my server blocks, I already 2 blocks, one named default, and another one which is the one of my WP site.
The default block has this lines: Any ideas?
That look about right, did you create the link using sudo ln -s /usr/share/phpmyadmin /var/www/html because when you installed wordpress using the tutorial you changed the root to /var/www/html/
So try to create it to that folder and then cd /var/www/html and run sudo mv phpmyadmin nothingtosee
This worked for me after installing wordpress.
What can you see when you goto
cd /var/www/htmland
ls -lWorks perfect on my droplet thanks.
It didnt’ work for me. Actually I don’t understand, because yes, I changed the root to /var/www/html/ but that path is where I only have my websites, and /usr/share/phpmyadmin is where phpmyadmin is…Anyway, I did what you said:
And after that I did
But when I go to http://myip/nothingtosee it shows a 404 not found
Glad it helped.
Lbones, when I do cd /var/www/html and ls -l, this is what I got.
serveruser@LEMP:/var/www/html$ ls -l total 4 drwxr-xr-x 4 www-data www-data 4096 Apr 8 03:09 webs
Got a 403, did a google, added this to my /etc/nginx/sites-available/default file:
restarted nginx:
Calm restored
Hi, thank you for this tutorial. I have a problem when going to http://mydomain.com/phpmyadmin, for some reason it downloads a file named download, which as some php code inside. Anybody could help me with this?
working for my remote database server
On my HHVM server it installs apache2
FYI. openssl passwd doesn’t generate password correctly. I suggest to use this utility: http://seriyps.ru/crypt/htpasswd/ It uses htpasswd from apache server bundle. Whether you have reasons not to trust “seriyps” just use htpasswd manually (but this way you must to install apache also).
I can access the PMA interface just fine in the browser but it won’t accept my login details. I can login with the same credentials fine on the CLI (sudo mysql -u root -p ) but the PMA UI gives me the error: Cannot log in to the MySQL server
I’ve tried changing [host] from localhost to 127.0.0.1 in the config.inc.php file and also tried changing [auth_type] from cookie to http with no luck.
I’ve also tried added mysqli as an extension in config.inc.php but that didn’t work either.
Here’s my config.inc.php block: /* Authentication type / $cfg[‘Servers’][$i][‘auth_type’] = ‘cookie’; / Server parameters */ $cfg[‘Servers’][$i][‘host’] = ‘127.0.0.1’; $cfg[‘Servers’][$i][‘connect_type’] = ‘tcp’; $cfg[‘Servers’][$i][‘compress’] = false; $cfg[‘Servers’][$i][‘AllowNoPassword’] = false; $cfg[‘Servers’][$i][‘extension’] = ‘mysqli’;
Done mysqld , php-fpm and nginx restarts after all config changes.
Just can’t get PMA to login to the DB.
If I create a new user in the CLI I can login with that user but of course it doesn’t have any privileges to create DB’s, so the connection to the DB works I just can’t login as root to PMA.
Droplet: Ubuntu 15.10 x32, nginx, mariadb 10, php 5.6
Does anyone suggest what the issue may be?
Could it possibly be linked to a bug? https://bugs.launchpad.net/ubuntu/+source/mariadb-10.0/+bug/1447808
Thanks, Wil.
FYI I created another root user using the statements below and I can login to PMA with that user but still can’t login using the original root. Strange.
CREATE USER ‘root2’@‘localhost’ IDENTIFIED BY ‘NEWPASSWORD’;GRANT ALL PRIVILEGES ON . TO ‘root2’@‘localhost’ WITH GRANT OPTION;
Hello, need help!
Spent the day installing nginx on my ubuntu 14.04 droplet, create 5 server blocks and installed wordpress on each one. Now, I installed the phpmyadmin as described here but i have two problems:
1 - can’t access using my.ipaddress/myphpadmin 2 - anything that I use after / takes me to a wordpress installation that I don’t know which one of the 5 blocks.
How to address this issue?
Installation stuck at:
Hi great howto it worked for me thanks. Just one problem: after the phpmyadmin login it goes to:
I have to write /phpmyadmin before …/index…
TIA for you help
I’m having the same problem. I imagine this is some base path configuration in phpmyadmin itself. Have you found a solution?
Hi,
I am on windows, connecting with putty. Pressing Tab for skipping the prompt for web service is not working for me.
How do I skip it?
Hello,
I use Laravel/Forge to create droplets which has been working fine. I really need a way to see my live database though so had been hoping to install phpMyAdmin.
I tried following the instructions here but it did not go well for me. When I tried installing phpMyAdmin an error message appeared stating the following:
[ERROR] mysql: Empty value for ‘port’ specified.
A snapshot of my terminal window can be seen here: https://img42.com/ATelX
I opened the phpmyadmin.conf file and could see that the port was indeed empty, I tried manually changing that to 3306 but that didn’t work.
Since then I have tried uninstalling and reinstalling phpMyAdmin but the uninstall of the phpMyAdmin database failed, I am not sure if that is important.
In addition I was not able to run ‘service php5-fpm restart’, The error message was 'php5-fpm: unrecognized service.
Any advice would be welcome.
D
great tutorial work very fine thank
i upgraded php 5 to php 7
what am i going to write code for php 7?
sudo php5enmod mcrypt
sudo service php5-fpm restart
I’m looking for the same answer. I have LEMP installed on my droplet and I need to install PHPMYSQL It would be great to have these instructions updated for PHP7.
Wonderful article. But I got an error which is showing at the bottom of the page on phpmyadmin. It says mcrypt missing. Here is a screenshot of it - https://1drv.ms/i/s!AjDzbQws1k6_g4F4QyaqtpthbHsOkw
And another thing, what’s solution for
on Ubuntu 14.04 with php 7.0 ? Thanks in advance. Again, thanks for the wonderful article.
Wonderful article!
I am using LEMP on Ubutu 16.04 with a virtual host(server block). When I log into phpmyadmin, I get a 404 page. But when I go back to /phpmyadmin I am logged in. So it is logging me in, but redirecting to a 404. The url (after logging in) is index.php(Plus a ton of other characters). Any idea what is going on?
i got a 404 not found message after login to phpmyadmin. Can you help me ?
Hi,
I would like to secure my Phpmyadmin login by changing the user login.
Instead of logging in as ROOT I would like to login as a maybe something like 27615_user_25176_GF so it would be a little more secure.
Is it to only change the config.inc.php file or di I need to do something else? Itried to create the User in the phpmyadmin by copying the root user anf change name and password but it did not work.
Best regards.
I set up my phpMyAdmin on 16.04 droplet as instructed with PHP 7. So far everything works fine except I am redicreted to http://server_domain_or_IP/index.php?token instead of http://server_domain_or_IP/nothingtosee/index.php?token
I found this during search https://serverfault.com/questions/433785/nginx-phpmyadmin-redirecting-to-instead-of-phpmyadmin-upon-login but not sure if its the right solution.
Any Ideas?
you hide phpmyadmin for ngix but for apache how we can do ?
Password didnt work for me. It show me the normal phpmyadmin if i type in the correct location though and 404 if i use the default /phpmyadmin.
I put under the first serverblock displaying listen to port 80 etc. (under default server configuration). Also just realized i used the wrong guide. Im runing Ubuntu 16.04.
@jellingwood Hi, thanks for this guide, it’s the best that I found.
After searched for a long time, I have a question about the Authentication Gate step.
If I access the address /nothingtosee, the “Admin Login” popup appears, that is ok. But if I add /nothingtosee/index.php, I can access the phpmyadmin page without problems and without authenticate myself. Is there a way to block this, or redirect to “Admin Login” popup too?
Thanks very much in advance.