Not using Ubuntu 16.04?
Choose a different version or distribution.
Introduction
While many users need the functionality of a database management system like MySQL, they may not feel comfortable interacting with the system solely from the MySQL prompt.
phpMyAdmin was created so that users can interact with MySQL through a web interface. In this guide, we’ll discuss how to install and secure phpMyAdmin so that you can safely use it to manage your databases from an Ubuntu 16.04 system.
Prerequisites
Before you get started with this guide, you need to have some basic steps completed.
First, we’ll assume that you are using a non-root user with sudo privileges, as described in steps 1-4 in the initial server setup of Ubuntu 16.04.
We’re also going to assume that you’ve completed a LAMP (Linux, Apache, MySQL, and PHP) installation on your Ubuntu 16.04 server. If this is not completed yet, you can follow this guide on installing a LAMP stack on Ubuntu 16.04.
Finally, there are important security considerations when using software like phpMyAdmin, since it:
- Communicates directly with your MySQL installation
- Handles authentication using MySQL credentials
- Executes and returns results for arbitrary SQL queries
For these reasons, and because it is a widely-deployed PHP application which is frequently targeted for attack, you should never run phpMyAdmin on remote systems over a plain HTTP connection. If you do not have an existing domain configured with an SSL/TLS certificate, you can follow this guide on securing Apache with Let’s Encrypt on Ubuntu 16.04.
Once you are finished with these steps, you’re ready to get started with this guide.
Step One — Install phpMyAdmin
To get started, we will install phpMyAdmin from the default Ubuntu repositories.
We can do this by updating our local package index and then using the apt packaging system to pull down the files and install them on our system:
- sudo apt-get update
- sudo apt-get install phpmyadmin php-mbstring php-gettext
This will ask you a few questions in order to configure your installation correctly.
Warning: When the first prompt appears, apache2 is highlighted, but not selected. If you do not hit Space to select Apache, the installer will not move the necessary files during installation. Hit Space, Tab, and then Enter to select Apache.
- For the server selection, choose apache2.
- Select yes when asked whether to use
dbconfig-commonto set up the database - You will be prompted for your database administrator’s password
- You will then be asked to choose and confirm a password for the
phpMyAdminapplication itself
The installation process actually adds the phpMyAdmin Apache configuration file into the /etc/apache2/conf-enabled/ directory, where it is automatically read.
The only thing we need to do is explicitly enable the PHP mcrypt and mbstring extensions, which we can do by typing:
- sudo phpenmod mcrypt
- sudo phpenmod mbstring
Afterwards, you’ll need to restart Apache for your changes to be recognized:
- sudo systemctl restart apache2
You can now access the web interface by visiting your server’s domain name or public IP address followed by /phpmyadmin:
https://domain_name_or_IP/phpmyadmin
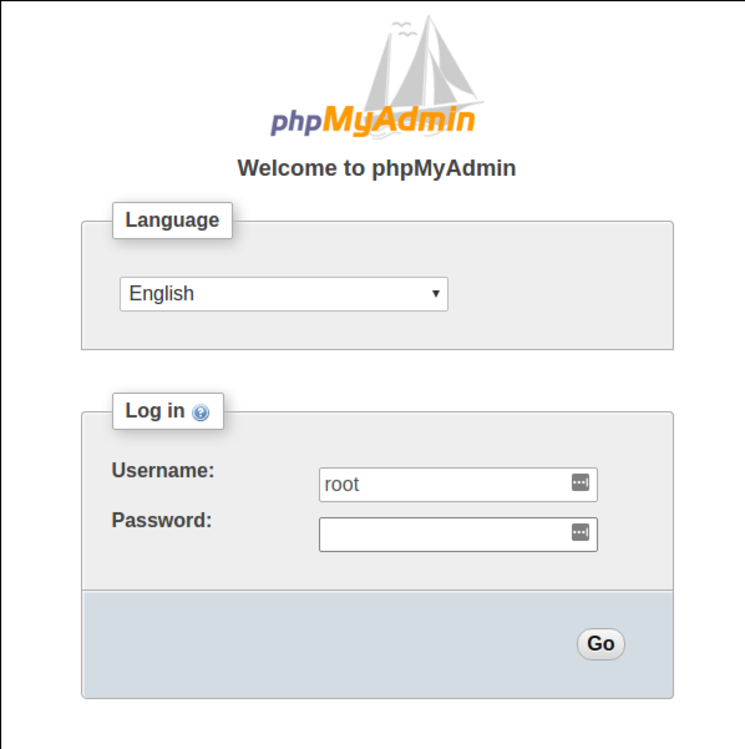
You can now log into the interface using the root username and the administrative password you set up during the MySQL installation.
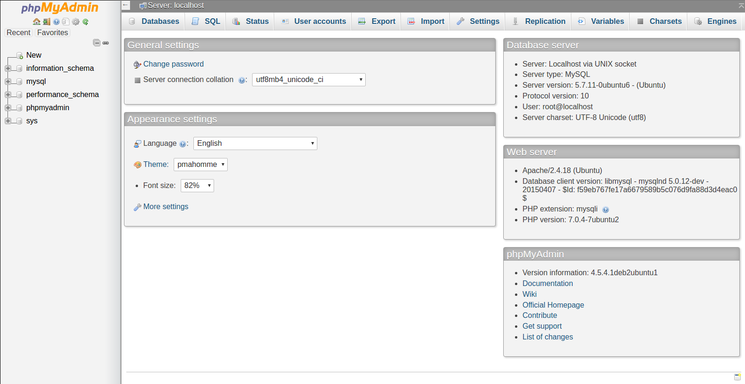
When you log in, you’ll see the user interface, which will look something like this:
Step Two — Secure your phpMyAdmin Instance
We were able to get our phpMyAdmin interface up and running fairly easily. However, we are not done yet. Because of its ubiquity, phpMyAdmin is a popular target for attackers. We should take extra steps to prevent unauthorized access.
One of the easiest way of doing this is to place a gateway in front of the entire application. We can do this using Apache’s built-in .htaccess authentication and authorization functionalities.
Configure Apache to Allow .htaccess Overrides
First, we need to enable the use of .htaccess file overrides by editing our Apache configuration file.
We will edit the linked file that has been placed in our Apache configuration directory:
- sudo nano /etc/apache2/conf-available/phpmyadmin.conf
We need to add an AllowOverride All directive within the <Directory /usr/share/phpmyadmin> section of the configuration file, like this:
<Directory /usr/share/phpmyadmin>
    Options FollowSymLinks
    DirectoryIndex index.php
    AllowOverride All
    . . .
When you have added this line, save and close the file.
To implement the changes you made, restart Apache:
- sudo systemctl restart apache2
Create an .htaccess File
Now that we have enabled .htaccess use for our application, we need to create one to actually implement some security.
In order for this to be successful, the file must be created within the application directory. We can create the necessary file and open it in our text editor with root privileges by typing:
- sudo nano /usr/share/phpmyadmin/.htaccess
Within this file, we need to enter the following information:
AuthType Basic
AuthName "Restricted Files"
AuthUserFile /etc/phpmyadmin/.htpasswd
Require valid-user
Let’s go over what each of these lines mean:
AuthType Basic: This line specifies the authentication type that we are implementing. This type will implement password authentication using a password file.AuthName: This sets the message for the authentication dialog box. You should keep this generic so that unauthorized users won’t gain any information about what is being protected.AuthUserFile: This sets the location of the password file that will be used for authentication. This should be outside of the directories that are being served. We will create this file shortly.Require valid-user: This specifies that only authenticated users should be given access to this resource. This is what actually stops unauthorized users from entering.
When you are finished, save and close the file.
Create the .htpasswd file for Authentication
The location that we selected for our password file was “/etc/phpmyadmin/.htpasswd”. We can now create this file and pass it an initial user with the htpasswd utility:
- sudo htpasswd -c /etc/phpmyadmin/.htpasswd username
You will be prompted to select and confirm a password for the user you are creating. Afterwards, the file is created with the hashed password that you entered.
If you want to enter an additional user, you need to do so without the -c flag, like this:
- sudo htpasswd /etc/phpmyadmin/.htpasswd additionaluser
Now, when you access your phpMyAdmin subdirectory, you will be prompted for the additional account name and password that you just configured:
https://domain_name_or_IP/phpmyadmin
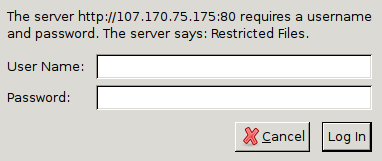
After entering the Apache authentication, you’ll be taken to the regular phpMyAdmin authentication page to enter your other credentials. This will add an additional layer of security since phpMyAdmin has suffered from vulnerabilities in the past.
Conclusion
You should now have phpMyAdmin configured and ready to use on your Ubuntu 16.04 server. Using this interface, you can easily create databases, users, tables, etc., and perform the usual operations like deleting and modifying structures and data.
Thanks for learning with the DigitalOcean Community. Check out our offerings for compute, storage, networking, and managed databases.
About the author
Still looking for an answer?
This textbox defaults to using Markdown to format your answer.
You can type !ref in this text area to quickly search our full set of tutorials, documentation & marketplace offerings and insert the link!
nano /etc/apache2/apache2.conf
Add the following to the bottom of the file:
phpMyAdmin Configuration
Include /etc/phpmyadmin/apache.conf
“The installation process actually adds the phpMyAdmin Apache configuration file into the /etc/apache2/conf-enabled/ directory, where it is automatically read.”
Nope, usually he does not.
U must copy: sudo cp /etc/phpmyadmin/apache.conf /etc/apache2/conf-enabled/phpmyadmin.conf Than open it: sudo nano /etc/apache2/conf-enabled/phpmyadmin.conf Add line after “DirectoryIndex index.php”: AllowOverride All
Example: <Directory /usr/share/phpmyadmin> Options FollowSymLinks DirectoryIndex index.php AllowOverride All
Hello,
Recently MySQL changed their code so that you could not leave a blank port when installing phpmyadmin so I keep getting an error when I try to install PHP my admin.
"An error occurred while installing the database:
mysql: [ERROR] mysql: Empty value for ‘port’ specified"
Hi! I’ve followed the guide but i got an error while installing phpmyadmin. The error says: "Empty value for ‘port’ specified. " How can i fix it?
This comment has been deleted
everythings fine, but `` sudo phpenmod mcrypt sudo phpenmod mbstring
just give me
WARNING: Module mcrypt ini file doesn't exist under /etc/php/5.6/mods-available
WARNING: Module mcrypt ini file doesn't exist under /etc/php/5.6/mods-available

both cases, help me please!
using ubuntu 16.4

thanks
Hi,
I dont know what’s happend… but I cant log in phpmyadmin. I tried with user and my pass, root and pass of phpmyadmin. Display this message: #1045 - Access denied for user ‘root’@‘localhost’ (using password: YES)
 This work is licensed under a Creative Commons Attribution-NonCommercial- ShareAlike 4.0 International License.
Become a contributor for community
Get paid to write technical tutorials and select a tech-focused charity to receive a matching donation.

DigitalOcean Documentation
Full documentation for every DigitalOcean product.

Resources for startups and AI-native businesses
The Wave has everything you need to know about building a business, from raising funding to marketing your product.
The developer cloud
Scale up as you grow — whether you're running one virtual machine or ten thousand.

Start building today
From GPU-powered inference and Kubernetes to managed databases and storage, get everything you need to build, scale, and deploy intelligent applications.
