Not using Ubuntu 14.04?
Choose a different version or distribution.
Introduction
Relational database management systems like MySQL are needed for a significant portion of web sites and applications. However, not all users feel comfortable administering their data from the command line.
To solve this problem, a project called phpMyAdmin was created in order to offer an alternative in the form of a web-based management interface. In this guide, we will demonstrate how to install and secure a phpMyAdmin configuration on an Ubuntu 14.04 server. We will build this setup on top of the Nginx web server, which has a good performance profile and can handle heavy loads better than some other web servers.
Prerequisites
Before we begin, there are a few requirements that need to be settled.
To ensure that you have a solid base to build this system upon, you should run through our initial server setup guide for Ubuntu 14.04. Among other things, this will walk you through setting up a non-root user with sudo access for administrative commands.
The second prerequisite that must be fulfilled in order to start on this guide is to install a LEMP (Linux, Nginx, MySQL, and PHP) stack on your Ubuntu 14.04 server. This is the platform that we will use to serve our phpMyAdmin interface (MySQL is also the database management software that we are wishing to manage). If you do not yet have a LEMP installation on your server, follow our tutorial on installing LEMP on Ubuntu 14.04.
When your server is in a properly functioning state after following these guides, you can continue on with the rest of this page.
Step One — Install phpMyAdmin
With our LEMP platform already in place, we can begin right away with installing the phpMyAdmin software. This is available within Ubuntu’s default repositories, so the installation process is simple.
First, update the server’s local package index to make sure it has a fresh set of references to available packages. Then, we can use the apt packaging tools to pull the software down from the repositories and install it on our system:
sudo apt-get update
sudo apt-get install phpmyadmin
During the installation, you will be prompted for some information. It will ask you which web server you would like the software to automatically configure. Since Nginx, the web server we are using, is not one of the available options, you can just hit TAB to bypass this prompt.
The next prompt will ask if you would like dbconfig-common to configure a database for phpmyadmin to use. Select “Yes” to continue.
You will need to enter the database administrative password that you configured during the MySQL installation to allow these changes. Afterward, you will be asked to select and confirm a password for a new database that will hold phpMyAdmin’s own data.
The installation will now complete. For the Nginx web server to find and serve the phpMyAdmin files correctly, we just need to create a symbolic link from the installation files to our Nginx document root directory by typing this:
sudo ln -s /usr/share/phpmyadmin /usr/share/nginx/html
A final item that we need to address is enabling the mcrypt PHP module, which phpMyAdmin relies on. This was installed with phpMyAdmin so we just need to toggle it on and restart our PHP processor:
sudo php5enmod mcrypt
sudo service php5-fpm restart
With that, our phpMyAdmin installation is now operational. To access the interface, go to your server’s domain name or public IP address followed by /phpmyadmin, in your web browser:
http://server_domain_or_IP/phpmyadmin
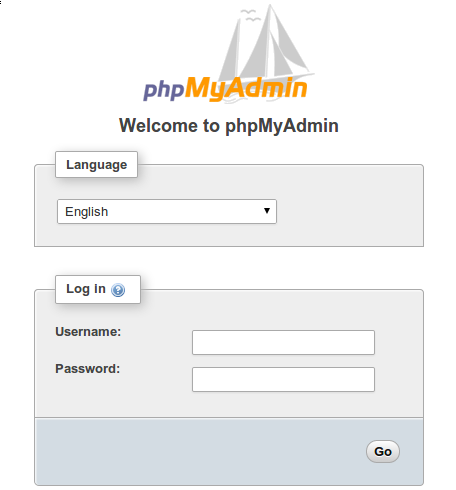
To sign in, use a username/password pair of a valid MySQL user. The root user and the MySQL administrative password is a good choice to get started. You will then be able to access the administrative interface:
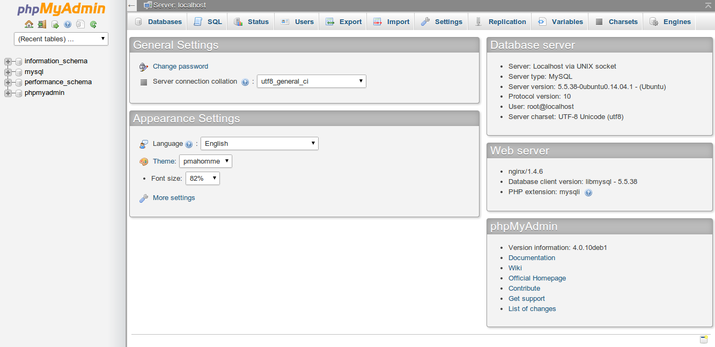
Click around to get familiar with the interface. In the next section, we will take steps to secure our new interface.
Step Two — Secure your phpMyAdmin Instance
The phpMyAdmin instance installed on our server should be completely usable at this point. However, by installing a web interface, we have exposed our MySQL system to the outside world.
Even with the included authentication screen, this is quite a problem. Because of phpMyAdmin’s popularity combined with the large amount of data it provides access to, installations like these are common targets for attackers.
We will implement two simple strategies to lessen the chances of our installation being targeted and compromised. We will change the location of the interface from /phpmyadmin to something else to sidestep some of the automated bot brute-force attempts. We will also create an additional, web server-level authentication gateway that must be passed before even getting to the phpMyAdmin login screen.
Changing the Application’s Access Location
In order for our Nginx web server to find and serve our phpMyAdmin files, we created a symbolic link from the phpMyAdmin directory to our document root in an earlier step.
To change the URL where our phpMyAdmin interface can be accessed, we simply need to rename the symbolic link. Move into the Nginx document root directory to get a better idea of what we are doing:
cd /usr/share/nginx/html
ls -l
total 8
-rw-r--r-- 1 root root 537 Mar  4 06:46 50x.html
-rw-r--r-- 1 root root 612 Mar  4 06:46 index.html
lrwxrwxrwx 1 root root  21 Aug  6 10:50 phpmyadmin -> /usr/share/phpmyadmin
As you can see, we have a symbolic link called phpmyadmin in this directory. We can change this link name to whatever we would like. This will change the location where phpMyAdmin can be accessed from a browser, which can help obscure the access point from hard-coded bots.
Choose a name that does not indicate the purpose of the location. In this guide, we will name our access location /nothingtosee. To accomplish this, we will just rename the link:
sudo mv phpmyadmin nothingtosee
ls -l
total 8
-rw-r--r-- 1 root root 537 Mar  4 06:46 50x.html
-rw-r--r-- 1 root root 612 Mar  4 06:46 index.html
lrwxrwxrwx 1 root root  21 Aug  6 10:50 nothingtosee -> /usr/share/phpmyadmin
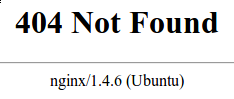
Now, if you go to the previous location of your phpMyAdmin installation, you will get a 404 error:
http://server_domain_or_IP/phpmyadmin
However, your phpMyAdmin interface will be available at the new location we selected:
http://server_domain_or_IP/nothingtosee
Setting up a Web Server Authentication Gate
The next feature we wanted for our installation was an authentication prompt that a user would be required to pass before ever seeing the phpMyAdmin login screen.
Fortunately, most web servers, including Nginx, provide this capability natively. We will just need to modify our Nginx configuration file with the details.
Before we do this, we will create a password file that will store our the authentication credentials. Nginx requires that passwords be encrypted using the crypt() function. The OpenSSL suite, which should already be installed on your server, includes this functionality.
To create an encrypted password, type:
openssl passwd
You will be prompted to enter and confirm the password that you wish to use. The utility will then display an encrypted version of the password that will look something like this:
O5az.RSPzd.HE
Copy this value, as you will need to paste it into the authentication file we will be creating.
Now, create an authentication file. We will call this file pma_pass and place it in the Nginx configuration directory:
sudo nano /etc/nginx/pma_pass
Within this file, you simply need to specify the username you would like to use, followed by a colon (:), followed by the encrypted version of your password you received from the openssl passwd utility.
We are going to name our user demo, but you should choose a different username. The file for this guide looks like this:
demo:O5az.RSPzd.HE
Save and close the file when you are finished.
Now, we are ready to modify our Nginx configuration file. Open this file in your text editor to get started:
sudo nano /etc/nginx/sites-available/default
Within this file, we need to add a new location section. This will target the location we chose for our phpMyAdmin interface (we selected /nothingtosee in this guide).
Create this section within the server block, but outside of any other blocks. We will put our new location block below the location / block in our example:
server {
    . . .

    location / {
        try_files $uri $uri/ =404;
    }

    location /nothingtosee {
    }

    . . .
}
Within this block, we need to set the value of a directive called auth_basic to an authentication message that our prompt will display to users. We do not want to indicate to unauthenticated users what we are protecting, so do not give specific details. We will just use “Admin Login” in our example.
We then need to use a directive called auth_basic_user_file to point our web server to the authentication file that we created. Nginx will prompt the user for authentication details and check that the inputted values match what it finds in the specified file.
After we are finished, the file should look like this:
server {
    . . .

    location / {
        try_files $uri $uri/ =404;
    }

    location /nothingtosee {
        auth_basic "Admin Login";
        auth_basic_user_file /etc/nginx/pma_pass;
    }

    . . .
}
Save and close the file when you are finished.
To implement our new authentication gate, we must restart the web server:
sudo service nginx restart
Now, if we visit our phpMyAdmin location in our web browser (you may have to clear your cache or use a different browser session if you have already been using phpMyAdmin), you should be prompted for the username and password you added to the pma_pass file:
http://server_domain_or_IP/nothingtosee

Once you enter your credentials, you will be taken to the normal phpMyAdmin login page. This added layer of protection will help keep your MySQL logs clean of authentication attempts in addition to the added security benefit.
Conclusion
You can now manage your MySQL databases from a reasonably secure web interface. This UI exposes most of the functionality that is available from the MySQL command prompt. You can view databases and schema, execute queries, and create new data sets and structures.
Thanks for learning with the DigitalOcean Community. Check out our offerings for compute, storage, networking, and managed databases.
About the author
Former Senior Technical Writer at DigitalOcean, specializing in DevOps topics across multiple Linux distributions, including Ubuntu 18.04, 20.04, 22.04, as well as Debian 10 and 11.
Still looking for an answer?
This textbox defaults to using Markdown to format your answer.
You can type !ref in this text area to quickly search our full set of tutorials, documentation & marketplace offerings and insert the link!
You could also use MySQL Workbench (I have used it for a year +), it can be setup to use a ssh tunnel so you don’t need to expose your server to a phpmyadmin and the need for an ssl cert.
Another option (for OSX users) would be: http://www.sequelpro.com/
You can setup a SSL connection and connect to MySQL using socket or localhost. If it’s your own droplet and only you (and/or some colleagues) have to access MySQL, I’d prefer Sequel Pro.
When you need phpMyAdmin? Please use this tutorial to make the internet a safer place ;)
I followed this tutorial and configured phpmyadmin successfully. Then I followed the following article to add a second domain to my Droplet by creating a virtual host ready for two separate Wordpress installs.
After I configured the server blocks to create a virtual server to host multiple sites on the server. I lost access to phpmyadmin via the url (ie. domain.com/nothingtosee). Now all that it returns is a 404 error.
Is there a quick fix to this?
Hi, how come after I typed sudo apt-get install phpmyadmin the first question it asked was whether I wanted it to be installed in Apache2 or Lighttd? I’m in Nginx(LEMP) and it’s not even an option for an answer. So I reluctantly selected Apache2. Would that be a problem? Should I uninstall it and start over? If it needs to be uninstalled, how to do that properly? Thanks!
Hi, your tutorial was great. I did have a problem. After accessing phpmyadmin (with htaccess password ), the next time I connected I didn’t get prompted for a password. I didn’t save the password in the browser (chrome and firefox) and I didn’t save cookies (cleared on close). Not sure where it is being saved.
I wanted to try a little more security rather than password protecting access to PhpMyadmin.
I wanted to secure it so that I could only access it from either localhost or my local private network 192.168.100.0.
I made the following changes:
- I undid AllowOverride All
- renamed .htaccess so the password mechanism stopped
- I added Require all denied Allow from 127.0.0.0/255.0.0.0 ::1/128 Allow from localhost
- actually I tried localhost first the i tried both
Now nobody can access phpmyadmin???
Alias /phpmyadmin /usr/share/phpmyadmin
<Directory /usr/share/phpmyadmin> Options FollowSymLinks DirectoryIndex index.php
BT Sept 6,2014
AllowOverride All
    <IfModule mod_php5.c>
            AddType application/x-httpd-php .php
            php_flag magic_quotes_gpc Off
            php_flag track_vars On
            php_flag register_globals Off
            php_admin_flag allow_url_fopen Off
            php_value include_path .
            php_admin_value upload_tmp_dir /var/lib/phpmyadmin/tmp
            php_admin_value open_basedir /usr/share/phpmyadmin/:/etc/phpmyadmin/:/var/lib/phpmyadmin/:/usr/share/php/php-gettext/:/usr/share/javascript/
    </IfModule>
BT trying to block PhpMyadmin from Internet
    Require all denied
    Allow from 127.0.0.0/255.0.0.0 ::1/128
    Allow from localhost
</Directory>
Authorize for setup
<Directory /usr/share/phpmyadmin/setup> <IfModule mod_authn_file.c> AuthType Basic AuthName “phpMyAdmin Setup” AuthUserFile /etc/phpmyadmin/htpasswd.setup </IfModule> Require valid-user </Directory>
Disallow web access to directories that don’t need it
<Directory /usr/share/phpmyadmin/libraries> Order Deny,Allow Deny from All </Directory> <Directory /usr/share/phpmyadmin/setup/lib> Order Deny,Allow Deny from All </Directory>
Can you see what’s wrong? thanks
In the above code example:
    location / {
        try_file $uri $uri/ =404;
    }
should be:
    location / {
        try_files $uri $uri/ =404;
    }
Note the highlighted ‘s’, else NginX could not apply your changes and your server block will cause a parse error.
Hi, Thank you for an excellent tutorial.
Could you please tell us what the right permission should be for the phpmyadmin symbolic link folder in the document root? [ :/ Eh, assuming that’s what it’s called. ]
The current permission for the same folder on my server is 777, should I be changing it to 755?
Thanks and Regards.
sudo ln -s /usr/share/phpmyadmin /usr/share/nginx/html
From apt Nginx we can installed 1.2.1 version, so the html should be changed to www, like this line:
sudo ln -s /usr/share/phpmyadmin /usr/share/nginx/www
only in later version(1.4) the path contains /html
PS: all html lines should be replaced by www
Hi, how to force SSL / HTTPS when you access http://server_domain_or_ip/nothingtosee (the phpmyadmin folder) ?
I’d rather not access phpmyadmin in http mode. Https is more secured
Thanks for this awesome post … could not get into securing my phpadmin installation as I get stuck with a 403 Forbidden error after trying to reach it …;
I set the link as stated :
sudo ln -s /usr/share/phpmyadmin /var/www/html # I’m using the /var directory…
then upon request to http://www.mydomain.net/phpmyadmin
I get a 403 Forbidden result…
in the log I can see : 2014/11/01 15:55:23 [error] 13195#0: *3 directory index of “/var/www/html/phpmyadmin/” is forbidden, client: XX.XX.XXX.XX, server: _, request: “GET /phpmyadmin”
php-fpm is running fine as I can get http://www.mydomain.net/info.php with the info.php file added into /var/www/html
HOWEVER if I request http://www.mydomain.net/phpmyadmin/index.php then I get the login panel…
what am I missing
 This work is licensed under a Creative Commons Attribution-NonCommercial- ShareAlike 4.0 International License.
Become a contributor for community
Get paid to write technical tutorials and select a tech-focused charity to receive a matching donation.

DigitalOcean Documentation
Full documentation for every DigitalOcean product.

Resources for startups and AI-native businesses
The Wave has everything you need to know about building a business, from raising funding to marketing your product.
The developer cloud
Scale up as you grow — whether you're running one virtual machine or ten thousand.

Get started for free
Sign up and get $200 in credit for your first 60 days with DigitalOcean.*

*This promotional offer applies to new accounts only.