- Log in to:
- Community
- DigitalOcean
- Sign up for:
- Community
- DigitalOcean
By Bulat Khamitov

Status: Deprecated
This article covers a version of CentOS that is no longer supported. If you are currently operating a server running CentOS 6, we highly recommend upgrading or migrating to a supported version of CentOS.
Reason: CentOS 6 reached end of life (EOL) on November 30th, 2020 and no longer receives security patches or updates. For this reason, this guide is no longer maintained.
See Instead:
This guide might still be useful as a reference, but may not work on other CentOS releases. If available, we strongly recommend using a guide written for the version of CentOS you are using.
If you would like to create your own online e-mail system, you can use iRedMail. In this article, we will explain how you can do it.
Step 1 - Droplet Creation
We use a 2 CPU Core / 2GB RAM droplet with CentOS 6.5 x64 image.
If you have a domain name you want to use, name your droplet as that domain name, which will become its hostname and reverse DNS record.
We should also add 2GB of SWAP memory to this droplet for stability:
dd if=/dev/zero of=/swap bs=1024 count=2097152
mkswap /swap && chown root. /swap && chmod 0600 /swap && swapon /swap
echo /swap swap swap defaults 0 0 >> /etc/fstab
echo vm.swappiness = 0 >> /etc/sysctl.conf && sysctl -p
Step 2 - Create a Domain Name
For our Cloud Mail purposes, we will register a free domain, cloudmail.tk from dot.tk
Once you have your domain name registered, point it to DigitalOcean's name servers:
ns1.digitalocean.com (69.55.55.74)
ns2.digitalocean.com (141.0.175.217)
ns3.digitalocean.com (69.55.62.20)

Now open your Control Panel on DigitalOcean and click DNS, located under Labs section.
Click Add Domain and create a new record by pointing your new domain to your droplet's IP address:

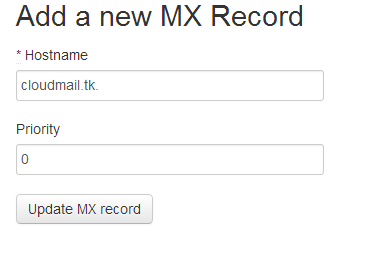
Create a new MX record, make sure to have a trailing dot at the end of your domain name:
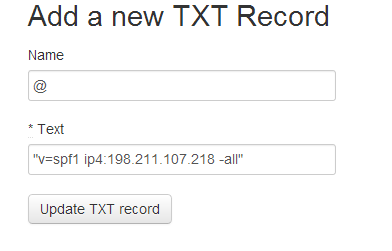
Add SPF records to make sure others cant spoof emails by pretending to send them from your domain.
Make sure to have "-all" in your SPF record, and point it to your droplet's IP.
The record's format would be "v=spf1 ip4:IP_ADDRESS -all"
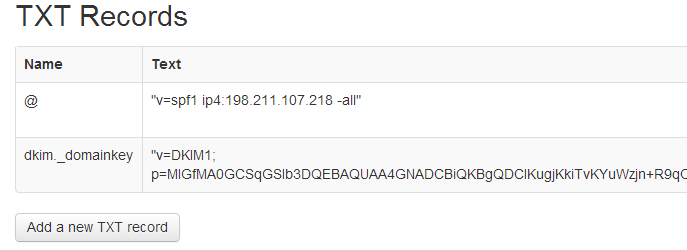
There will be one more record to add after you have finished installing iRedMail - DKIM key.
Step 3 - iRedMail Installation
Make sure to set the hostname of your domain name, if you haven't done this during droplet creation:
wget https://bitbucket.org/zhb/iredmail/downloads/iRedMail-0.8.6.tar.bz2
tar jxvf iRedMail-0.8.6.tar.bz2 && cd iRedMail-0.8.6
hostname cloudmail.tk
bash iRedMail.sh
You are greeted with a Graphical User Interface Installer by iRedMail:

If you have several droplets, you can even use GlusterFS for distributed, replicated e-mail storage, providing further redundancy:

For backend, we chose MySQL. You can also use OpenLDAP and PostgreSQL:

Since we have registered a domain in Step 2, we will place it here:

From package selection, you can omit phpMyAdmin and Fail2Ban:

When asked whether you would like to use firewall rules provided with iRedMail, select 'No'.

Firewall rules should be custom made for each server, and adopting a DROP ruleset from iRedMail's package is not recommended.We would also not recommend using Fail2Ban from their package, as it banned our own IP when we refreshed a page.
Reboot your droplet after completion.
All of the installation notes and logs can be found in iRedMail.tips file ( /root/iRedMail-0.8.6/iRedMail.tips ).
Here you will have information on passwords, SSL certificate locations, and DKIM records.
Add the DKIM record to DigitalOcean's DNS control panel for your domain:
Step 4 - Add SSL Certificate
Although this step is optional if you just want to use self-generated certificate, we would still recommend getting a trusted SSL certificate.
By default, iRedMail will create a self-signed certificate and store it in /etc/pki/tls/certs/iRedMail_CA.pem and /etc/pki/tls/private/iRedMail.key
We can get a free SSL certificate from InstantSSL
You would need to create a CSR and private KEY first:
cd /etc/pki/tls/certs
openssl req -out cloudmail.tk.csr -new -newkey rsa:2048 -nodes -keyout cloudmail.tk.key
This will generate 2 files: cloudmail.tk.csr (your Certificate Signing Request file), and cloudmail.tl.key (your private SSL key which should not be shared with anyone).
You would provide the CSR file (cloudmail.tk.csr) to InstantSSL during SSL request.
After they have validated your request, you will receive the certificate file (in zip format) that contains two files:
cloudmail_tk.ca-bundle (your SSL certificate bundle)
cloudmail_tk.crt (your SSL certificate)
Place both files to /etc/pki/tls/certs and modify /etc/httpd/conf.d/ssl.conf
SSLCertificateFile /etc/pki/tls/certs/cloudmail.tk.crt
SSLCertificateKeyFile /etc/pki/tls/certs/cloudmail.tk.key
SSLCACertificateFile /etc/pki/tls/certs/cloudmail.tk.ca-bundle.crt
Restart Apache
service httpd restart
Now you should have SSL enabled, and you can proceed to logging in to iRedAdmin (https://cloudmail.tk/iredadmin/ ) with username postmaster@cloudmail.tk and password you provided during installation in Step 3.
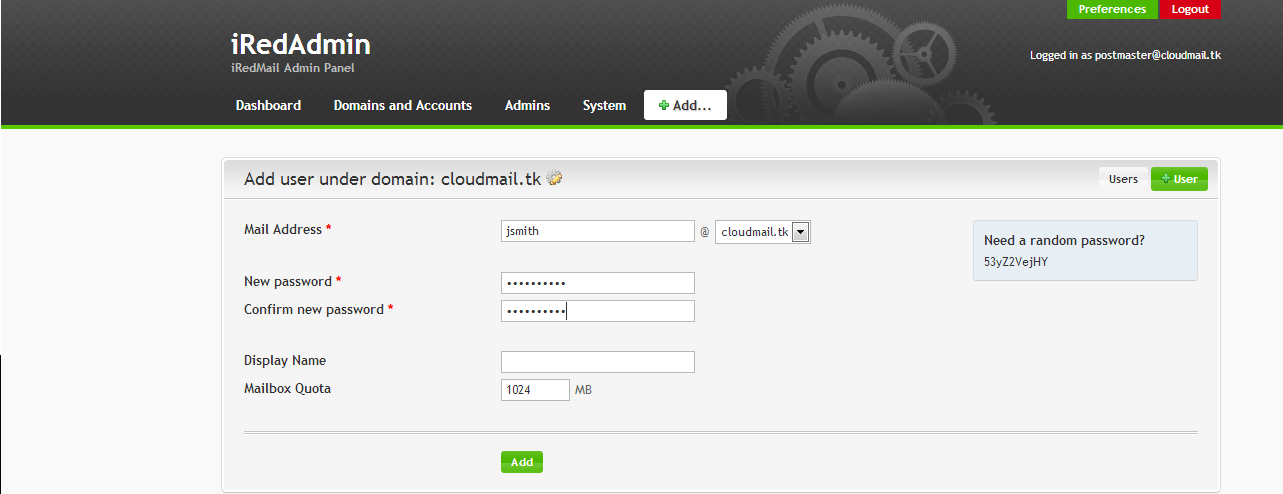
From iRedAdmin, you can add new users, new admins, and new domains into your system:
Once you have created an e-mail account, you can access it at https://cloudmail.tk/mail/
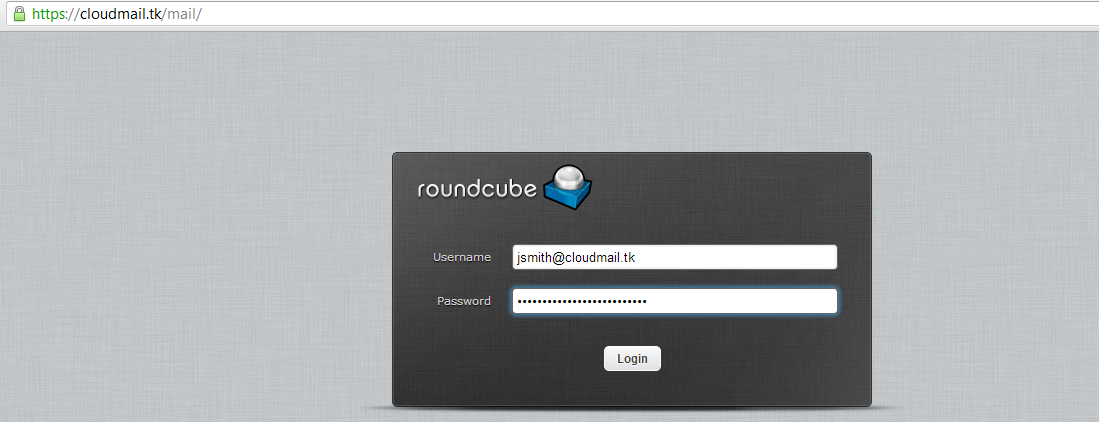
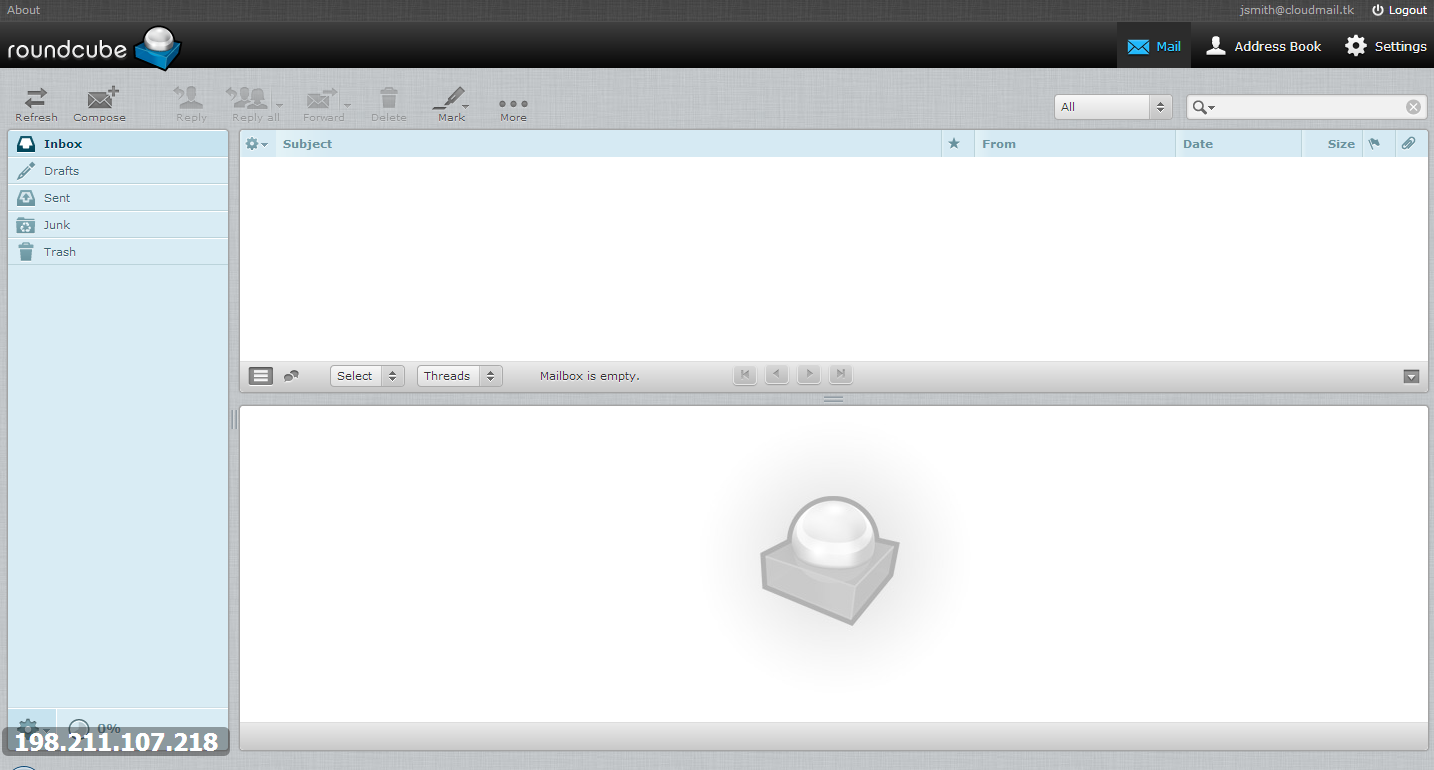
And you are all done!
Thanks for learning with the DigitalOcean Community. Check out our offerings for compute, storage, networking, and managed databases.
Still looking for an answer?
This textbox defaults to using Markdown to format your answer.
You can type !ref in this text area to quickly search our full set of tutorials, documentation & marketplace offerings and insert the link!
Step 3, one of the screenshots says: “it cannot be the same as server hostname: cloudmail.tk” But you’ve specified that name - cloudmail.tk Is this correctly?
This warning refers to server hostname, i.e Linux OS’s hostname which is usually mapped to 127.0.0.1 in /etc/hosts.
Since you would be using a public IP address to listen for mail, you would specify your domain hostname. You can verify that you dont have your domain’s name under 127.0.0.1 in /etc/hosts to be extra careful.
For an even more advanced configuration you can also specify a hostname that is listening on VPN only - and you would have something like 10.8.0.3 cloudmail.tk in your /etc/hosts file - this way all mail will be exchanged over VPN.
Everything setup perfectly, though trying to send an email to another account (gmail) but it isnt sending.
On the HTTPS, I’m getting “internal server error” and from SSL error log: OperationalError: (2003, “Can’t connect to MySQL server on ‘127.0.0.1’ (111)”)
HTTP & MySQL runs fine
@suud.ridzuan: Make sure the MySQL username and password are correct. Are you sure MySQL is running? What does (“ps aux | grep mysql”) output?
I’ve got mail setup and running. IMAP and SMTP seem to be doing what they are supposed to do. I had to turn off spam filtering to be able to receive any mail at all though. Seems like that amavisd would refuse the port that its on. It also seems to crash itself out sometimes too. I’m unable to figure out what is causing it to fail. /var/log/mail only suggests that postfix is unable to talk to the port that it is running on and no other relevant information.
Yup MySQL is running fine… I believe something wrong with the config file, changed the IP but the error showing “127.0.0.1”… am I editing the right config file, iRedMail/config ?
@suud.ridzuan Hmm, I suggest you ask in the official iRedMail support forum - they’ll be able to help you better: http://www.iredmail.org/forum/
Just a thought… You should add to the tutorial how to add the ssl cert to the dovecot config. Some email clients won’t use self signed certificates upon pop3 or imap connections.
- Table of contents
Deploy on DigitalOcean
Click below to sign up for DigitalOcean's virtual machines, Databases, and AIML products.
Become a contributor for community
Get paid to write technical tutorials and select a tech-focused charity to receive a matching donation.
DigitalOcean Documentation
Full documentation for every DigitalOcean product.
Resources for startups and SMBs
The Wave has everything you need to know about building a business, from raising funding to marketing your product.
Get our newsletter
Stay up to date by signing up for DigitalOcean’s Infrastructure as a Newsletter.
New accounts only. By submitting your email you agree to our Privacy Policy
The developer cloud
Scale up as you grow — whether you're running one virtual machine or ten thousand.
Get started for free
Sign up and get $200 in credit for your first 60 days with DigitalOcean.*
*This promotional offer applies to new accounts only.
