- Log in to:
- Community
- DigitalOcean
- Sign up for:
- Community
- DigitalOcean
By Gerald Sigmund

What the Red Means
The lines that the user needs to enter or customize will be in red in this tutorial! The rest should mostly be copy-and-pastable.
What is JBoss?
JBoss is a powerful open source Java application server developed by RedHat. It has full support for the JavaEE 6 Webprofile, which means you have the following out of the box support:
- Servlet 3.0
- JSF
- Java Server Faces
- EJB
- JPA
- CDI
- Bean Validation
Additionally there is also support for other JavaEE features like JMS, JAX-RS and JAX-WS.
More documentation can be found here.
Step One—Install Java
First you have to check if you have installed java on your VPS.
java -version
When you get the following error you have to install it.
-bash: java: command not found
Install Java.
apt-get update
apt-get install openjdk-7-jdk
Step Two—Install JBoss
The next step is to download the current JBoss version, which is at the moment 7.1.1.
wget http://download.jboss.org/jbossas/7.1/jboss-as-7.1.1.Final/jboss-as-7.1.1.Final.tar.gz
Now unzip it and move it to /usr/local/share/jboss.
tar xfvz jboss-as-7.1.1.Final.tar.gz
mv jboss-as-7.1.1.Final /usr/local/share/jboss
Step Three—Create a New User
Because we don't want to run it as root you should create a new user which is used to start the JBoss server.
adduser appserver
Also change the ownership of the newly created folder to the new user.
chown -R appserver /usr/local/share/jboss
The next step will be creating a new user for the JBoss management console.
su appserver
cd /usr/local/share/jboss/bin
./add-user.sh
Now you should create a new Management User by typing "a" and enter later username and password
What type of user do you wish to add?
 a) Management User (mgmt-users.properties)
 b) Application User (application-users.properties)
(a): a

Enter the details of the new user to add.
Realm (ManagementRealm) :
Username : app1
Password :
Re-enter Password :
It is really important that the Realm has the value "ManagementRealm" because this is the realm for the management console.
Step Four—Start the JBoss Server
After this steps you can start the JBoss server using the following command.
./standalone.sh -Djboss.bind.address=yourserverip -Djboss.bind.address.management=yourserverip&
You have to set the bind address because otherwise JBoss is only accessable from localhost. You can also set as IP address 0.0.0.0 if you have no static IP.
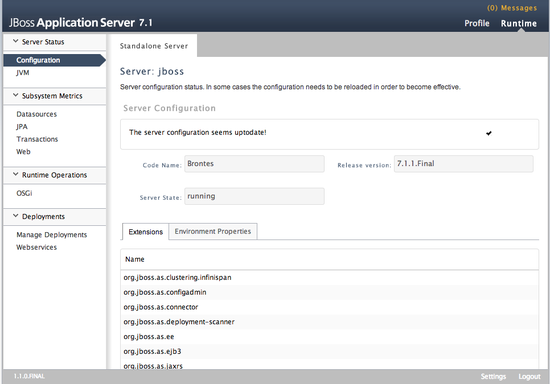
To verify if everything works you can navigate to the management console.
http://yourserverip:9990/console
You have to enter username and password of the user you created using add-user.sh.
You should see the following site now:

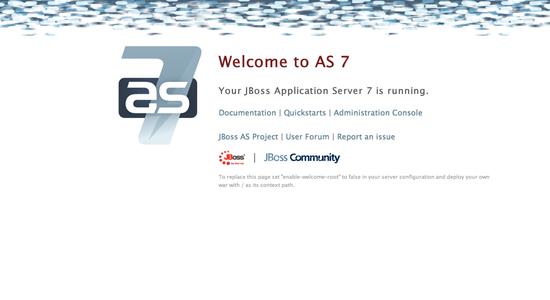
To enter the deployed root web page you have to navigate to the following url.
http://yourserverip:8080/
You should see the following site now:

To stop the server you have to run the following command.
./jboss-cli.sh --connect --controller=yourserverip:9999 command=:shutdown
Thanks for learning with the DigitalOcean Community. Check out our offerings for compute, storage, networking, and managed databases.
About the author
Still looking for an answer?
This textbox defaults to using Markdown to format your answer.
You can type !ref in this text area to quickly search our full set of tutorials, documentation & marketplace offerings and insert the link!
This is great - 99% there. Unable to connect to 8080 port and view the default web page. Though the console is available as shown int the document. Something is still missing.
So… I tried to install the jboss, and followed the tutorial above and worked perfectly. My problem now it’s to make the jboss start automatically, i tried to add the command lines including an export to the JBOSS_HOME in the rc.local but don’t make any effect.
@jhonnygaltran: See if this helps: <a href=“https://community.jboss.org/wiki/startjbossonbootwithlinux”>https://community.jboss.org/wiki/startjbossonbootwithlinux</a>
Hey… make some modifications in the script in the forum (Just changed the commands to the binding used in this article) and now it’s working fine. Thank’s Kamal =)
/usr/local/share/jboss/bin $ sh add-user.sh /usr/bin/java: 1: /usr/bin/java: Syntax error: end of file unexpected (expecting “)”)
Any help?
- Table of contents
Deploy on DigitalOcean
Click below to sign up for DigitalOcean's virtual machines, Databases, and AIML products.
Become a contributor for community
Get paid to write technical tutorials and select a tech-focused charity to receive a matching donation.
DigitalOcean Documentation
Full documentation for every DigitalOcean product.
Resources for startups and SMBs
The Wave has everything you need to know about building a business, from raising funding to marketing your product.
Get our newsletter
Stay up to date by signing up for DigitalOcean’s Infrastructure as a Newsletter.
New accounts only. By submitting your email you agree to our Privacy Policy
The developer cloud
Scale up as you grow — whether you're running one virtual machine or ten thousand.
Get started for free
Sign up and get $200 in credit for your first 60 days with DigitalOcean.*
*This promotional offer applies to new accounts only.
