Not using Ubuntu 20.04?
Choose a different version or distribution.
Introduction
Nginx is one of the most popular web servers in the world and is responsible for hosting some of the largest and highest-traffic sites on the internet. It is a lightweight choice that can be used as either a web server or reverse proxy.
This guide covers installing Nginx on Ubuntu, adjusting the firewall, managing the Nginx process, and setting up server blocks for hosting multiple domains from a single server.
Simplify deploying applications with DigitalOcean App Platform. Deploy directly from GitHub in minutes.
Key Takeaways
- Install Nginx from Ubuntu’s default repositories using
apt, then configure UFW firewall rules to allow HTTP and HTTPS traffic. - Use
systemctlcommands to manage the Nginx service lifecycle, including start, stop, restart, reload, enable, and disable operations. - Configure server blocks in
/etc/nginx/sites-available/and enable them via symlinks to/etc/nginx/sites-enabled/for hosting multiple domains. - Test your Nginx configuration with
sudo nginx -tbefore restarting to avoid service downtime or configuration errors. - The default web root is
/var/www/html, but create separate directories per domain in/var/www/for multi-site hosting. - Use
sudo systemctl reload nginxto apply configuration changes without dropping active connections, unlikerestartwhich causes brief downtime. - Configure firewall profiles (Nginx HTTP, Nginx HTTPS, or Nginx Full) based on your traffic requirements, with the most restrictive profile that still allows your configured traffic.
Prerequisites
Before you begin this guide, you should have a regular, non-root user with sudo privileges configured on your server. You can learn how to configure a regular user account by following our Initial server setup guide for Ubuntu (compatible with Ubuntu 20.04 and later versions).
You will also optionally want to have registered a domain name before completing the last steps of this tutorial. To learn more about setting up a domain name with DigitalOcean, please refer to our Introduction to DigitalOcean DNS.
When you have an account available, log in as your non-root user to begin.
Note: Throughout this guide, replace your_domain and your_server_ip with your actual domain name and server IP address.
Step 1 – Installing Nginx
Nginx is available in Ubuntu’s default repositories. Install it using the apt packaging system.
First, update the local package index to access the most recent package listings, then install nginx:
- sudo apt update
- sudo apt install nginx
After accepting the procedure, apt will install Nginx and any required dependencies to your server.
Step 2 – Adjusting the Firewall
Configure the firewall to allow Nginx traffic before testing. Nginx registers itself as a service with ufw upon installation, making it straightforward to allow Nginx access.
Important: If UFW is not enabled yet, make sure SSH access is allowed before enabling it to avoid locking yourself out:
- sudo ufw allow OpenSSH
Then enable the firewall:
- sudo ufw enable
List the application configurations that ufw knows how to work with by typing:
- sudo ufw app list
You should get a listing of the application profiles:
Available applications:
  Nginx Full
  Nginx HTTP
  Nginx HTTPS
  OpenSSH
As demonstrated by the output, there are three profiles available for Nginx:
- Nginx Full: This profile opens both port 80 (normal, unencrypted web traffic) and port 443 (TLS/SSL encrypted traffic)
- Nginx HTTP: This profile opens only port 80 (normal, unencrypted web traffic)
- Nginx HTTPS: This profile opens only port 443 (TLS/SSL encrypted traffic)
Enable the most restrictive profile that allows your configured traffic. Right now, we will only need to allow traffic on port 80.
You can enable this by typing:
- sudo ufw allow 'Nginx HTTP'
You can verify the change by typing:
- sudo ufw status
The output will indicate which HTTP traffic is allowed:
Status: active

To                         Action      From
--                         ------      ----
OpenSSH                    ALLOW       Anywhere
Nginx HTTP                 ALLOW       Anywhere
OpenSSH (v6)               ALLOW       Anywhere (v6)
Nginx HTTP (v6)            ALLOW       Anywhere (v6)
Step 3 – Checking your Web Server
At the end of the installation process, Ubuntu starts Nginx. The web server is up and running.
We can check with the systemd init system to make sure the service is running by typing:
- systemctl status nginx
● nginx.service - A high-performance web server and a reverse proxy server
   Loaded: loaded (/lib/systemd/system/nginx.service; enabled; vendor preset: enabled)
   Active: active (running) since Fri 2020-04-20 16:08:19 UTC; 3 days ago
     Docs: man:nginx(8)
 Main PID: 2369 (nginx)
    Tasks: 2 (limit: 1153)
   Memory: 3.5M
   CGroup: /system.slice/nginx.service
           ├─2369 nginx: master process /usr/sbin/nginx -g daemon on; master_process on;
           └─2380 nginx: worker process
The service is running. Test it by requesting a page from Nginx.
You can access the default Nginx landing page to confirm that the software is running properly by navigating to your server’s IP address. If you do not know your server’s IP address, you can find it by using the icanhazip.com tool, which will give you your public IP address as received from another location on the internet:
- curl -4 icanhazip.com
When you have your server’s IP address, enter it into your browser’s address bar:
http://your_server_ip
You should receive the default Nginx landing page:
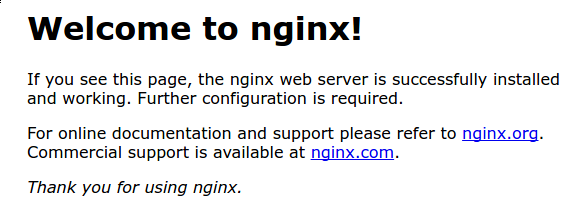
If you are on this page, your server is running correctly and is ready to be managed.
Quick verification checklist
If the default page does not load or you want to validate locally, run the following checks.
Confirm Nginx is responding locally
Use curl -I to send an HTTP HEAD request to localhost and confirm you get a successful status line (like 200 OK) and Nginx response headers.
- curl -I http://localhost
HTTP/1.1 200 OK
Server: nginx/1.18.0 (Ubuntu)
Date: Tue, 27 Jan 2026 01:35:12 GMT
Content-Type: text/html
Connection: keep-alive
Confirm Nginx is listening on port 80
This command checks whether any process is actively bound to TCP port 80 and displays the owning process and PID. You should see nginx listed in the output.
- sudo ss -lntp | grep -E '(:80\s|:80$)'
LISTEN 0      511          0.0.0.0:80        0.0.0.0:*    users:(("nginx",pid=2369,fd=6))
LISTEN 0      511             [::]:80           [::]:*    users:(("nginx",pid=2369,fd=7))
Check recent Nginx error logs
If Nginx is running but requests are failing, reviewing recent error logs helps identify common problems such as permission issues, misconfigured server blocks, or upstream connection failures.
sudo tail -n 50 /var/log/nginx/error.log
2026/01/27 01:32:41 [error] 2380#2380: *3 open() "/var/www/html/index.html" failed (13: Permission denied), client: 127.0.0.1, server: _, request: "GET / HTTP/1.1", host: "localhost"
These checks help quickly identify service status, port binding, configuration, and permission issues before moving forward.
Step 4 – Managing the Nginx Process
Now that you have your web server up and running, let’s review some basic management commands.
To stop your web server, type:
- sudo systemctl stop nginx
To start the web server when it is stopped, type:
- sudo systemctl start nginx
To stop and then start the service again, type:
- sudo systemctl restart nginx
If you are only making configuration changes, Nginx can often reload without dropping connections. To do this, type:
- sudo systemctl reload nginx
By default, Nginx is configured to start automatically when the server boots. If this is not what you want, you can disable this behavior by typing:
- sudo systemctl disable nginx
To re-enable the service to start up at boot, you can type:
- sudo systemctl enable nginx
With these management commands, you can now configure server blocks to host multiple domains.
Step 5 – Setting Up Server Blocks (Recommended)
When using the Nginx web server, server blocks (similar to virtual hosts in Apache) can be used to encapsulate configuration details and host more than one domain from a single server. We will set up a domain called your_domain, but you should replace this with your own domain name.
Nginx on Ubuntu has one server block enabled by default that is configured to serve documents out of a directory at /var/www/html. While this works well for a single site, it can become unwieldy if you are hosting multiple sites. Instead of modifying /var/www/html, let’s create a directory structure within /var/www for our your_domain site, leaving /var/www/html in place as the default directory to be served if a client request doesn’t match any other sites.
Create the directory for your_domain as follows, using the -p flag to create any necessary parent directories:
- sudo mkdir -p /var/www/your_domain/html
Next, assign ownership of the directory with the $USER environment variable:
- sudo chown -R $USER:$USER /var/www/your_domain/html
Set correct permissions for your web root. The following command grants read, write, and execute to the owner, and read/execute to groups and others:
- sudo chmod -R 755 /var/www/your_domain
Next, create a sample index.html page using nano or your favorite editor:
- sudo nano /var/www/your_domain/html/index.html
Inside, add the following sample HTML:
<html>
    <head>
        <title>Welcome to your_domain!</title>
    </head>
    <body>
        <h1>Success! The your_domain server block is working!</h1>
    </body>
</html>
Save and close the file by pressing Ctrl+X to exit, then when prompted to save, Y and then Enter.
Create a server block with the correct directives for Nginx to serve this content. Instead of modifying the default configuration file directly, create a new one at /etc/nginx/sites-available/your_domain:
- sudo nano /etc/nginx/sites-available/your_domain
Paste in the following configuration block, which is similar to the default, but updated for our new directory and domain name:
server {
        listen 80;
        listen [::]:80;

        root /var/www/your_domain/html;
        index index.html index.htm index.nginx-debian.html;

        server_name your_domain www.your_domain;

        location / {
                try_files $uri $uri/ =404;
        }
}
The root directive points to the new directory, and server_name uses your domain name.
Next, let’s enable the file by creating a link from it to the sites-enabled directory, which Nginx reads from during startup:
- sudo ln -s /etc/nginx/sites-available/your_domain /etc/nginx/sites-enabled/
If you no longer want the default site to respond to unmatched requests, you can disable it by removing its symlink:
- sudo unlink /etc/nginx/sites-enabled/default
Only do this after confirming your new server block is working correctly.
Note: Nginx uses a common practice called symbolic links, or symlinks, to track which of your server blocks are enabled. Creating a symlink is like creating a shortcut on disk, so that you could later delete the shortcut from the sites-enabled directory while keeping the server block in sites-available if you wanted to enable it.
Two server blocks are now enabled and configured to respond to requests based on their listen and server_name directives. Learn more about how Nginx processes these directives:
your_domain: Responds to requests foryour_domainandwww.your_domain.default: Responds to any requests on port 80 that do not match the other server block.
To avoid a possible hash bucket memory problem that can arise from adding additional server names, adjust a single value in the /etc/nginx/nginx.conf file. Open the file:
- sudo nano /etc/nginx/nginx.conf
Find the server_names_hash_bucket_size directive and remove the # symbol to uncomment the line. In nano, press Ctrl+W to search.
Note: Commenting out lines of code – usually by putting # at the start of a line – is another way of disabling them without needing to actually delete them. Many configuration files ship with multiple options commented out so that they can be enabled or disabled, by toggling them between active code and documentation.
...
http {
    ...
    server_names_hash_bucket_size 64;
    ...
}
...
Save and close the file when you are finished.
Next, test to make sure that there are no syntax errors in any of your Nginx files:
- sudo nginx -t
If there aren’t any problems, reload Nginx to apply your changes without dropping active connections:
- sudo systemctl reload nginx
Nginx should now be serving your domain name. You can test this by navigating to http://your_domain, where you should see something like this:

Step 6 – Getting Familiar with Important Nginx Files and Directories
Now that you know how to manage the Nginx service itself, you should take a few minutes to familiarize yourself with a few important directories and files.
Content
/var/www/html: The actual web content, which by default only consists of the default Nginx page you saw earlier, is served out of the/var/www/htmldirectory. This can be changed by altering Nginx configuration files.
Server Configuration
/etc/nginx: The Nginx configuration directory. All of the Nginx configuration files reside here./etc/nginx/nginx.conf: The main Nginx configuration file. This can be modified to make changes to the Nginx global configuration./etc/nginx/sites-available/: The directory where per-site server blocks can be stored. Nginx will not use the configuration files found in this directory unless they are linked to thesites-enableddirectory. Typically, all server block configuration is done in this directory, and then enabled by linking to the other directory./etc/nginx/sites-enabled/: The directory where enabled per-site server blocks are stored. Typically, these are created by linking to configuration files found in thesites-availabledirectory./etc/nginx/snippets: This directory contains configuration fragments that can be included elsewhere in the Nginx configuration. Potentially repeatable configuration segments are good candidates for refactoring into snippets.
Server Logs
/var/log/nginx/access.log: Every request to your web server is recorded in this log file unless Nginx is configured to do otherwise./var/log/nginx/error.log: Any Nginx errors will be recorded in this log.
Performance tuning for high-traffic servers
For high-traffic workloads, start with safe baseline tuning before applying aggressive optimizations.
Worker process tuning: Open /etc/nginx/nginx.conf and ensure the following values are set:
worker_processes auto;
Inside the events block, review:
events {
    worker_connections 1024;
}
Increase worker_connections only if you expect high concurrency and have sufficient system resources.
Keepalive connections: Enable keepalives for upstream connections when using reverse proxy setups to reduce connection overhead.
Configuration validation: After any tuning changes, always validate and reload safely:
- sudo nginx -t
- sudo systemctl reload nginx
Avoid changing buffer sizes and timeouts blindly. Measure performance and adjust incrementally to prevent memory pressure or request handling issues.
Setting up Nginx as a reverse proxy for applications like Node.js, Python, or PHP
Nginx can be used as a reverse proxy (compatible with Ubuntu 20.04 and 22.04) to route requests to different applications or services. This is useful when you have multiple applications running on the same server and want to manage them as a single entity.
To set up Nginx as a reverse proxy, you need to create a server block in the sites-available directory and configure it to listen for requests on a specific port. You can then use the proxy_pass directive to forward requests to the appropriate backend application or service.
For example, if you have a Node.js application running on port 3000, you can set up a server block like this:
server {
    listen 80;
    server_name your_domain;

    location / {
        proxy_pass http://localhost:3000;
        proxy_http_version 1.1;
        proxy_set_header Upgrade $http_upgrade;
        proxy_set_header Connection "upgrade";
        proxy_set_header Host $host;
        proxy_set_header X-Real-IP $remote_addr;
        proxy_set_header X-Forwarded-For $proxy_add_x_forwarded_for;
        proxy_set_header X-Forwarded-Proto $scheme;
    }
}
Troubleshooting common Nginx errors
Common Nginx errors and their troubleshooting solutions:
1. “403 Forbidden” Error
The “403 Forbidden” error occurs when Nginx denies access to a requested resource. This can happen due to incorrect permissions on the file or directory, or if the Nginx user does not have the necessary permissions to access the content.
Solution: Ensure Nginx can read the files you are serving. For a typical site under /var/www, verify directory and file permissions (for example, 755 on directories and 644 on files) and confirm your root path in the server block points to the correct location. Avoid blanket ownership changes on /var/www/html; instead, update permissions or ownership only for the specific site directory you are serving.
2. “502 Bad Gateway” Error
The “502 Bad Gateway” error occurs when Nginx acts as a reverse proxy and the backend server fails to respond. This can happen due to a misconfigured backend server or if the backend server is not running.
Solution: Check the backend server’s status and ensure it is running correctly. If the backend server is running, check the Nginx configuration files for any errors in the proxy_pass directive. For example, ensure that the port number in the proxy_pass directive matches the port the backend server is listening on.
3. “504 Gateway Timeout” Error
The “504 Gateway Timeout” error occurs when Nginx acts as a reverse proxy and the backend server takes too long to respond. This can happen due to a slow backend server or if the timeout values in the Nginx configuration are set too low.
Solution: Increase the timeout values in the Nginx configuration files. For example, you can add the following lines to your server block to increase the timeout values:
proxy_connect_timeout 300;
proxy_send_timeout 300;
proxy_read_timeout 300;
These lines increase the timeout values to 300 seconds.
By understanding the causes of these common Nginx errors and applying the solutions provided, you can quickly troubleshoot and resolve issues with your Nginx server.
FAQs
What is Nginx used for?
Nginx is a popular open-source web server software that can be used for a variety of purposes, including:
- Serving static content (HTML, CSS, images, etc.)
- Acting as a reverse proxy server to distribute incoming traffic to multiple backend servers
- Load balancing to distribute incoming traffic across multiple servers
- SSL termination to handle HTTPS traffic
- URL rewriting and redirection
How do I secure Nginx with SSL?
To secure Nginx with SSL, you need to obtain an SSL certificate and configure Nginx to use it. Here’s an example of how to do this:
-
Obtain an SSL certificate from a trusted certificate authority or use a self-signed certificate for testing purposes. For production, use Let’s Encrypt (see the conclusion section) or obtain certificates from a trusted CA. Certificate files are typically stored in
/etc/ssl/certs/for certificates and/etc/ssl/private/for private keys. -
Create or update a dedicated server block for your domain in
/etc/nginx/sites-available/your_domainwith the following configuration:server { listen 443 ssl; server_name your_domain.com; ssl_certificate /etc/ssl/certs/your_certificate.crt; ssl_certificate_key /etc/ssl/private/your_certificate.key; location / { root /var/www/your_domain/html; index index.html index.htm; } } -
Restart Nginx to apply the changes:
sudo systemctl restart nginx
This configuration sets up Nginx to listen for HTTPS traffic on port 443 and uses the specified SSL certificate and key. Replace the certificate paths with your actual certificate file locations.
What’s the difference between restart and reload in Nginx?
The restart command stops and then starts Nginx, which causes a brief service interruption. The reload command gracefully reloads the configuration without dropping active connections.
- Use
sudo systemctl restart nginxwhen you need to fully restart the service (e.g., after package updates) - Use
sudo systemctl reload nginxwhen you’ve made configuration changes and want to apply them without downtime
How do I check Nginx configuration syntax?
Test your Nginx configuration for syntax errors before applying changes using:
- sudo nginx -t
This command validates all configuration files and reports any syntax errors or warnings. If the test passes, you’ll see “syntax is ok” and “test is successful” messages.
What are the default Nginx ports?
Nginx listens on the following default ports:
- Port 80: HTTP (unencrypted web traffic)
- Port 443: HTTPS (TLS/SSL encrypted web traffic)
These ports are configured in your server blocks using the listen directive. You can change these ports if needed, but ports 80 and 443 are the standard web ports.
How do I view Nginx error logs?
Nginx logs are located in /var/log/nginx/. View error logs using:
- sudo tail -f /var/log/nginx/error.log
This command displays the last 10 lines and follows new entries in real-time. For access logs, use /var/log/nginx/access.log. You can also view specific log entries with grep or less.
What are server blocks in Nginx?
Server blocks (similar to virtual hosts in Apache) allow you to host multiple websites on a single Nginx server. Each server block contains configuration for a specific domain or site, including:
- The domain name (
server_name) - Document root directory (
root) - SSL certificate settings
- Location-specific rules
Server blocks are stored in /etc/nginx/sites-available/ and enabled by creating symlinks in /etc/nginx/sites-enabled/.
How do I reload Nginx without downtime?
Use the reload command to apply configuration changes without interrupting active connections:
- sudo systemctl reload nginx
This sends a signal to the Nginx master process to reload configuration files. Worker processes finish handling current requests before being replaced with new workers using the updated configuration, ensuring zero downtime.
What’s the difference between sites-available and sites-enabled?
These directories work together to manage server block configurations:
/etc/nginx/sites-available/: Stores all server block configuration files. Files here are not active./etc/nginx/sites-enabled/: Contains symlinks to configuration files insites-available/. Nginx only reads configurations from this directory.
This separation allows you to keep multiple configurations ready while only enabling the ones you need. To enable a site, create a symlink: sudo ln -s /etc/nginx/sites-available/your_site /etc/nginx/sites-enabled/
How do I uninstall Nginx?
To completely remove Nginx and its configuration files:
- sudo apt remove nginx
- sudo apt purge nginx
The remove command uninstalls the package, while purge also deletes configuration files. If you want to keep configuration files for future use, use only remove.
Conclusion
Now that Nginx is installed and configured, you can begin deploying production workloads, enabling HTTPS, and integrating application backends behind your web server.
If you’d like to build out a more complete application stack, check out the article How To Install Linux, Nginx, MySQL, PHP (LEMP stack) on Ubuntu (compatible with Ubuntu 20.04 and later versions).
In order to set up HTTPS for your domain name with a free SSL certificate using Let’s Encrypt, you should move on to How To Secure Nginx with Let’s Encrypt on Ubuntu (compatible with Ubuntu 20.04 and later versions).
For further exploration, consider the following tutorials to enhance your Nginx setup:
- How To Run Nginx in a Docker Container on Ubuntu (compatible with Ubuntu 20.04 and 22.04).
- How To Use Docker Exec to Run Commands in a Docker Container.
- How To Troubleshoot Common Nginx Errors.
- How To Set Up Laravel, Nginx, and MySQL with Docker Compose on Ubuntu (compatible with Ubuntu 20.04 and later versions).
Thanks for learning with the DigitalOcean Community. Check out our offerings for compute, storage, networking, and managed databases.
About the author(s)
Open source advocate and lover of education, culture, and community.
I help Businesses scale with AI x SEO x (authentic) Content that revives traffic and keeps leads flowing | 3,000,000+ Average monthly readers on Medium | Sr Technical Writer(Team Lead) @ DigitalOcean | Ex-Cloud Consultant @ AMEX | Ex-Site Reliability Engineer(DevOps)@Nutanix
Building future-ready infrastructure with Linux, Cloud, and DevOps. Full Stack Developer & System Administrator. Technical Writer @ DigitalOcean | GitHub Contributor | Passionate about Docker, PostgreSQL, and Open Source | Exploring NLP & AI-TensorFlow | Nailed over 50+ deployments across production environments.
Still looking for an answer?
This textbox defaults to using Markdown to format your answer.
You can type !ref in this text area to quickly search our full set of tutorials, documentation & marketplace offerings and insert the link!
Just an FYI, For me the UFW was not active. I had to run sudo ufw enable on Step 2.
I just wanted to mention to all those who may be having problems - Be sure you allow SSL/port 443 connections in your firewall!
sudo ufw allow https -or- sudo ufw allow 443
Hours spent trying all kinds of different configurations, turns out the solution was as simple as adding this firewall rule!
The link is broken for “Introduction to DigitalOcean DNS” in the first paragraph of the Server Blocks section.
i followed this exactly replacing your_domain with the word ‘happy’, i could not connect and only got 404 error when trying to access http://happy or http://www.happy or even my ip/happy or localhost/happy, all variants, with and without http://
assuming i did something wrong i tried again… verbatim… using your_domain this time. i copy pasta the whole way. still 404 error.
but just my ip or localhost always returns the welcome to nginx page. any ideas?
when i try to run sudo systemctl restart nginx i recieve the following error:
Job for nginx.service failed because the control process exited with error code.
See "systemctl status nginx.service" and "journalctl -xe" for details.
running journalctl -xe it says:
pam_unix(sudo:auth): Couldn't open /etc/securetty: No such file or directory
I’m not sure what this means or what step i could have messed up in order to recieve this error message. Any help would be appreciated!
Make sure you sudo ufw allow 'OpenSSH' or you might not be able to log back in.
Hi, I’m stuck at this step: “Nginx should now be serving your domain name. You can test this by navigating to http://your_domain, where you should see something like this” I’ve followed the tutorial verbatim so far but I’m getting “This site can’t be reached” error when I navigate to http://<mydomainname>.com Could someone please help me out?
I 've gotten as far as sudo nginx -t and restarting. I do own my domain, its a .me domain. When I go to the domain I just get “This site can’t be reached”. Is there anything I need to do on the namecheap side of things?
This comment has been deleted
I seem to have the same problem as many other users here, I can use cURL from the server terminal or my own computer’s terminal and I’d get the correct page contents. However, trying to access domain from a browser just gives me “This site can’t be reached” and that the server “refused to connect”.
I’ve reset my VPS and restarted the process three times now, does anyone know what might be the reason? Thanks!
 This work is licensed under a Creative Commons Attribution-NonCommercial- ShareAlike 4.0 International License.
Become a contributor for community
Get paid to write technical tutorials and select a tech-focused charity to receive a matching donation.

DigitalOcean Documentation
Full documentation for every DigitalOcean product.

Resources for startups and AI-native businesses
The Wave has everything you need to know about building a business, from raising funding to marketing your product.
The developer cloud
Scale up as you grow — whether you're running one virtual machine or ten thousand.

Get started for free
Sign up and get $200 in credit for your first 60 days with DigitalOcean.*

*This promotional offer applies to new accounts only.