 in Angular")
Introduction
Internationalization is the process of supporting multiple languages in your applications.
This can be accomplished in an Angular application through third party libraries, such as ngx-translate, or you can use the built-in i18n functionality.
Note: “i18n” is a numeronym where “18” represents the number of letters between the first letter (“I”) and the last letter (“N”) in the word “internationalization”. As you develop applications, you may also encounter “a11y” which is a numeronym for accessibility.
In this tutorial, you will learn to use the built-in i18n functionality in an Angular application.
Prerequisites
To complete this tutorial, you will need:
- Node.js installed locally, which you can do by following How to Install Node.js and Create a Local Development Environment.
- Some familiarity with setting up an Angular project and using Angular components may be beneficial.
This tutorial was verified with Node v14.13.1, npm v6.14.8, angular v10.1.6, and @angular/localize v10.1.6.
Step 1 — Setting Up the Project
You can use @angular/cli to create a new Angular Project.
In your terminal window, use the following command:
- npx @angular/cli new angular-internationalization-example --style=css --routing=false --skip-tests
This will configure a new Angular project with styles set to “CSS” (as opposed to “Sass”, Less", or “Stylus”), no routing, and skipping tests.
Navigate to the newly created project directory:
- cd angular-internationalization-example
To create the basis for the translation project, open app.component.html in your code editor and replace the code with the following lines:
<section>
  <article>
    <h1>Under Construction!</h1>
    <p>This page is under construction.</p>
  </article>
</section>
This code will display "Under Construction!" and "This page is under construction" messages.
Next, open app.component.css and replace the code with the following lines:
section {
  background: #8e2de2; /* fallback for old browsers */
  background: -webkit-linear-gradient(to right, #4a00e0, #8e2de2); /* Chrome 10-25, Safari 5.1-6 */
  background: linear-gradient(to right, #4a00e0, #8e2de2);
  display: flex;
  justify-content: center;
  align-items: center;
  height: 100vh;
}

article {
  border: 1px solid white;
  box-shadow: 1px 1px 100px 10px rgba(0, 0, 0, 0.8);
  color: white;
  padding: 40px;
  text-align: center;
}
This code uses flexbox, viewport height values, linear-gradient backgrounds, and box-shadows to center the "Under Construction!" message on the screen.
Then, open styles.css and replace the code with the following lines:
html,
body {
  padding: 0;
  margin: 0;
}
This will remove any padding and margin that the browser user styles tend to place by default. By using these styles you can create a consistent baseline between all the browsers with different defaults.
In a terminal window, start your application:
- npm start
Visit localhost:4200 in your web browser:
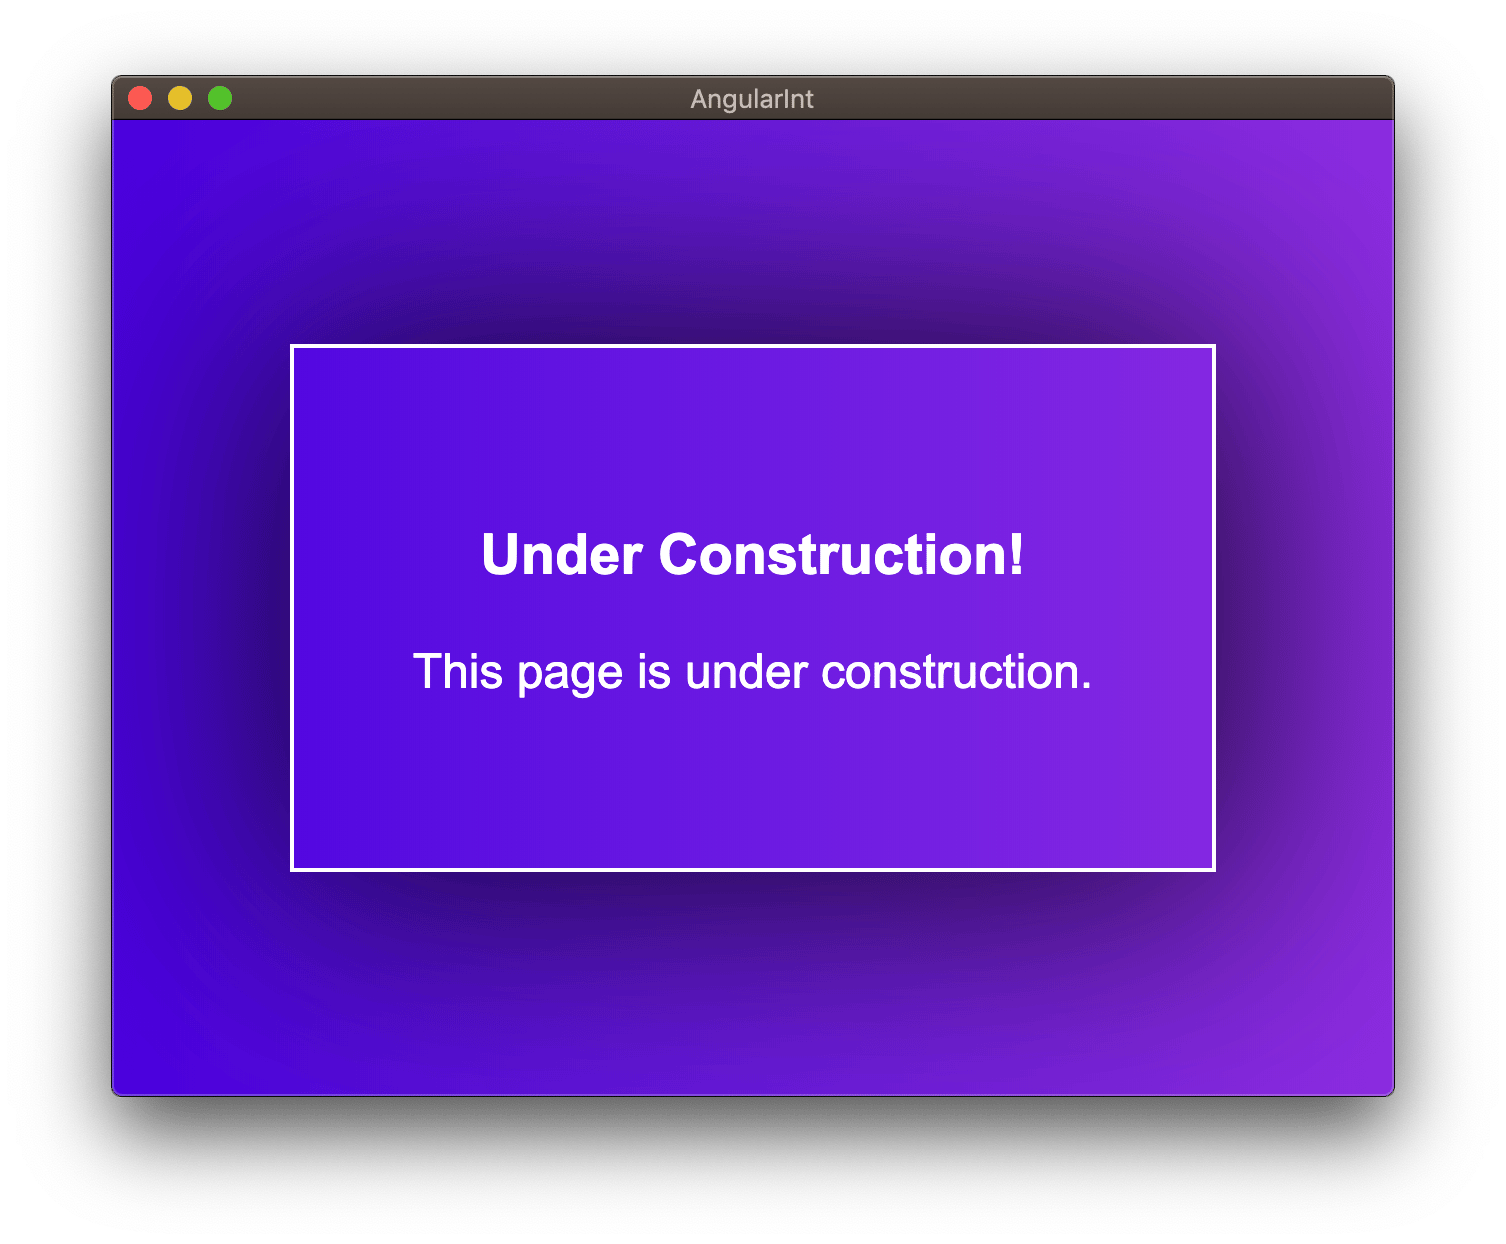
Once you are able to verify that the application is behaving as expected, you can begin to extract the messages you want to translate.
Step 2 — Using xi18n to Extract messages.xlf
xi18n to Extract messages.xlfLet’s start by marking text that you would like to translate within the application. In this tutorial, you will be translating the application into French (fr) and German (de) with Google Translate providing the translations.
Add the i18n directive to all of the text that you would like to translate:
<section>
  <article>
    <h1 i18n>Under Construction!</h1>
    <p i18n>This page is under construction.</p>
  </article>
</section>
Then, you will have to make an npm script inside package.json that uses the Angular CLI to extract the marked items from app.component.html into a messages.xlf file:
{
  // ...
  "scripts": {
    "ng": "ng",
    "start": "ng serve",
    "build": "ng build",
    "test": "ng test",
    "lint": "ng lint",
    "e2e": "ng e2e",
    "i18n:extract": "ng xi18n"
  },
  // ...
}
After adding this, run your new script in a terminal window:
- npm run i18n:extract
Then, open up messages.xlf and you will observe something similar to this:
<?xml version="1.0" encoding="UTF-8" ?>
<xliff version="1.2" xmlns="urn:oasis:names:tc:xliff:document:1.2">
  <file source-language="en-US" datatype="plaintext" original="ng2.template">
    <body>
      <trans-unit id="48a16ab522feaff81571155668deb1a4304291f4" datatype="html">
        <source>Under Construction!</source>
        <context-group purpose="location">
          <context context-type="sourcefile">src/app/app.component.html</context>
          <context context-type="linenumber">3</context>
        </context-group>
      </trans-unit>
      <trans-unit id="84c778d7a95cb5dc26c9cc9feb5b7abb4d295792" datatype="html">
        <source>This page is under construction.</source>
        <context-group purpose="location">
          <context context-type="sourcefile">src/app/app.component.html</context>
          <context context-type="linenumber">4</context>
        </context-group>
      </trans-unit>
    </body>
  </file>
</xliff>
For each item that needs translating (i.e., has the i18n directive), a trans-unit will be created.
You can also use this structure to provide more information about the translation. This is useful if you are getting each message translated by a third party and want to provide more information.
Inside of app.component.html, update the i18n items with a description:
<article>
  <h1 i18n="Title for the under construction card">Under Construction!</h1>
  <p i18n="A description for the under construction card.">This page is under construction.</p>
</article>
You can further add context to this by using the pipe character (|). This gives an item meaning and each item with the same meaning will have the same translation:
<article>
  <h1 i18n="Card Header|Title for the under construction card">Under Construction!</h1>
  <p i18n="Card Descritpion|A description for the under construction card.">This page is under construction.</p>
</article>
You can also give each i18n item an id by using two at symbol characters (@@) to enforce persistence when you generate the translations:
<article>
  <h1 i18n="Card Header|Title for the under construction card@@constructionHeader">Under Construction!</h1>
  <p i18n="Card Descritpion|A description for the under construction card.@@constructionDescription">This page is under construction.</p>
</article>
Let’s build the translations once again:
- npm run int:extract
The items will now be updated with the id, meaning and description:
<?xml version="1.0" encoding="UTF-8" ?>
<xliff version="1.2" xmlns="urn:oasis:names:tc:xliff:document:1.2">
  <file source-language="en-US" datatype="plaintext" original="ng2.template">
    <body>
      <trans-unit id="constructionHeader" datatype="html">
        <source>Under Construction!</source>
        <context-group purpose="location">
          <context context-type="sourcefile">src/app/app.component.html</context>
          <context context-type="linenumber">3</context>
        </context-group>
        <note priority="1" from="description">Title for the under construction card</note>
        <note priority="1" from="meaning">Card Header</note>
      </trans-unit>
      <trans-unit id="constructionDescription" datatype="html">
        <source>This page is under construction.</source>
        <context-group purpose="location">
          <context context-type="sourcefile">src/app/app.component.html</context>
          <context context-type="linenumber">4</context>
        </context-group>
        <note priority="1" from="description">A description for the under construction card.</note>
        <note priority="1" from="meaning">Card Descritpion</note>
      </trans-unit>
    </body>
  </file>
</xliff>
Once you have a messages.xlf file with multiple trans-units, description, meaning, and id, you can begin to create French and German translations.
Step 3 — Creating French and German Translations
By default, Angular considers everything to be in the “American English” (en-US) locale. You will have to add other locales and update the configuration to support them.
These locales are referred to by locale identifiers (ID). For example, “American English” uses the ID en-US. The first two characters - en - assign a locale identifier for “English”. The last two characters - US - assign a locale extension for “United States”. These identifiers are derived from rules established by BCP47.
To avoid cluttering the project directory, it may be beneficial to store the translation files in a new directory. You can provide an output-path option to your i18n:extract script to place them in a locales directory:
{
  // ...
  "scripts": {
    "ng": "ng",
    "start": "ng serve",
    "build": "ng build",
    "test": "ng test",
    "lint": "ng lint",
    "e2e": "ng e2e",
    "i18n:extract": "ng xi18n --output-path src/locale"
  },
  // ...
}
Remove the existing messages.xlf file:
- rm messages.xlf
And re-run the i18n:extract command;
- npm run i18n:extract
Once you have verified the script change works as expected and that there is a messages.xlf file in the locales directory, you can begin to add targets for translations.
French
First, copy messages.xlf to messages.fr.xlf:
- cp src/locale/messages.xlf src/locale/messages.fr.xlf
Then, add a target for each item:
<?xml version="1.0" encoding="UTF-8" ?>
<xliff version="1.2" xmlns="urn:oasis:names:tc:xliff:document:1.2">
  <file source-language="en-US" datatype="plaintext" original="ng2.template">
    <body>
      <trans-unit id="constructionHeader" datatype="html">
        <source>Under Construction!</source>
        <target>En construction</target>
        <context-group purpose="location">
          <context context-type="sourcefile">src/app/app.component.html</context>
          <context context-type="linenumber">3</context>
        </context-group>
        <note priority="1" from="description">Title for the under construction card</note>
        <note priority="1" from="meaning">Card Header</note>
      </trans-unit>
      <trans-unit id="constructionDescription" datatype="html">
        <source>This page is under construction.</source>
        <target>Cette page est en construction</target>
        <context-group purpose="location">
          <context context-type="sourcefile">src/app/app.component.html</context>
          <context context-type="linenumber">4</context>
        </context-group>
        <note priority="1" from="description">A description for the under construction card.</note>
        <note priority="1" from="meaning">Card Descritpion</note>
      </trans-unit>
    </body>
  </file>
</xliff>
Each trans-unit now has a source message that is in English and a target message that is in French.
German
Next, copy messages.xlf to messages.de.xlf:
- cp src/locale/messages.xlf src/locale/messages.de.xlf
Then, add a target for each item:
<?xml version="1.0" encoding="UTF-8" ?>
<xliff version="1.2" xmlns="urn:oasis:names:tc:xliff:document:1.2">
  <file source-language="en-US" datatype="plaintext" original="ng2.template">
    <body>
      <trans-unit id="constructionHeader" datatype="html">
        <source>Under Construction!</source>
        <target>Im Bau</target>
        <context-group purpose="location">
          <context context-type="sourcefile">src/app/app.component.html</context>
          <context context-type="linenumber">3</context>
        </context-group>
        <note priority="1" from="description">Title for the under construction card</note>
        <note priority="1" from="meaning">Card Header</note>
      </trans-unit>
      <trans-unit id="constructionDescription" datatype="html">
        <source>This page is under construction.</source>
        <target>Diese Seite befindet sich im Aufbau</target>
        <context-group purpose="location">
          <context context-type="sourcefile">src/app/app.component.html</context>
          <context context-type="linenumber">4</context>
        </context-group>
        <note priority="1" from="description">A description for the under construction card.</note>
        <note priority="1" from="meaning">Card Descritpion</note>
      </trans-unit>
    </body>
  </file>
</xliff>
Each trans-unit now has a source message that is in English and a target message that is in German.
Step 4 — Creating French and German Builds
You have versions of the application that are translated based on locale.
You can use the Angular CLI to generate specific builds for each locale that you want to support.
First, you will need to install @angular/localize:
- ./node_modules/@angular/cli/bin/ng add @angular/localize
Open angular.json in your code editor and add fr and de locales:
{
  "projects": {
    "angular-internationalization-example": {
      // ...
      "i18n": {
        "sourceLocale": "en-US",
        "locales": {
          "fr": {
            "translation": "src/locale/messages.fr.xlf",
            "baseHref": ""
          },
          "de": {
            "translation": "src/locale/messages.de.xlf",
            "baseHref": ""
          }
        }
      },
      "architect": {
        // ...
      }
    }},
  // ...
}
And create configuration settings for fr and de under build:
{
  "projects": {
    "angular-internationalization-example": {
      // ...
      "architect": {
        "build": {
          // ...
          "configurations": {
            "production": {
              // ...
            },
            "fr": {
              "localize": ["fr"],
              "outputPath": "dist/under-construction-fr/",
              "i18nMissingTranslation": "error"
            },
            "de": {
              "localize": ["de"],
              "outputPath": "dist/under-construction-de/",
              "i18nMissingTranslation": "error"
            }
          }
        },
        // ...
      }
    }},
  // ...
}
Note: Previously, this tutorial used seperate values for "i18nFile", "i18nFormat", and ``“i18nLocale”. These have since been deprecated and localize` is the preferred approach.
You can also update the configuration settings under serve:
{
  "projects": {
    "angular-internationalization-example": {
      // ...
      "architect": {
        "serve": {
          // ...
          "configurations": {
            "production": {
              "browserTarget": "angular-internationalization-example:build:production"
            },
            "fr": {
              "browserTarget": "angular-internationalization-example:build:fr"
            },
            "de": {
              "browserTarget": "angular-internationalization-example:build:de"
            }
          }
        },
        // ...
      }
    }},
  // ...
}
You can now make some more scripts inside of package.json which include the ability to build and serve the new locales:
{
  "scripts": {
    "ng": "ng",
    "start": "ng serve",
    "start:fr": "ng serve --configuration=fr",
    "start:de": "ng serve --configuration=de",
    "build": "ng build",
    "build:fr": "ng build --configuration=fr",
    "build:de": "ng build --configuration=de",
    "test": "ng test",
    "lint": "ng lint",
    "e2e": "ng e2e",
    "i18n:extract": "ng xi18n --output-path src/locale"
  }
}
You can start all of our projects by running the following in the terminal:
- npm start
And in another terminal window, start the French build:
- npm run start:fr -- --port=4201
And in another terminal window, start the German build:
- npm run start:de -- --port=4202
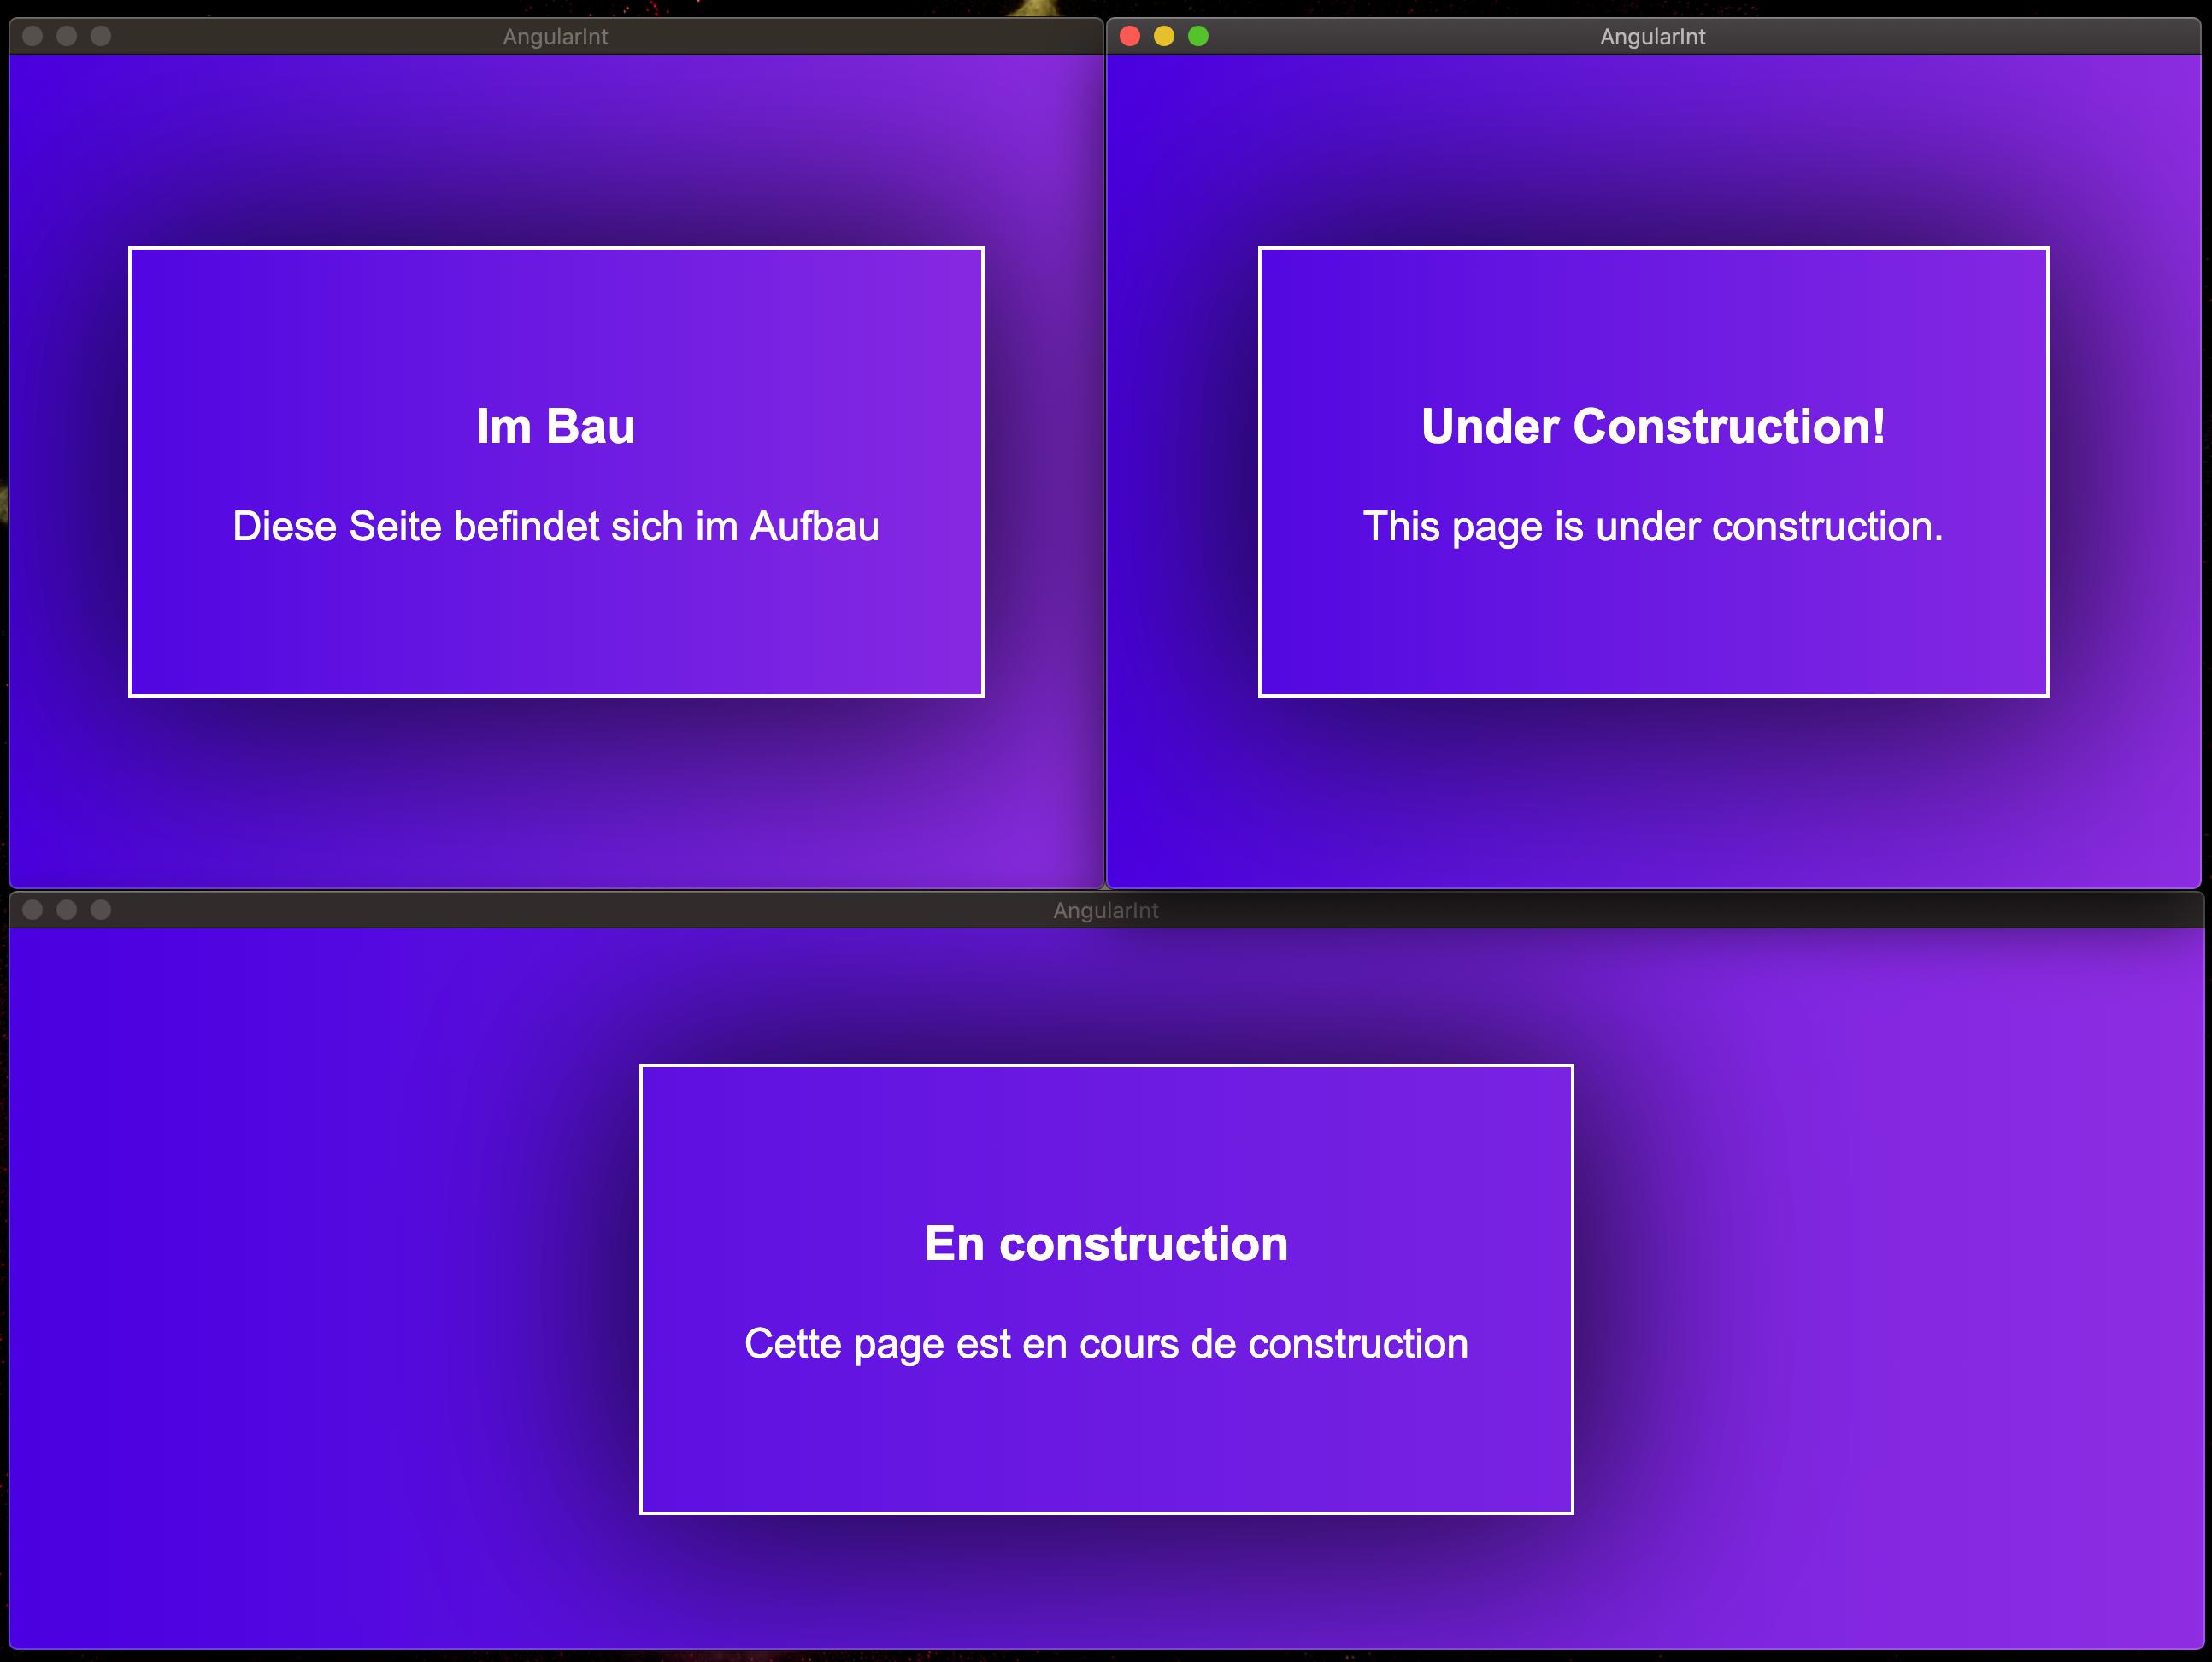
This will run the application for English on the default port, French on port 4201, and German on port 4202:
You have built translated versions of your application.
Conclusion
In this tutorial, you used the build-in i18n tool available to Angular to generate translated builds in French and German.
To read more about using the built-in i18n tool, consult the official documentation.
If you’d like to learn more about Angular, check out our Angular topic page for exercises and programming projects.
Thanks for learning with the DigitalOcean Community. Check out our offerings for compute, storage, networking, and managed databases.
About the author
I create educational content over at YouTube and https://developer.school.
Still looking for an answer?
This textbox defaults to using Markdown to format your answer.
You can type !ref in this text area to quickly search our full set of tutorials, documentation & marketplace offerings and insert the link!
This comment has been deleted
Was very very helpfull thanks! I’d like to know how to do it on error messages, please.
 This work is licensed under a Creative Commons Attribution-NonCommercial- ShareAlike 4.0 International License.
Become a contributor for community
Get paid to write technical tutorials and select a tech-focused charity to receive a matching donation.

DigitalOcean Documentation
Full documentation for every DigitalOcean product.

Resources for startups and AI-native businesses
The Wave has everything you need to know about building a business, from raising funding to marketing your product.
The developer cloud
Scale up as you grow — whether you're running one virtual machine or ten thousand.

Start building today
From GPU-powered inference and Kubernetes to managed databases and storage, get everything you need to build, scale, and deploy intelligent applications.
