- Log in to:
- Community
- DigitalOcean
- Sign up for:
- Community
- DigitalOcean

Introduction
Ghost is a great new blogging platform that focuses on content creation and presentation over the superfluous bells and whistles that dominate other platforms. It provides a clean, easy-to-use interface and can produce very polished results.
In the first part of this article, we discussed how to manage content in Ghost by creating, editing, and deleting blog posts.
The second part of this article will cover some simple configuration that will help get your site off the ground.
How To Change Ghost Themes
The main aesthetic adjustment that you can make to your blog is the theme. A theme controls how all of the pieces are presented visually and how the elements are drawn together.
There are a number of different themes you can get for Ghost. Some are free and some you must purchase.
We will apply one of the free themes from the Ghost Marketplace called “N’Coded”.
You can see this theme by visiting:
marketplace.ghost.org
Click on the “N’Coded” theme to be taken to the theme’s GitHub page.
Log into your Ghost VPS and navigate to the Ghost themes directory:
cd /var/www/ghost/content/themes/
We will use git to install the theme into this directory. Install git if it is not already present in the system:
apt-get update && apt-get install git-core -y
Now, we can clone the project from the GitHub page:
git clone https://github.com/polygonix/N-Coded.git
Change ownership of the files to the Ghost user and group:
chown -R ghost:ghost N-Coded
Restart Ghost to allow it to see the new theme folder:
service ghost restart
Open your web browser and navigate to the general settings page:
<pre> <span class=“highlight”>your_domain_name</span>/ghost/settings/general </pre>
Scroll down to the bottom and you will see a “Theme” area. Change the theme to “N-Coded”:

Click the “Save” button in the upper right corner.
Navigate to your blog to see the new theme:

How To Change Ghost Settings
You can change most of your blog’s settings by navigating to the “settings” page of your blog:
<pre> <span class=“highlight”>your_domain_name</span>/ghost/settings </pre>
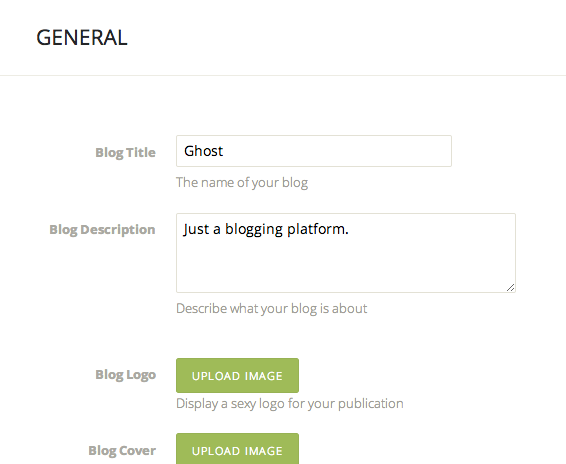
You will be taken to the general settings page:

Here, you can adjust items like the title and description of your blog, and update the logo and cover images.
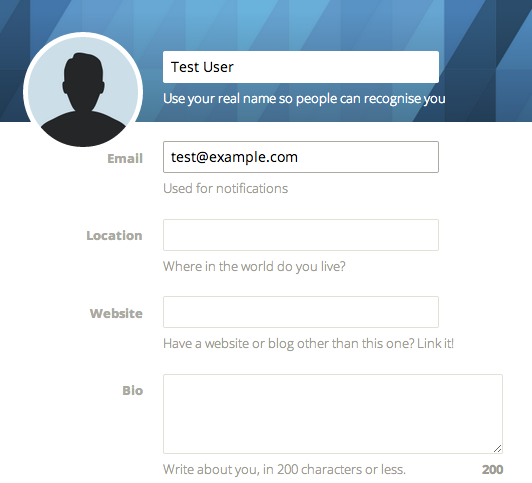
To change details for your user, click on the “User” tab on the left-hand side:

Here, you can adjust settings for your profile. These details include your user name and email, as well as a short biography and a link to a personal external site.
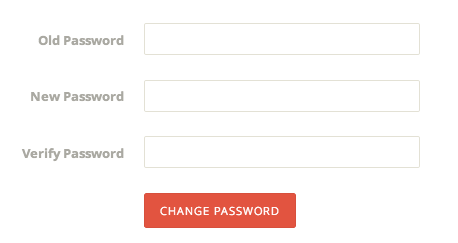
If you scroll to the bottom of the page, you can change your personal password by typing in your current password and supplying/confirming a replacement:

Conclusion
Ghost helps you stay focused on your content by removing the distractions present in other blogging platforms. You should now be able to start generating content and adjust themes and the most common settings.
Explore the interface and practice using the system to manage your ideas. Publish some posts and create some drafts without publishing to see how Ghost organizes those pieces. The more you play around, the more comfortable you will be using the platform on a daily basis.
<div class=“author”>By Justin Ellingwood</div>
Thanks for learning with the DigitalOcean Community. Check out our offerings for compute, storage, networking, and managed databases.
About the author
Former Senior Technical Writer at DigitalOcean, specializing in DevOps topics across multiple Linux distributions, including Ubuntu 18.04, 20.04, 22.04, as well as Debian 10 and 11.
Still looking for an answer?
This textbox defaults to using Markdown to format your answer.
You can type !ref in this text area to quickly search our full set of tutorials, documentation & marketplace offerings and insert the link!
The “service ghost restart” command gives me the error “ghost: unrecognised service”.
Any ideas what I can do to fix that?
Thanks for the great article though!
Hi,
Thanks for this tutorial.
What about a theme bought on Envato’s Themeforest ? How to install it ?
I answer my own question ;-)
Install FTP server on your VPS, then use FTP client (FileZilla…) to upload your ghost theme inside the content folder of Ghost… That’s it.
The email set up in ghost is really tricky, did word by word the ghost tutorial using Mailgun but nothing…
I seem to be getting an error in the counsel.
"Git: command not found
Hi,
I followed these instructions and am getting a 500 bad gateway error.
I’ve restarted ghost but the problem seems to be with the nginx server. Any ideas on troubleshooting?
I installed ghost from the DO applications and then followed these theme instructions but I too receive a 500 bad gateway error
- Table of contents
- How To Change Ghost Themes
- How To Change Ghost Settings
- Conclusion
Deploy on DigitalOcean
Click below to sign up for DigitalOcean's virtual machines, Databases, and AIML products.
Become a contributor for community
Get paid to write technical tutorials and select a tech-focused charity to receive a matching donation.
DigitalOcean Documentation
Full documentation for every DigitalOcean product.
Resources for startups and SMBs
The Wave has everything you need to know about building a business, from raising funding to marketing your product.
Get our newsletter
Stay up to date by signing up for DigitalOcean’s Infrastructure as a Newsletter.
New accounts only. By submitting your email you agree to our Privacy Policy
The developer cloud
Scale up as you grow — whether you're running one virtual machine or ten thousand.
Get started for free
Sign up and get $200 in credit for your first 60 days with DigitalOcean.*
*This promotional offer applies to new accounts only.
