By Hathy A and Sharon Campbell

Introduction
Most Ruby on Rails applications require user registration and authentication mechanisms. Developing these from scratch requires a lot of time and effort – thankfully, there’s Devise. Using the Devise gem, you can set up a full-fledged user authentication system within minutes.
However, you could make your users happier by allowing them to access your application without creating a new account. They could simply log in using their existing Facebook, Twitter, Amazon, or DigitalOcean accounts. In fact, you could support authentication with any popular OAuth service provider. OAuth support is provided by the OmniAuth gem. In this tutorial, we shall create a simple application that uses both Devise and OmniAuth.
Prerequisites
Before you get started, make sure you have the latest versions of RVM, Ruby, and Rails installed on your host. If you don’t, please follow the instructions here: How To Install Ruby on Rails on Ubuntu 12.04 LTS with RVM
This tutorial has been tested with Ruby 2.1.2 and Rails 4.1.5.
Step 1 - Create a New Rails Application
It is recommended that you have all your Rails applications in a separate directory.
You should create one now.
mkdir rails_apps
cd rails_apps
You have to initialize the RVM environment before you start issuing Rails commands.
If you take a break while following this tutorial, remember to do this every time you restart your terminal session.
. ~/.rvm/scripts/rvm
rvm use ruby --default
Let us call the new application myapp. After creating the application, use cd to enter the application’s base directory.
rails new myapp
cd myapp
Note: All Rails commands should be run from inside your application’s directory, which in this case is ~/rails_apps/myapp.
Step 2 - Add the Required Gems to the Gemfile
We’ll need the Devise and OmniAuth gems. In addition, you will also need a separate gem for every OAuth service provider you wish to support. For this tutorial, we’ll support login using DigitalOcean, so we need the omniauth-digitalocean gem.
Add the following lines to the end of the file ~/rails_apps/myapp/Gemfile. You can use nano as your text editor.
gem 'therubyracer'
gem 'devise'
gem 'omniauth'
gem 'omniauth-digitalocean'
You will need similar gems to support other providers. For example, to support Facebook, you will need omniauth-facebook. Here are some such gems for your reference:
- Twitter - omniauth-twitter
- Amazon - omniauth-amazon
- Google - omniauth-google
- Github - omniauth-github
Install the newly added gems.
bundle install
Step 3 - Add Basic Functionality to the Application
Let us quickly add a few pages to this application for testing. Eventually these pages will be accessible only after logging in.
We can use Rails’ scaffolding feature for this. Using the rails g scaffold command, we simply specify the details about a model, and Rails generates fully functional pages to perform CRUD (Create Read Update Delete) operations on that model. In other words, all the associated controllers and views are generated, along with the model file.
rails g scaffold Product name:string price:integer description:text
rake db:migrate
Next, we have to define the root of this application.
Edit ~/rails_apps/myapp/config/routes.rb, and add the line root 'products#index' to specify the root of the app, just below the existing resources line. You can ignore all of the lines that are commented out. When you’re done, the active lines in the file will look like this:
Rails.application.routes.draw do
  resources :products
  root 'products#index'
end
Go ahead, test your application now. Start the development server by typing in:
rails s
Visit http://localhost:3000/ from your browser. If you’re developing remotely, please replace localhost with the appropriate IP address or domain for your Droplet. 3000 is the default port number for the development server.
For now, no login is required. Add a couple of products by clicking on “New Product”. Once you are satisfied that your application is working as expected, go back to the terminal and press Ctrl+C to stop the server.
Step 4 - Set Up Devise
Type the following commands to add Devise authentication support.
rails generate devise:install
rails generate devise User
rake db:migrate
This adds the sign-in and sign-up forms, and all the associated logic.
Our app now has a basic authentication system, where users can register themselves, and then log in. However, all the pages are still directly accessible. To change this, edit ~/rails_apps/myapp/app/controllers/application_controller.rb and add authenticate_user! as an action that has to be performed before serving any page.
class ApplicationController < ActionController::Base
  protect_from_forgery with: :exception
  before_action :authenticate_user!
end
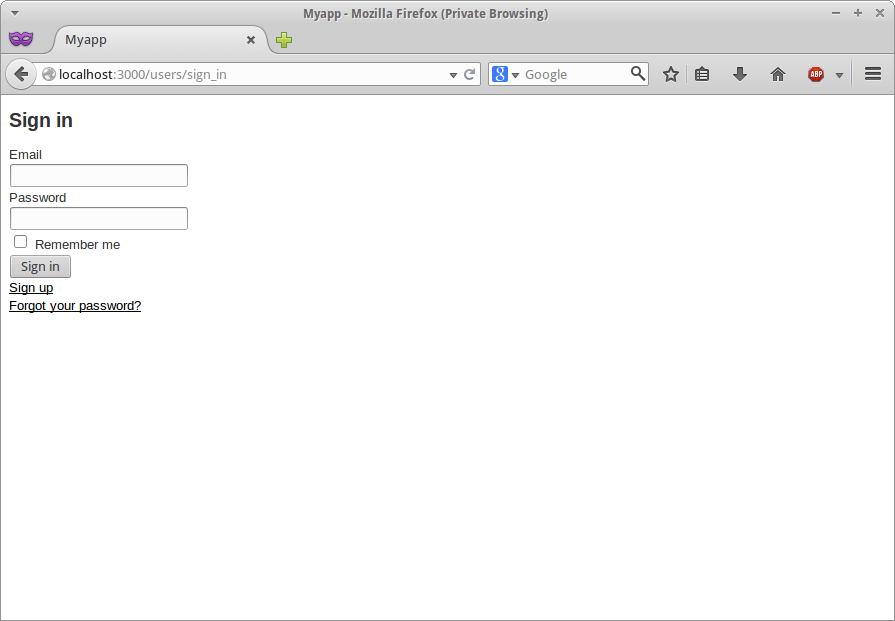
If you want to, you could start the development server again with the rails s command, and check out these newly added pages by visiting http://localhost:3000/ (again, use your own domain or IP address). You should see a page that looks like this:

You can register as a new user by visiting http://localhost:3000/users/sign_up.
Step 5 - Update the User Model to Support OmniAuth
If you started the server again, stop it with CTRL-C. Add a new column called uid to the model that Devise generated.
rails g migration AddColumnsToUsers provider uid
rake db:migrate
Step 6 - Get the Client ID and Client Secret from the OAuth Service Provider
Visit the service provider’s website and register your application there. All the service providers have different registration procedures. For DigitalOcean, refer to the tutorial here: How To Use OAuth Authentication with DigitalOcean as a User or Developer
You will be asked for a callback URL during the registration process. There is a separate callback URL for each provider. Here are the callback URLs for a few popular service providers:
- Digital Ocean: http://localhost:3000/users/auth/digitalocean/callback
- Facebook: http://localhost:3000/users/auth/facebook/callback
- Amazon: http://localhost:3000/users/auth/amazon/callback
- Twitter: http://localhost:3000/users/auth/twitter/callback
- Google: http://localhost:3000/users/auth/google/callback
Please replace localhost with an IP address or domain that resolves to your Droplet. At the end of the registration process, you will be provided with your client ID and client secret. You will use these values in the next step.
Step 7 - Update the Devise Initializer
Edit ~/rails_apps/myapp/config/initializers/devise.rb to add the client IDs and secrets at the bottom of the file, just before the end line. It is also a good idea to update the mailer_sender to something that has your own server’s name and user. You don’t need to make any other changes beyond those two items.
After editing, your file would look like this (there will also be many commented lines in the file):
Devise.setup do |config|
  #Replace example.com with your own domain name
  config.mailer_sender = 'mailer@example.com'

  require 'devise/orm/active_record'
  config.case_insensitive_keys = [ :email ]
  config.strip_whitespace_keys = [ :email ]
  config.skip_session_storage = [:http_auth]
  config.stretches = Rails.env.test? ? 1 : 10
  config.reconfirmable = true
  config.expire_all_remember_me_on_sign_out = true
  config.password_length = 8..128
  config.reset_password_within = 6.hours
  config.sign_out_via = :delete

  #Add your ID and secret here
  #ID first, secret second
  config.omniauth :digitalocean, "db381dc9990be7e3bc42503d0", "5b0824c2722b65d29965f1a1df"
end
Step 8 - Update the User Model
The User model that Devise generated has to be changed to specify the service providers that we want to use. We’re adding three items to the existing list (:omniauthable, :omniauth_providers => [:digitalocean], and don’t forget the extra comma!). We also create a new method named from_omniauth to extract the information that is available after the authentication.
After editing it, your ~/rails_apps/myapp/app/models/user.rb should look like this:
class User < ActiveRecord::Base
  devise :database_authenticatable, :registerable,
         :recoverable, :rememberable, :trackable, :validatable,
	 :omniauthable, :omniauth_providers => [:digitalocean]

  def self.from_omniauth(auth)
	  where(provider: auth.provider, uid: auth.uid).first_or_create do |user|
		user.provider = auth.provider
		user.uid = auth.uid
		user.email = auth.info.email
		user.password = Devise.friendly_token[0,20]
	  end
  end
end
Save the file.
Step 9 - Add a Controller to Handle the Callback URLs
First, edit ~/rails_apps/myapp/config/routes.rb and update the devise_for line to specify the name of the controller that will be handling the callbacks. Let us simply call it callbacks. Your file should now look like this (minus the commented sections):
Rails.application.routes.draw do
  devise_for :users, :controllers => { :omniauth_callbacks => "callbacks" }
  resources :products
  root 'products#index'
end
Then, create a new file ~/rails_apps/myapp/app/controllers/callbacks_controller.rb.
Add the following code to it:
class CallbacksController < Devise::OmniauthCallbacksController
	def digitalocean
		@user = User.from_omniauth(request.env["omniauth.auth"])
		sign_in_and_redirect @user
	end
end
If you have used more OAuth providers, you will need a separate method for each of them. The name of the method should match the name of the provider. For example, to add support for Facebook, your method will be defined using def facebook.
Your application is now ready. Fire up your server again:
rails s
Visit your home page. Since we’re testing the login feature, you may want to do this in a session without stored data, such as a Chrome Incognito Window. You should see a Sign in with Digitalocean link. Click on it. You should be redirected to DigitalOcean’s login page. After a successful login, you will be redirected back to your own application, and the products page will be shown.
Conclusion
You now have a modern user authentication system for your app, where users can sign in using an email address, a social networking account, or another popular service.
If you ever decide to take this app to production on a Droplet, you can refer to the tutorial here: How To Launch Your Ruby on Rails App with the DigitalOcean One Click Image. If you add your app to a new Droplet, don’t forget to go back to Step 6 to update your DigitalOcean API settings with your production server’s callback URLs.
Thanks for learning with the DigitalOcean Community. Check out our offerings for compute, storage, networking, and managed databases.
About the author(s)
Hathy is an independent developer and blogger who loves tinkering with new frameworks, SDKs and devices.
Current fan and former Editorial Manager at DigitalOcean. Hi! Expertise in areas including Ubuntu, Docker, Rails, and more.
Still looking for an answer?
This textbox defaults to using Markdown to format your answer.
You can type !ref in this text area to quickly search our full set of tutorials, documentation & marketplace offerings and insert the link!
Hi, thanks for the guide :) I just wanted to point out that the last two images are identical, whereas the last one should show a link to Digital Ocean, no?
Hi,
Thanks for tutorial, excellent! Did you write a test for User.from_omniauth(auth) ?
If you did, could you provide a link to it or a gist? Would be very helpful.
Thanks!
Jet
I needed to add .to_s to auth.uid
where(provider: auth.provider, uid: auth.uid.to_s).first_or_create do |user|
Hi, I get an problem :( After click link Sign In With Facebook, I log in failed and get this alert.
translation missing: en.devise.callbacks.user.failurebook
Any idea ? Thanks!
Hello and thank you!!!
You won’t believe how long it took for me to integrate oauth with devise. Thank you so much for putting this amazing tutorial online. I’ve tried every other online tutorial, read the docs, and asked around and still couldn’t get it to work. Finally it is working and it is because of this tutorial.
Thanks again. Omar
Tried to implement the same tutorial for Facebook, user gets saved in the database, but email gets nulled everytime. Any clue?
After a long struggle with facebook oauth i found this,
The api changed on 8 of July.
This did it in devise.rb:
config.omniauth :facebook, “appid”, “appsecret”, scope: ‘email’, info_fields: ‘email’
Hello,
Im getting a error -> NOT NULL constraint failed: users.email <- when signing with twitter
I’ve followed the steps ad run into this error
@user #<User id: nil, name: nil, created_at: “2015-09-10 17:09:38”, updated_at: “2015-09-10 17:09:38”, email: nil, encrypted_password: “$2a$10$u8Fu1ARiWmLHg4OkRIuet.rWnEuPzvX4MlmrqCLuVrF…”, reset_password_token: nil, reset_password_sent_at: nil, remember_created_at: nil, sign_in_count: 1, current_sign_in_at: “2015-09-10 17:09:38”, last_sign_in_at: “2015-09-10 17:09:38”, current_sign_in_ip: “127.0.0.1”, last_sign_in_ip: “127.0.0.1”, location: nil, rate: nil, skill: nil, provider: “twitter”, uid: “720600918”>
Here is the repo: https://github.com/Alloffices/MailboxApp
Any suggestions?
 This work is licensed under a Creative Commons Attribution-NonCommercial- ShareAlike 4.0 International License.
Become a contributor for community
Get paid to write technical tutorials and select a tech-focused charity to receive a matching donation.

DigitalOcean Documentation
Full documentation for every DigitalOcean product.

Resources for startups and AI-native businesses
The Wave has everything you need to know about building a business, from raising funding to marketing your product.
The developer cloud
Scale up as you grow — whether you're running one virtual machine or ten thousand.

Start building today
From GPU-powered inference and Kubernetes to managed databases and storage, get everything you need to build, scale, and deploy intelligent applications.
