By Stack Abuse, Timothy Nolan and Vinayak Baranwal

Introduction
When you view a webpage in your browser, you are making a request to another computer on the internet, which then provides you the webpage as a response. That computer you are talking to via the internet is a web server. A web server receives HTTP requests from a client, like your browser, and provides an HTTP response, like an HTML page or JSON from an API.
The Node.js http module provides everything you need to build a web server without external dependencies. It handles incoming requests, parses HTTP headers, manages connections, and sends responses—all through straightforward JavaScript APIs.
The http module is Node.js’s built-in solution for creating HTTP servers and clients. Unlike frameworks like Express.js, it’s part of Node.js core, meaning no installation or dependencies are required. This makes it ideal for lightweight applications, learning HTTP fundamentals, or when you want full control over request handling.
A lot of software is involved for a server to return a webpage. This software generally falls into two categories: frontend and backend. Front-end code is concerned with how the content is presented, such as the color of a navigation bar and the text styling. Back-end code is concerned with how data is exchanged, processed, and stored. Code that handles network requests from your browser or communicates with the database is primarily managed by back-end code.
Node.js allows developers to use JavaScript to write back-end code, even though traditionally it was used in the browser to write front-end code. Having both the frontend and backend together like this reduces the effort it takes to make a web server, which is a major reason why Node.js is a popular choice for writing back-end code.
This tutorial demonstrates how to build production-ready web servers using the http module that’s included in Node.js. You’ll build servers that handle routing, parse request bodies, serve static files, implement proper error handling, and work with both CommonJS and ES Module syntax.
Simplify deploying Node.js applications with DigitalOcean App Platform. Deploy Node directly from GitHub in minutes.
Key Takeaways
Before diving in, here’s what you’ll accomplish:
-
Create HTTP servers using Node.js core
httpmodule without frameworks:
You’ll learn how to spin up a fully functional HTTP web server using nothing but Node.js’s corehttpmodule. This means avoiding external dependencies or frameworks, giving you a deeper understanding of how servers actually work at a low level, as well as enabling more lightweight and flexible implementations for your use cases. -
Handle different content types (JSON, HTML, CSV, static files) with proper headers:
You will discover how to work with multiple content types, responding with HTML for web pages, JSON for APIs, CSV files, or serving static assets like images and scripts. You’ll understand how to set HTTP headers likeContent-Typeproperly, ensuring that browsers and clients interpret your responses correctly for seamless user experiences. -
Implement routing using request URL parsing and switch statements:
Routing is fundamental for web servers, letting you serve different logic for different URLs and endpoints. You’ll see techniques for parsing incoming request URLs and structuring your server logic (for example, with switch statements) to provide custom responses based on paths and HTTP methods, simulating the basics of what larger frameworks do behind the scenes. -
Process POST requests by parsing request bodies and handling different content types:
Handling user-submitted data is key for any interactive application. You’ll learn how to handle POST requests, including reading and parsing the request body as raw data, JSON, or other formats. This section covers buffering incoming data, parsing it safely, and responding according to the received payload, providing the building blocks for user interaction or API development. -
Serve static files efficiently from the filesystem:
Many web servers need to serve static assets—images, stylesheets, JavaScript files—directly to users. You’ll discover how to read files from disk and send them efficiently over HTTP, managing file paths responsibly to avoid security issues, and exploring optimizations like file streaming to improve performance for larger files. -
Implement error handling with appropriate HTTP status codes and logging:
A robust server must handle errors gracefully. You’ll see how to detect, log, and respond to errors—such as bad requests or missing files—using standardized HTTP status codes like 400, 404, and 500. You’ll also learn basic logging practices so problems are trackable and users receive informative error messages without leaking sensitive information. -
Use modern JavaScript with both CommonJS (
require) and ES Modules (import) syntax:
Node.js supports two module systems: CommonJS and ES Modules. You’ll practice using bothrequire()andimportstatements, understanding when—and how—to use each style. This not only ensures compatibility across different Node.js projects, but also helps you write modern, clean, and maintainable JavaScript code. -
Apply production best practices including file caching, error recovery, and security considerations:
Lastly, you’ll touch on essential best practices for deploying Node.js web servers in real-world environments. This includes leveraging file caching for performance, implementing error recovery strategies to keep your server resilient, as well as applying basic security measures (such as input sanitization and proper HTTP headers) to safeguard your applications and users.
Understanding the HTTP Module
The http module is Node.js’s low-level interface for HTTP communication. It provides:
- Server creation:
http.createServer()creates an HTTP server instance - Request handling: Incoming requests are represented by
IncomingMessageobjects - Response management: Outgoing responses use
ServerResponseobjects - Streaming support: Both requests and responses are streams, enabling efficient data transfer
Why Use the HTTP Module Instead of Express? While Express.js provides convenient abstractions, the native http module gives you complete control, smaller bundle sizes, and deep understanding of HTTP fundamentals. It’s the foundation that frameworks build upon. For simple APIs, microservices, or learning purposes, it’s often all you need.
The module is event-driven: when a request arrives, the server emits a 'request' event and calls your request listener function. This design enables Node.js to handle many concurrent connections efficiently on a single thread through its event loop.
Core concepts to understand:
- Non-blocking I/O: The
httpmodule uses Node.js’s event loop to handle multiple connections without creating separate threads for each request. This makes it highly efficient for I/O-bound operations. - Streams: Request and response objects inherit from Node.js streams. This means large payloads can be processed in chunks without loading everything into memory—critical for handling file uploads or serving large files.
- Headers and status codes: The module gives you direct control over HTTP headers (
res.setHeader()) and status codes (res.writeHead()), allowing precise HTTP semantics. - No magic routing: Unlike frameworks, there’s no built-in routing. You manually parse
req.urlandreq.methodto determine how to respond—giving full transparency into how routing actually works.
When you call http.createServer(), Node.js creates a TCP server behind the scenes that listens for incoming connections, parses HTTP protocol messages, and emits events your code can handle. Understanding this low-level operation helps you debug issues and make informed architectural decisions.
Prerequisites
-
Ensure that Node.js is installed on your development machine. This tutorial works with Node.js 20.x or 22.x LTS (recommended). To install Node.js on macOS or Ubuntu, follow the steps in How to Install Node.js and Create a Local Development Environment on macOS or How To Install Node.js on Ubuntu.
-
The Node.js platform supports creating web servers out of the box. Familiarity with the basics of Node.js is helpful. Review our guide on How To Write and Run Your First Program in Node.js.
-
Asynchronous programming is used in some sections. If you’re new to async code or the
fsmodule, see How To Write Asynchronous Code in Node.js. -
For production-focused sections, familiarity with Linux process management (systemd/PM2) and reverse proxies (like Nginx) will help when applying deployment guidance.
Step 1 — Creating a Basic HTTP Server
Build a minimal HTTP server that responds to any request with plain text. This foundation applies whether you use Express or build from scratch. When Node.js calls http.createServer(), it creates a TCP server that listens on a port. Each incoming connection triggers your request listener function.
Set up your project folder:
- mkdir first-servers
- cd first-servers
Now, create the file that will house the code:
- touch hello.js
Open the file in a text editor. We will use nano as it’s available in the terminal:
- nano hello.js
We start by loading the http module that’s standard with all Node.js installations. Add the following line to hello.js:
const http = require("http");
The http module contains the function to create the server, which we will see later on. If you would like to learn more about modules in Node.js, check out our How To Create a Node.js Module article.
Our next step will be to define two constants, the host and port that our server will be bound to:
...
const host = 'localhost';
const port = 8000;
As mentioned before, web servers accept requests from browsers and other clients. We may interact with a web server by entering a domain name, which is translated to an IP address by a DNS server. An IP address is a unique sequence of numbers that identify a machine on a network, like the internet. For more information on domain name concepts, take a look at our An Introduction to DNS Terminology, Components, and Concepts article.
The value localhost is a special private address that computers use to refer to themselves. It’s typically the equivalent of the internal IP address 127.0.0.1 and it’s only available to the local computer, not to any local networks we’ve joined or to the internet.
The port is a number that servers use as an endpoint or “door” to our IP address. In our example, we will use port 8000 for our web server. Ports 8080 and 8000 are typically used as default ports in development, and in most cases developers will use them rather than other ports for HTTP servers.
When we bind our server to this host and port, we will be able to reach our server by visiting http://localhost:8000 in a local browser.
Let’s add a special function, which in Node.js we call a request listener. This function is meant to handle an incoming HTTP request and return an HTTP response. This function must have two arguments, a request object and a response object. The request object captures all the data of the HTTP request that’s coming in. The response object is used to return HTTP responses for the server.
We want our first server to return this message whenever someone accesses it: "My first server!".
Let’s add that function next:
...

const requestListener = function (req, res) {
  res.writeHead(200);
  res.end("My first server!");
};
The function would usually be named based on what it does. For example, if we created a request listener function to return a list of books, we would likely name it listBooks(). Since this one is a sample case, we will use the generic name requestListener.
All request listener functions in Node.js accept two arguments: req and res (we can name them differently if we want). The HTTP request the user sends is captured in a Request object, which corresponds to the first argument, req. The HTTP response that we return to the user is formed by interacting with the Response object in second argument, res.
The first line res.writeHead(200); sets the HTTP status code of the response. HTTP status codes indicate how well an HTTP request was handled by the server. In this case, the status code 200 corresponds to "OK". If you are interested in learning about the various HTTP codes that your web servers can return with the meaning they signify, our guide on How To Troubleshoot Common HTTP Error Codes is a good place to start.
The next line of the function, res.end("My first server!");, writes the HTTP response back to the client who requested it. This function returns any data the server has to return. In this case, it’s returning text data.
Finally, we can now create our server and make use of our request listener:
...

const server = http.createServer(requestListener);
server.listen(port, host, () => {
  console.log(`Server is running on http://${host}:${port}`);
});
Save and exit nano by pressing CTRL+X.
In the first line, we create a new server object via the http module’s createServer() function. This server accepts HTTP requests and passes them on to our requestListener() function.
After we create our server, we must bind it to a network address. We do that with the server.listen() method. It accepts three arguments: port, host, and a callback function that fires when the server begins to listen.
All of these arguments are optional, but it is a good idea to explicitly state which port and host we want a web server to use. When deploying web servers to different environments, knowing the port and host it is running on is required to set up load balancing or a DNS alias.
The callback function logs a message to our console so we can know when the server began listening to connections.
Here’s the complete hello.js file with inline comments explaining each part:
// Import the built-in http module - no installation needed
const http = require("http");

// Define where the server will listen
const host = 'localhost';  // Only accessible from this machine
const port = 8000;          // Common development port

// Request listener: handles every incoming HTTP request
const requestListener = function (req, res) {
    // Set HTTP status code to 200 (OK)
    res.writeHead(200);

    // Send the response body and close the connection
    res.end("My first server!");
};

// Create the server with our request listener
const server = http.createServer(requestListener);

// Start listening for connections
server.listen(port, host, () => {
    console.log(`Server is running on http://${host}:${port}`);
});
This code creates a functional HTTP server in under 20 lines. Every time a client connects—regardless of the URL or HTTP method—the server responds with “My first server!” and a 200 status code.
Note: Even though requestListener() does not use the req object, it must still be the first argument of the function.
With less than fifteen lines of code, we now have a web server. Let’s see it in action and test it end-to-end by running the program:
- node hello.js
In the console, we will see this output:
OutputServer is running on http://localhost:8000
Notice that the prompt disappears. This is because a Node.js server is a long running process. It only exits if it encounters an error that causes it to crash and quit, or if we stop the Node.js process running the server.
In a separate terminal window, we’ll communicate with the server using cURL, a CLI tool to transfer data to and from a network. Enter the command to make an HTTP GET request to our running server:
- curl http://localhost:8000
When we press ENTER, our terminal will show the following output:
OutputMy first server!
We’ve now set up a server and got our first server response.
Let’s break down what happened when we tested our server. Using cURL, we sent a GET request to the server at http://localhost:8000. Our Node.js server listened to connections from that address. The server passed that request to the requestListener() function. The function returned text data with the status code 200. The server then sent that response back to cURL, which displayed the message in our terminal.
In production, you typically don’t bind to localhost—you bind to 0.0.0.0 to accept connections from any network interface. However, for local development, localhost is safer and prevents external access to your development server. Also, if port 8000 is already in use, you’ll get an EADDRINUSE error—simply choose a different port or stop the process using that port with lsof -i :8000 (macOS/Linux).
Before we continue, let’s exit our running server by pressing CTRL+C. This interrupts our server’s execution, bringing us back to the command line prompt.
In most web sites we visit or APIs we use, the server responses are seldom in plain text. We get HTML pages and JSON data as common response formats. In the next step, we will learn how to return HTTP responses in common data formats we encounter in the web.
If you want to learn about making HTTP requests from Node.js (the client side), check out our guide on How To Create an HTTP Client with Core HTTP in Node.js.
Step 2 — Returning Different Types of Content
The response we return from a web server can take a variety of formats. JSON and HTML were mentioned before, and we can also return other text formats like XML and CSV. Finally, web servers can return non-text data like PDFs, zipped files, audio, and video.
In this article, in addition to the plain text we just returned, you’ll learn how to return the following types of data:
- JSON
- CSV
- HTML
The three data types are all text-based, and are popular formats for delivering content on the web. Many server-side development languages and tools have support for returning these different data types. In the context of Node.js, we need to do two things:
- Set the
Content-Typeheader in our HTTP responses with the appropriate value. - Ensure that
res.end()gets the data in the right format.
Let’s see this in action with some examples. The code we will be writing in this section and later ones have many similarities to the code we wrote previously. Most changes exist within the requestListener() function. Let’s create files with this “template code” to make future sections easier to follow.
Create a new file called html.js. This file will be used later to return HTML text in an HTTP response. We’ll put the template code here and copy it to the other servers that return various types.
In the terminal, enter the following:
- touch html.js
Now open this file in a text editor:
- nano html.js
Let’s copy the “template code.” Enter this in nano:
const http = require("http");

const host = 'localhost';
const port = 8000;

const requestListener = function (req, res) {};

const server = http.createServer(requestListener);
server.listen(port, host, () => {
    console.log(`Server is running on http://${host}:${port}`);
});
Save and exit html.js with CTRL+X, then return to the terminal.
Now let’s copy this file into two new files. The first file will be to return CSV data in the HTTP response:
- cp html.js csv.js
The second file will return a JSON response in the server:
- cp html.js json.js
The remaining files will be for later exercises:
- cp html.js htmlFile.js
- cp html.js routes.js
We’re now set up to continue our exercises. Let’s begin with returning JSON.
Serving JSON
JavaScript Object Notation, commonly referred to as JSON, is a text-based data exchange format. As its name suggests, it is derived from JavaScript objects, but it is language independent, meaning it can be used by any programming language that can parse its syntax.
JSON is commonly used by APIs to accept and return data. Its popularity is due to lower data transfer size than previous data exchange standards like XML, as well as the tooling that exists that allow programs to parse them without excessive effort. If you’d like to learn more about JSON, you can read our guide on How To Work with JSON in JavaScript.
Open the json.js file with nano:
- nano json.js
When serving JSON, you must set the Content-Type header to application/json. Without it, browsers and API clients treat the response as plain text, causing fetch().json() to fail. Set headers before calling writeHead()—once headers are sent, they cannot be modified.
Common mistake: Calling res.writeHead(200) before res.setHeader() locks headers. If you try to set headers after writeHead(), they’re ignored. Always call setHeader() first, then writeHead().
Modify the requestListener() function:
...
const requestListener = function (req, res) {
    res.setHeader("Content-Type", "application/json");
    res.writeHead(200);
    res.end(`{"message": "This is a JSON response"}`);
};
...
The status code 200 indicates success. The response body contains valid JSON.
Why use JSON.stringify() instead of manual strings? Manually writing JSON is error-prone. If your message contains quotes, newlines, or special characters, you must escape them manually. JSON.stringify() handles this automatically:
const data = {
    message: "This is a JSON response",
    timestamp: Date.now(),
    note: 'He said "hello"' // Quotes automatically escaped
};
res.setHeader("Content-Type", "application/json");
res.writeHead(200);
res.end(JSON.stringify(data));
Watch out for circular references: If your object references itself, JSON.stringify() throws: TypeError: Converting circular structure to JSON. This often happens with database query results. Always validate your data structure.
What happens if you try to send an object directly? The http module only accepts strings or Buffers. If you try res.end({ message: "test" }), Node.js throws: TypeError [ERR_INVALID_ARG_TYPE]: The first argument must be one of type string or Buffer. You must convert objects to JSON strings first.
Verify the header was set correctly: Use the -i flag with curl to see response headers:
- curl -i http://localhost:8000
You should see Content-Type: application/json in the headers. If you see text/plain or no Content-Type, you either called setHeader() after writeHead() or forgot it entirely.
Common debugging scenario: If your frontend JavaScript gets undefined when calling fetch('/api').then(r => r.json()), check the headers with curl -i. The Content-Type must be exactly application/json (case-sensitive for some strict parsers).
Save and exit json.js by pressing CTRL+X. Now, let’s run the server with the node command:
- node json.js
In another terminal, let’s reach the server by using cURL:
- curl http://localhost:8000
As we press ENTER, we will see the following result:
Output{"message": "This is a JSON response"}
We now have successfully returned a JSON response, just like many of the popular APIs we create apps with. Be sure to exit the running server with CTRL+C so we can return to the standard terminal prompt. Next, let’s look at another popular format of returning data: CSV.
Serving CSV
The Comma Separated Values (CSV) file format is a text standard that’s commonly used for providing tabular data. In most cases, each row is separated by a newline, and each item in the row is separated by a comma.
In our workspace, open the csv.js file with a text editor:
- nano csv.js
Let’s add the following lines to our requestListener() function:
...
const requestListener = function (req, res) {
    res.setHeader("Content-Type", "text/csv");
    res.setHeader("Content-Disposition", "attachment;filename=oceanpals.csv");
};
...
This time, our Content-Type indicates that a CSV file is being returned as the value is text/csv. The second header we add is Content-Disposition. This header tells the browser how to display the data, particularly in the browser or as a separate file.
When we return CSV responses, most modern browsers automatically download the file even if the Content-Disposition header is not set. However, when returning a CSV file we should still add this header as it allows us to set the name of the CSV file. In this case, we signal to the browser that this CSV file is an attachment and should be downloaded. We then tell the browser that the file’s name is oceanpals.csv.
Let’s write the CSV data in the HTTP response:
...
const requestListener = function (req, res) {
    res.setHeader("Content-Type", "text/csv");
    res.setHeader("Content-Disposition", "attachment;filename=oceanpals.csv");
    res.writeHead(200);
    res.end(`id,name,email\n1,Sammy Shark,shark@ocean.com`);
};
...
Return a 200/OK status with the CSV data. The comma separates values in each column and the newline character (\n) separates rows. We have two rows: the header row and one data row.
CSV formatting gotcha: The simple example above works, but production CSV generation requires escaping. If your data contains commas (like "Smith, John") or quotes, they’ll break the CSV format. Proper CSV escaping wraps values with quotes and doubles internal quotes: "Smith, John" becomes "Smith, ""John""" in the CSV. For production, use a library like csv-stringify or properly escape values to prevent parsing errors.
What happens without Content-Disposition? Most browsers download the file if Content-Type: text/csv is set, but the filename might be the URL path or something generic. The attachment;filename=oceanpals.csv header ensures the browser saves it with a specific name. Without attachment, some browsers try to display CSV inline, which often looks messy.
We’ll test this server in the browser. Save csv.js and exit the editor with CTRL+X.
Run the server with the Node.js command:
- node csv.js
In another Terminal, let’s reach the server by using cURL:
- curl http://localhost:8000
The console will show this:
Outputid,name,email
1,Sammy Shark,shark@ocean.com
If we go to http://localhost:8000 in our browser, a CSV file will be downloaded. Its file name will be oceanpals.csv.
Exit the running server with CTRL+C to return to the standard terminal prompt.
Having returned JSON and CSV, we’ve covered two cases that are popular for APIs. Let’s move on to how we return data for websites people view in a browser.
Serving HTML
HTML (HyperText Markup Language), is the most common format to use when we want users to interact with our server via a web browser. It was created to structure web content. Web browsers are built to display HTML content, as well as any styles we add with CSS, another front-end web technology that allows us to change the aesthetics of our websites.
Let’s reopen html.js with our text editor:
- nano html.js
Modify the requestListener() function to return the appropriate Content-Type header for an HTML response:
...
const requestListener = function (req, res) {
    res.setHeader("Content-Type", "text/html");
};
...
Now, let’s return HTML content to the user. Add the highlighted lines to html.js so it looks like this:
...
const requestListener = function (req, res) {
    res.setHeader("Content-Type", "text/html");
    res.writeHead(200);
    res.end(`<html><body><h1>This is HTML</h1></body></html>`);
};
...
We first add the HTTP status code. We then call response.end() with a string argument that contains valid HTML. When we access our server in the browser, we will see an HTML page with one header tag containing This is HTML.
Let’s save and exit by pressing CTRL+X. Now, let’s run the server with the node command:
- node html.js
We will see Server is running on http://localhost:8000 when our program has started.
Now go into the browser and visit http://localhost:8000. Our page will look like this:

Let’s quit the running server with CTRL+C and return to the standard terminal prompt.
It’s common for HTML to be written in a file, separate from the server-side code like our Node.js programs. Next, let’s see how we can return HTML responses from files.
Step 3 — Serving an HTML Page From a File
We can serve HTML as strings in Node.js to the user, but it’s preferable that we load HTML files and serve their content. This way, as the HTML file grows we don’t have to maintain long strings in our Node.js code, keeping it more concise and allowing us to work on each aspect of our website independently. This “separation of concerns” is common in many web development setups, so it’s good to know how to load HTML files to support it in Node.js
To serve HTML files, we load the HTML file with the fs module and use its data when writing our HTTP response.
First, we’ll create an HTML file that the web server will return. Create a new HTML file:
- touch index.html
Now open index.html in a text editor:
- nano index.html
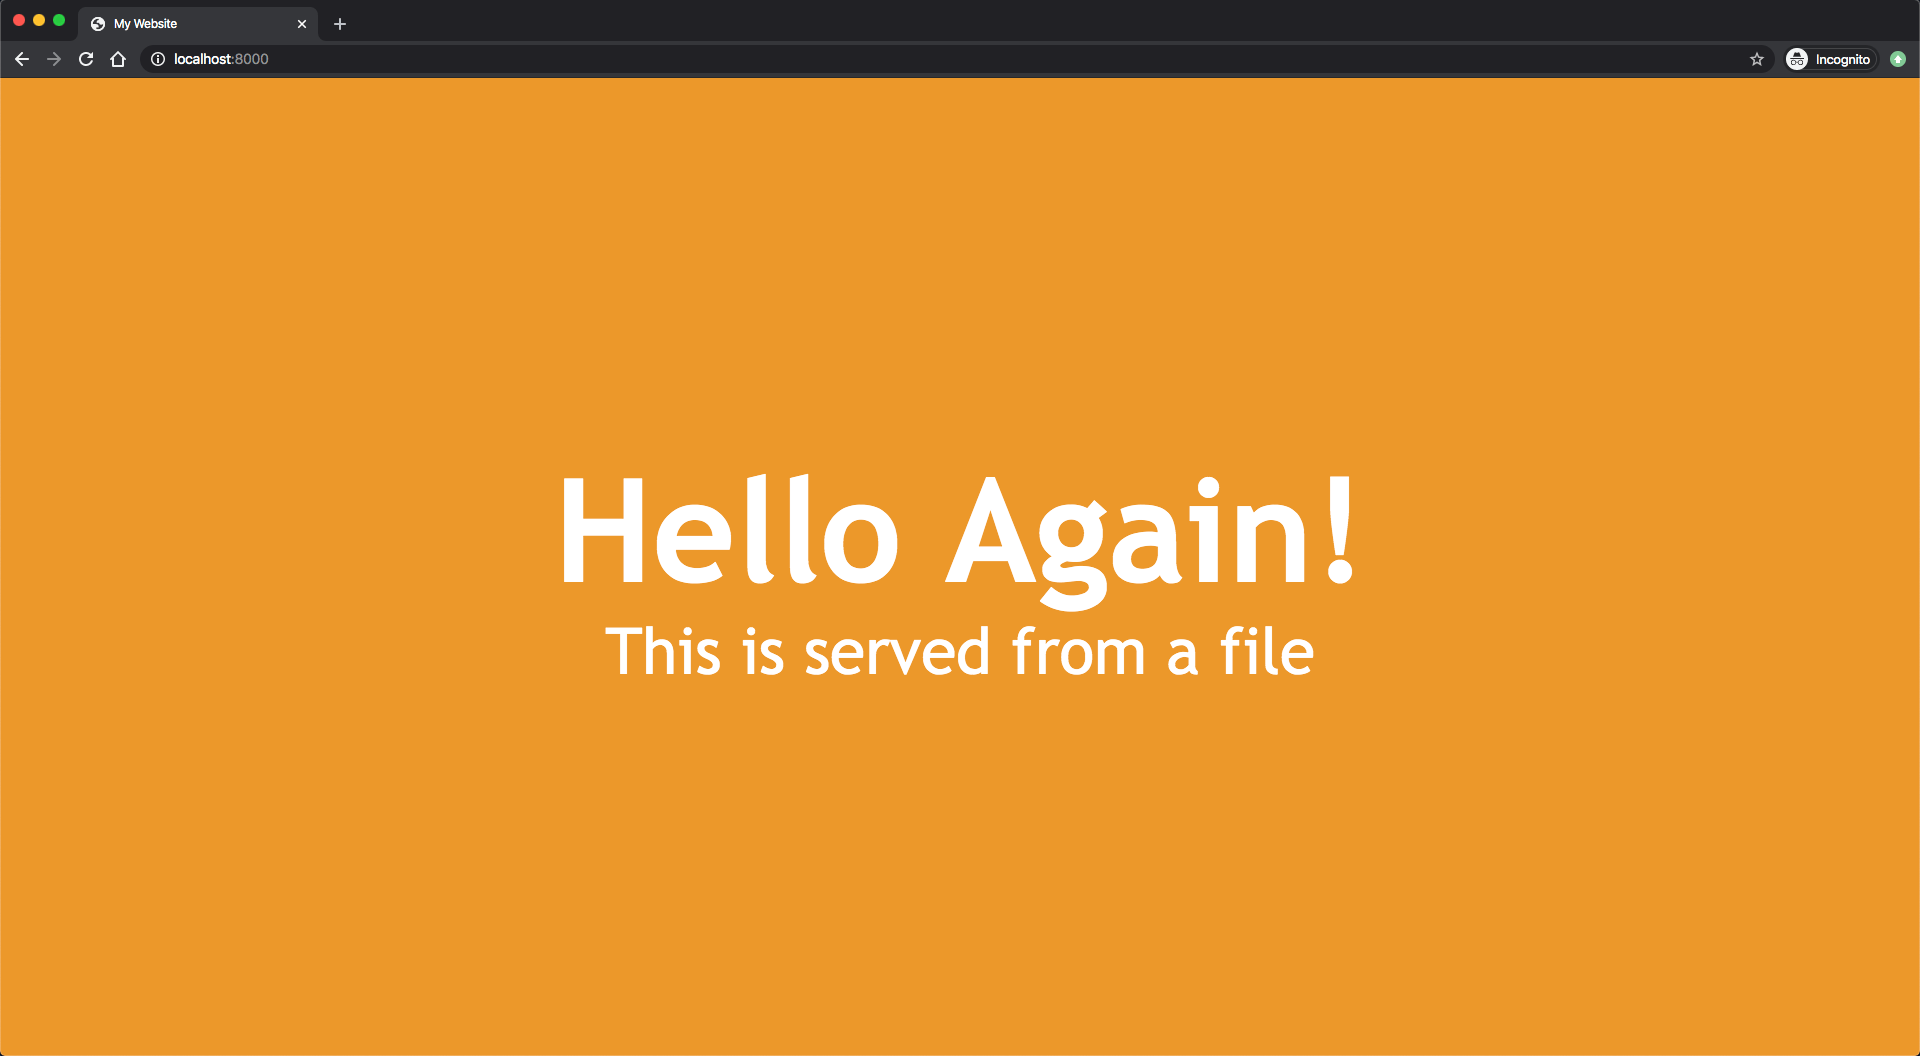
Our web page will be minimal. It will have an orange background and will display some greeting text in the center. Add this code to the file:
<!DOCTYPE html>

<head>
    <title>My Website</title>
    <style>
        *,
        html {
            margin: 0;
            padding: 0;
            border: 0;
        }

        html {
            width: 100%;
            height: 100%;
        }

        body {
            width: 100%;
            height: 100%;
            position: relative;
            background-color: rgb(236, 152, 42);
        }

        .center {
            width: 100%;
            height: 50%;
            margin: 0;
            position: absolute;
            top: 50%;
            left: 50%;
            transform: translate(-50%, -50%);
            color: white;
            font-family: "Trebuchet MS", Helvetica, sans-serif;
            text-align: center;
        }

        h1 {
            font-size: 144px;
        }

        p {
            font-size: 64px;
        }
    </style>
</head>

<body>
    <div class="center">
        <h1>Hello Again!</h1>
        <p>This is served from a file</p>
    </div>
</body>

</html>
This single webpage shows two lines of text: Hello Again! and This is served from a file. The lines appear in the center of the page, one above each other. The first line of text is displayed in a heading, meaning it would be large. The second line of text will appear slightly smaller. All the text will appear white and the webpage has an orange background.
While it’s not the scope of this article or series, if you are interested in learning more about HTML, CSS, and other front-end web technologies, you can take a look at Mozilla’s Getting Started with the Web guide.
That’s all we need for the HTML, so save and exit the file with CTRL+X. We can now move on to the server code.
For this exercise, we’ll work on htmlFile.js. Open it with the text editor:
- nano htmlFile.js
As we have to read a file, let’s begin by importing the fs module:
const http = require("http");
const fs = require('fs').promises;
...
This module contains a readFile() function that we’ll use to load the HTML file in place. We import the promise variant in keeping with modern JavaScript best practices. We use promises as its syntactically more succinct than callbacks, which we would have to use if we assigned fs to just require('fs'). To learn more about asynchronous programming best practices, you can read our How To Write Asynchronous Code in Node.js guide.
We want our HTML file to be read when a user requests our system. Let’s begin by modifying requestListener() to read the file:
...
const requestListener = function (req, res) {
    fs.readFile(__dirname + "/index.html")
};
...
We use the fs.readFile() method to load the file. Its argument has __dirname + "/index.html". The special variable __dirname has the absolute path of where the Node.js code is being run. We then append /index.html so we can load the HTML file we created earlier.
Now let’s return the HTML page once it’s loaded:
...
const requestListener = function (req, res) {
    fs.readFile(__dirname + "/index.html")
        .then(contents => {
            res.setHeader("Content-Type", "text/html");
            res.writeHead(200);
            res.end(contents);
        })
};
...
If the fs.readFile() promise successfully resolves, it will return its data. We use the then() method to handle this case. The contents parameter contains the HTML file’s data.
We first set the Content-Type header to text/html to tell the client that we are returning HTML data. We then write the status code to indicate the request was successful. We finally send the client the HTML page we loaded, with the data in the contents variable.
The fs.readFile() method can fail at times, so we should handle this case when we get an error. Add this to the requestListener() function:
...
const requestListener = function (req, res) {
    fs.readFile(__dirname + "/index.html")
        .then(contents => {
            res.setHeader("Content-Type", "text/html");
            res.writeHead(200);
            res.end(contents);
        })
        .catch(err => {
            res.writeHead(500);
            res.end('Internal Server Error');
            return;
        });
};
...
Save the file and exit nano with CTRL+X.
When a promise encounters an error, it is rejected. We handle that case with the catch() method. It sets the status code to 500 signifying that an internal error was encountered, and sends a user-friendly error message. In production, you should never expose raw error details to users, as this can leak sensitive information.
Run our server with the node command:
- node htmlFile.js
In the web browser, visit http://localhost:8000. You will see this page:
You have now returned an HTML page from the server to the user. You can quit the running server with CTRL+C. You will see the terminal prompt return when you do.
When writing code like this in production, you may not want to load an HTML page every time you get an HTTP request. While this HTML page is roughly 800 bytes in size, more complex websites can be megabytes in size. Large files can take a while to load. If your site is expecting a lot of traffic, it may be best to load HTML files at startup and save their contents. After they are loaded, you can set up the server and make it listen to requests on an address.
To demonstrate this method, let’s see how we can rework our server to be more efficient and scalable.
Serving HTML Efficiently
Instead of loading the HTML for every request, in this step we will load it once at the beginning. The request will return the data we loaded at startup.
In the terminal, re-open the Node.js script with a text editor:
- nano htmlFile.js
Let’s begin by adding a new variable before we create the requestListener() function:
...
let indexFile;

const requestListener = function (req, res) {
...
When we run this program, this variable will hold the HTML file’s contents.
Now, let’s readjust the requestListener() function. Instead of loading the file, it will now return the contents of indexFile:
...
const requestListener = function (req, res) {
    res.setHeader("Content-Type", "text/html");
    res.writeHead(200);
    res.end(indexFile);
};
...
Next, we shift the file reading logic from the requestListener() function to our server startup. Make the following changes as we create the server:
...

const server = http.createServer(requestListener);

fs.readFile(__dirname + "/index.html")
    .then(contents => {
        indexFile = contents;
        server.listen(port, host, () => {
            console.log(`Server is running on http://${host}:${port}`);
        });
    })
    .catch(err => {
        console.error(`Could not read index.html file: ${err}`);
        process.exit(1);
    });
Save the file and exit nano with CTRL+X.
The code that reads the file is similar to what we wrote in our first attempt. However, when we successfully read the file we now save the contents to our global indexFile variable. We then start the server with the listen() method. The key thing is that the file is loaded before the server is run. This way, the requestListener() function will be sure to return an HTML page, as indexFile is no longer an empty variable.
Our error handler has changed as well. If the file can’t be loaded, we capture the error and print it to our console. We then exit the Node.js program with the exit() function without starting the server. This way we can see why the file reading failed, address the problem, and then start the server again.
We’ve now created different web servers that return various types of data to a user. So far, we have not used any request data to determine what should be returned. We’ll need to use request data when setting up different routes or paths in a Node.js server, so next let’s see how they work together.
Step 4 — Managing Routes Using an HTTP Request Object
Most websites we visit or APIs we use usually have more than one endpoint so we can access various resources. A good example would be a book management system, one that might be used in a library. It would not only need to manage book data, but it would also manage author data for cataloguing and searching convenience.
Even though the data for books and authors are related, they are two different objects. In these cases, software developers usually code each object on different endpoints as a way to indicate to the API user what kind of data they are interacting with.
Let’s create a new server for a small library, which will return two different types of data. If the user goes to our server’s address at /books, they will receive a list of books in JSON. If they go to /authors, they will receive a list of author information in JSON.
So far, the server returns the same response to every request. To support multiple resources, store your data in variables and use conditional routing. For example:
const books = JSON.stringify([
  { title: "The Alchemist", author: "Paulo Coelho", year: 1988 },
  { title: "The Prophet", author: "Kahlil Gibran", year: 1923 }
]);
const authors = JSON.stringify([
  { name: "Paulo Coelho", countryOfBirth: "Brazil", yearOfBirth: 1947 },
  { name: "Kahlil Gibran", countryOfBirth: "Lebanon", yearOfBirth: 1883 }
]);

const requestListener = function (req, res) {
  res.setHeader("Content-Type", "application/json");
  switch (req.url) {
    case "/books":
      res.writeHead(200);
      res.end(books);
      break;
    case "/authors":
      res.writeHead(200);
      res.end(authors);
      break;
    default:
      res.writeHead(404);
      res.end(JSON.stringify({error:"Resource not found"}));
  }
}
Test with curl http://localhost:8000/books or /authors to see the respective data. Any other URL returns a 404 error.
The problem with simple string matching: req.url is a raw string that includes everything after the domain—paths, query strings, and fragments. If someone visits /books?id=123, your case "/books" won’t match because req.url is /books?id=123, not /books. Query parameters break routing: /books?sort=name won’t match /books. URL-encoded characters can break routing: /books%20reviews (space encoded as %20) won’t match /books reviews.
Use the URL API instead: The URL API automatically separates the pathname from query parameters, decodes URL-encoded characters, and handles edge cases correctly.
const host = req.headers.host || 'localhost:8000';
const url = new URL(req.url, `http://${host}`);

switch (url.pathname) {
  case '/books':
    // Validate HTTP method - only GET allowed for this endpoint
    if (req.method !== 'GET') {
      res.writeHead(405, { 'Allow': 'GET' });
      return res.end(JSON.stringify({ error: 'Method not allowed' }));
    }
    res.writeHead(200);
    return res.end(books);

  case '/authors':
    if (req.method !== 'GET') {
      res.writeHead(405, { 'Allow': 'GET' });
      return res.end(JSON.stringify({ error: 'Method not allowed' }));
    }
    res.writeHead(200);
    return res.end(authors);

  default:
    res.writeHead(404);
    return res.end(JSON.stringify({ error: 'Resource not found' }));
}
Why check the HTTP method? The same path might support different HTTP methods (GET for retrieving, POST for creating). Without this check, a POST request to /books would return the books list instead of creating a new book, which breaks REST API conventions. The 405 Method Not Allowed status code with the Allow header tells clients which methods are valid for this endpoint.
Query string handling: The URL API automatically separates the pathname (/books) from query parameters (?id=123), so /books?id=123 correctly routes to the books endpoint while you can still access url.searchParams.get('id') if needed.
Test various scenarios:
- curl http://localhost:8000/books
- curl http://localhost:8000/authors
- curl http://localhost:8000/books?id=123 # Query string doesn't break routing
- curl -X POST http://localhost:8000/books # Returns 405 Method Not Allowed
- curl http://localhost:8000/nonexistent # Returns 404
Step 5 — Handling POST Requests and Parsing Request Bodies
So far, we’ve only handled GET requests. Most APIs need to accept data from clients, which typically happens through POST requests. The http module requires manual parsing of request bodies, which are received as streams.
Critical insight: Unlike GET requests where data comes in the URL, POST request bodies arrive as a stream. This means data doesn’t arrive all at once—it comes in chunks. If you try to parse JSON before all chunks arrive, you’ll get incomplete or malformed data. You must collect all chunks first, then parse.
Here’s what happens if you try to parse too early:
// WRONG - Body isn't complete yet
req.on('data', chunk => {
  const data = JSON.parse(chunk); // Will fail - chunk is only part of the body
});

// CORRECT - Collect all chunks first
let body = '';
req.on('data', chunk => body += chunk.toString());
req.on('end', () => {
  const data = JSON.parse(body); // Now body is complete
});
Create a server that accepts POST requests with JSON payloads. Create a new file:
- touch post.js
- cp routes.js post.js
Open post.js:
- nano post.js
Here’s a production-ready JSON body parser that handles security concerns:
const MAX_BODY = 1 * 1024 * 1024; // 1MB limit prevents memory exhaustion

function parseJSONBody(req, res) {
  return new Promise((resolve, reject) => {
    let body = '';
    let received = 0;

    // Validate Content-Type before processing
    const contentType = req.headers['content-type'] || '';
    if (!contentType.startsWith('application/json')) {
      res.writeHead(415, { 'Content-Type': 'application/json' });
      res.end(JSON.stringify({ error: 'Unsupported Content-Type' }));
      return reject(new Error('Unsupported Content-Type'));
    }

    // Collect data chunks
    req.on('data', chunk => {
      received += chunk.length;

      // Prevent memory exhaustion from huge payloads
      if (received > MAX_BODY) {
        res.writeHead(413, { 'Content-Type': 'application/json' });
        res.end(JSON.stringify({ error: 'Payload too large' }));
        req.destroy(); // Stop receiving more data
        return reject(new Error('Payload too large'));
      }
      body += chunk.toString(); // Convert Buffer to string
    });

    // All chunks received, now parse
    req.on('end', () => {
      try {
        if (!body) {
          res.writeHead(400, { 'Content-Type': 'application/json' });
          res.end(JSON.stringify({ error: 'Empty request body' }));
          return reject(new Error('Empty request body'));
        }

        const data = JSON.parse(body);

        // Validate it's an object (not a string, number, etc.)
        if (typeof data !== 'object' || data === null || Array.isArray(data)) {
          res.writeHead(400, { 'Content-Type': 'application/json' });
          res.end(JSON.stringify({ error: 'Invalid JSON object' }));
          return reject(new Error('Invalid JSON object'));
        }

        resolve(data);
      } catch (parseError) {
        // JSON.parse() throws for malformed JSON
        res.writeHead(400, { 'Content-Type': 'application/json' });
        res.end(JSON.stringify({ error: 'Malformed JSON' }));
        console.error('JSON parse error:', parseError.message);
      }
    });

    // Handle network errors
    req.on('error', (error) => {
      console.error('Request error:', error.message);
      res.writeHead(400, { 'Content-Type': 'application/json' });
      res.end(JSON.stringify({ error: 'Request error' }));
    });
  });
}
Why check Content-Type? If a client sends form data with Content-Type: application/x-www-form-urlencoded, trying to parse it as JSON will fail. The 415 Unsupported Media Type status code tells the client their Content-Type isn’t acceptable.
Why limit body size? Without a limit, a malicious client could send gigabytes of data, exhausting your server’s memory. The 413 Payload Too Large response and req.destroy() stop the connection immediately when the limit is exceeded.
Why validate the parsed result? JSON.parse('"hello"') succeeds but returns a string, not an object. Your code might expect data.property to work, but strings don’t have properties. The check ensures you get an actual object.
Use this function in your POST handler:
const requestListener = async function (req, res) {
  if (req.method === 'POST' && req.url === '/books') {
    const bookData = await parseJSONBody(req, res);
    // Now use bookData safely
    // ...
  }
};
Step 6 — Serving Static Files
Many web applications need to serve static assets like images, CSS files, JavaScript files, or other resources. While the http module doesn’t have built-in static file serving like Express’s express.static, you can implement it using the fs and path modules.
Critical security issue: If you naively use path.join(__dirname, 'public', req.url) without validation, an attacker can access any file on your server using directory traversal attacks. A request like GET /../../../etc/passwd could expose system files. The path.resolve() check ensures the resolved path never escapes the public directory.
Here’s what can go wrong without proper path validation:
// VULNERABLE - Allows directory traversal
const filePath = path.join(__dirname, 'public', req.url);
// Request: /../../../etc/passwd
// Resolves to: /etc/passwd (outside public directory!)

// SECURE - Validates path stays within public directory
const safePath = path.resolve(publicDir, '.' + reqPath);
if (!safePath.startsWith(publicDir)) {
  res.writeHead(403);
  res.end('Forbidden');
  return;
}
// Request: /../../../etc/passwd
// safePath: /home/user/app/public/../../../etc/passwd
// Resolved: /etc/passwd
// Check fails because /etc/passwd doesn't start with /home/user/app/public
Create a secure static file server:
- touch static.js
Open static.js:
- nano static.js
Serve static files efficiently and securely by streaming with fs.createReadStream() and secure path resolution:
const http = require("http");
const fs = require("fs");
const path = require("path");

const host = 'localhost';
const port = 8000;

const mimeTypes = {
  '.html': 'text/html',
  '.css': 'text/css',
  '.js': 'application/javascript',
  '.json': 'application/json',
  '.png': 'image/png',
  '.jpg': 'image/jpeg',
  '.jpeg': 'image/jpeg',
  '.gif': 'image/gif',
  '.svg': 'image/svg+xml',
  '.ico': 'image/x-icon',
  '.pdf': 'application/pdf'
};

const publicDir = path.resolve(__dirname, 'public');

const requestListener = (req, res) => {
  // Normalize the request path
  let reqPath = req.url === '/' ? '/index.html' : req.url;

  // Strip query string - ?id=123 shouldn't affect file path
  reqPath = reqPath.split('?')[0];

  // Resolve path and check it stays within publicDir
  // The '.' prefix prevents absolute paths from being resolved incorrectly
  const safePath = path.resolve(publicDir, '.' + reqPath);

  // Critical security check: ensure resolved path is within publicDir
  if (!safePath.startsWith(publicDir)) {
    res.writeHead(403, { 'X-Content-Type-Options': 'nosniff' });
    res.end('Forbidden');
    return;
  }

  // Check if file exists and is actually a file (not a directory)
  fs.stat(safePath, (err, stat) => {
    if (err || !stat.isFile()) {
      res.writeHead(404, { 'X-Content-Type-Options': 'nosniff' });
      res.end('File not found');
      return;
    }

    // Determine MIME type from file extension
    const ext = path.extname(safePath).toLowerCase();
    const contentType = mimeTypes[ext] || 'application/octet-stream';

    res.setHeader("Content-Type", contentType);
    res.setHeader("X-Content-Type-Options", "nosniff"); // Prevents MIME sniffing attacks
    res.writeHead(200);

    // Stream file instead of loading into memory
    // Critical for large files - won't consume all memory
    const stream = fs.createReadStream(safePath);
    stream.pipe(res);

    stream.on('error', () => {
      // File might be deleted between stat() and createReadStream()
      res.writeHead(500, { 'X-Content-Type-Options': 'nosniff' });
      res.end('Server error');
    });
  });
};

const server = http.createServer(requestListener);
server.listen(port, host, () => {
  console.log(`Server is running on http://${host}:${port}`);
  console.log(`Serving static files from: ${publicDir}`);
});
Create a public directory and add a test file:
- mkdir public
- echo "<h1>Static File Served!</h1>" > public/index.html
Run the server:
- node static.js
Visit http://localhost:8000 in your browser to see the static file served.
Why use streaming instead of fs.readFile()? For a 100MB video file, fs.readFile() loads the entire file into memory before sending it. With fs.createReadStream(), data flows directly from disk to network in small chunks, using minimal memory regardless of file size.
Why check stat.isFile()? If someone requests a directory path like /images/, fs.stat() succeeds but isFile() returns false. Without this check, you’d try to stream a directory, which fails. The check ensures you only serve actual files.
Test the path traversal protection:
- curl http://localhost:8000/../../../etc/passwd
- # Should return 403 Forbidden, not the system file
Step 7 — Error Handling and Logging
Robust error handling is crucial for production servers. The http module doesn’t provide automatic error handling, so you must implement it yourself.
Proper error handling involves catching async errors, logging them appropriately, sending user-friendly error responses, and preventing server crashes from unhandled errors. Let’s enhance our server with comprehensive error handling and logging:
const http = require("http");
const fs = require('fs').promises;

const host = 'localhost';
const port = 8000;

// Simple logging utility
const log = {
    info: (msg) => console.log(`[INFO] ${new Date().toISOString()} - ${msg}`),
    error: (msg, err) => console.error(`[ERROR] ${new Date().toISOString()} - ${msg}`, err),
    warn: (msg) => console.warn(`[WARN] ${new Date().toISOString()} - ${msg}`)
};

const requestListener = async function (req, res) {
    try {
        log.info(`${req.method} ${req.url} - ${req.headers['user-agent'] || 'Unknown'}`);
        if (req.url === '/') {
            try {
                const data = await fs.readFile(__dirname + '/index.html');
                res.setHeader("Content-Type", "text/html");
                res.writeHead(200);
                res.end(data);
            } catch (error) {
                log.error('Failed to read index.html', error);
                res.writeHead(500);
                res.end('<h1>Internal Server Error</h1><p>Unable to load page.</p>');
            }
        } else if (req.url === '/error') {
            throw new Error('Simulated error for testing');
        } else {
            res.writeHead(404);
            res.end('<h1>Not Found</h1><p>The requested resource was not found.</p>');
        }
    } catch (error) {
        log.error('Unhandled error in request handler', error);
        const errorMessage = process.env.NODE_ENV !== 'production'
            ? error.message
            : 'An unexpected error occurred';
        res.writeHead(500);
        res.end(`<h1>Internal Server Error</h1><p>${errorMessage}</p>`);
    }
};

const server = http.createServer(requestListener);

// Handle server-level errors
server.on('error', (error) => {
    if (error.code === 'EADDRINUSE') {
        log.error(`Port ${port} is already in use`);
    } else {
        log.error('Server error', error);
    }
    process.exit(1);
});

// Handle client connection errors
server.on('clientError', (err, socket) => {
    log.warn('Client error: ' + err.message);
    socket.end('HTTP/1.1 400 Bad Request\r\n\r\n');
});

server.listen(port, host, () => {
    log.info(`Server is running on http://${host}:${port}`);
});
Graceful Shutdown (SIGTERM/SIGINT)
When running under process managers like PM2 or Docker, handle termination signals to close the server gracefully:
const connections = new Set();

server.on('connection', socket => {
  connections.add(socket);
  socket.on('close', () => connections.delete(socket));
});

const shutdown = (signal) => {
  log.warn(`${signal} received: shutting down gracefully...`);
  server.close(() => {
    log.info('Server closed.');
    process.exit(0);
  });
  setTimeout(() => {
    log.warn('Forcing socket close...');
    connections.forEach(s => s.destroy());
    process.exit(1);
  }, 10000).unref();
};

process.on('SIGTERM', () => shutdown('SIGTERM'));
process.on('SIGINT', () => shutdown('SIGINT'));
Key error handling practices shown:
- Try-catch blocks around async operations
- Server-level error handlers for connection and port issues
- Client error handling for malformed requests
- Logging with timestamps and severity levels
- Environment-aware error messages (don’t expose stack traces in production)
- Graceful error responses with appropriate HTTP status codes
Step 8 — Using ES Modules (ESM) Syntax
Modern Node.js supports ES Modules (ESM) using import/export syntax instead of CommonJS require/module.exports. To use ESM, either name your file with .mjs extension or set "type": "module" in your package.json.
ESM syntax uses import instead of require and export instead of module.exports. Here’s the same basic server using ES Module syntax:
Create server.mjs:
- touch server.mjs
- nano server.mjs
import http from 'http';
import fs from 'fs/promises';
import path from 'path';
import { fileURLToPath } from 'url';

// ES Modules don't have __dirname, so we recreate it
const __filename = fileURLToPath(import.meta.url);
const __dirname = path.dirname(__filename);

const host = 'localhost';
const port = 8000;

const requestListener = async (req, res) => {
    try {
        if (req.url === '/') {
            const data = await fs.readFile(path.join(__dirname, 'index.html'));
            res.setHeader("Content-Type", "text/html");
            res.writeHead(200);
            res.end(data);
        } else {
            res.writeHead(404);
            res.end('Not found');
        }
    } catch (error) {
        console.error('Error:', error);
        res.writeHead(500);
        res.end('Server error');
    }
};

const server = http.createServer(requestListener);

server.listen(port, host, () => {
    console.log(`Server is running on http://${host}:${port}`);
});
Run it:
- node server.mjs
Key Differences: In ESM, __dirname isn’t available—you must derive it from import.meta.url. Also, file paths in fs operations may need explicit resolution. Otherwise, the HTTP module API remains identical.
Alternatively, create package.json with "type": "module":
{
  "type": "module"
}
Then use .js files with ESM syntax:
import http from 'http';

const server = http.createServer((req, res) => {
    res.writeHead(200);
    res.end('ESM Server');
});

server.listen(8000);
Production Considerations
When moving from development to production, several important considerations come into play:
HTTPS Support
The http module serves HTTP only. For HTTPS, use the https module similarly:
const https = require('https');
const fs = require('fs');

const options = {
    key: fs.readFileSync('path/to/private-key.pem'),
    cert: fs.readFileSync('path/to/certificate.pem')
};

const server = https.createServer(options, requestListener);
Security: Never commit private keys or certificates to version control. Use environment variables or secure secret management services in production.
Reverse Proxy Configuration
In production, Node.js servers typically run behind reverse proxies like Nginx or Apache. The proxy handles SSL termination, static files, and load balancing. Your Node.js server should:
- Listen on
localhostor127.0.0.1only - Read
X-Forwarded-Forheaders for client IPs - Trust proxy headers only from your proxy server
See our guide on How To Configure Nginx as a Reverse Proxy on Ubuntu for setup details.
Process Management
For production, use process managers like PM2 to handle:
- Automatic restarts on crashes
- Zero-downtime deployments
- Log management
- Cluster mode for utilizing multiple CPU cores
Learn more in our How To Set Up a Node.js Application for Production on Ubuntu guide.
Performance Optimization
-
File caching: Load static files at startup (as shown in Step 3) rather than reading from disk on every request. This significantly reduces I/O overhead.
-
Stream large files: For files over 1MB, use
fs.createReadStream()and pipe to the response instead of loading the entire file into memory. -
Connection pooling: For database connections, use connection pooling to avoid the overhead of creating new connections per request.
-
Compression: Use the
zlibmodule for gzip compression on text responses to reduce bandwidth:const zlib = require('zlib'); const gzip = zlib.createGzip(); res.setHeader('Content-Encoding', 'gzip'); gzip.pipe(res); gzip.write(data); gzip.end(); -
Cluster mode: Use Node.js
clustermodule to spawn worker processes equal to CPU cores, maximizing throughput for CPU-intensive operations. -
Request timeouts: Set reasonable timeout values to prevent slow clients from consuming resources:
server.setTimeout(30000); // 30 seconds -
Memory monitoring: Track memory usage to detect leaks early. In production, monitor heap size and implement graceful restarts if memory grows unbounded.
Caching and Compression Best Practices
To further improve performance and reduce response times, apply caching and compression where appropriate.
-
Enable caching for static files:
AddCache-ControlandETagheaders to your static file responses. For example:const stat = fs.statSync(safePath); res.setHeader('Cache-Control', 'public, max-age=86400'); // cache for 1 day res.setHeader('ETag', `"${stat.size}-${stat.mtime.getTime()}"`);Browsers and CDNs will reuse cached copies until the ETag or cache duration expires.
-
Use gzip or Brotli compression:
Text-based responses like HTML, CSS, JS, and JSON compress extremely well. You can apply compression with Node’szlibmodule:const zlib = require('zlib'); const stream = fs.createReadStream(safePath); res.setHeader('Content-Encoding', 'gzip'); stream.pipe(zlib.createGzip()).pipe(res);This reduces bandwidth usage and speeds up delivery for clients with slower connections.
-
Avoid over-caching dynamic endpoints:
For APIs or frequently updated data, set shorter cache durations (e.g.,max-age=60) or useno-storewhen necessary.
These optimizations complement static file streaming and graceful shutdown, helping your Node.js server deliver high performance while staying secure and predictable.
Use Node.js http module for minimal APIs, custom routing, or learning HTTP internals.
Use Express/Fastify when you need middleware, templating, or rapid prototyping.
Troubleshooting Common Issues
Port Already in Use (EADDRINUSE)
Error: Error: listen EADDRINUSE: address already in use :::8000
Solution:
- Find the process using the port:
lsof -i :8000(macOS/Linux) ornetstat -ano | findstr :8000(Windows) - Kill the process or use a different port
- Add error handling (as shown in Step 7) to catch this gracefully
Request Body Not Received
Problem: POST request body is empty or undefined
Solution: Request bodies are streams—you must collect chunks. Always use the pattern shown in Step 5:
let body = '';
req.on('data', chunk => body += chunk.toString());
req.on('end', () => {
    // Now parse body
});
CORS Errors in Browser
Problem: Browser blocks requests due to CORS policy
Solution: Add CORS headers in your response:
res.setHeader("Access-Control-Allow-Origin", "*"); // Or specific domain
res.setHeader("Access-Control-Allow-Methods", "GET, POST, OPTIONS");
res.setHeader("Access-Control-Allow-Headers", "Content-Type");
Security: Using "*" for Access-Control-Allow-Origin allows any origin. In production, specify your frontend domain explicitly.
Static Files Return 404
Problem: Static files aren’t found even though they exist
Solution:
- Check the file path resolution
- Verify
__dirnamepoints to the correct directory - Ensure file permissions allow reading
- Validate path sanitization isn’t stripping valid characters
Frequently Asked Questions
What is the HTTP module in Node.js?
The http module is Node.js’s built-in module for creating HTTP servers and clients. It provides low-level APIs for handling HTTP requests and responses without requiring external dependencies. It’s part of Node.js core, so it’s available in every Node.js installation.
How do I create a simple web server in Node.js?
Create a server using http.createServer() with a request listener function:
const http = require('http');

const server = http.createServer((req, res) => {
    res.writeHead(200);
    res.end('Hello World');
});

server.listen(8000);
This creates a server listening on port 8000 that responds to all requests with “Hello World”.
What’s the difference between the HTTP module and Express.js?
The http module is Node.js core functionality providing low-level HTTP handling. Express.js is a framework built on top of http that adds routing, middleware, templating, and other conveniences. The http module gives you complete control but requires more manual setup, while Express.js provides abstractions at the cost of additional dependencies.
Use http module when:
- Building lightweight APIs or microservices
- Learning HTTP fundamentals
- You want zero dependencies
- Full control over request/response handling
Use Express.js when:
- Building complex applications with many routes
- You need middleware ecosystem
- Rapid prototyping is a priority
- You want community-standard patterns
For a comprehensive introduction to Express.js and how it simplifies web development, see our guide on Node.js Express Basics.
Can I build a REST API using Node.js without Express?
Yes, absolutely. The http module is sufficient for building REST APIs. You’ll need to manually handle:
- Route parsing (using
req.urlandreq.method) - Request body parsing (collecting stream chunks)
- Response formatting
- Error handling
For simple APIs, this is often preferable to adding framework dependencies. See Steps 4 and 5 in this tutorial for routing and POST request handling examples.
How do I handle different routes using the Node.js HTTP module?
Parse req.url and use conditional logic or a switch statement:
const requestListener = (req, res) => {
    switch (req.url) {
        case '/':
            res.writeHead(200);
            res.end('Home page');
            break;
        case '/about':
            res.writeHead(200);
            res.end('About page');
            break;
        default:
            res.writeHead(404);
            res.end('Not found');
    }
};
For more complex routing, you can parse URL paths, query strings using the url module, and handle different HTTP methods.
How do I send HTML or JSON responses with the HTTP module?
Set the Content-Type header appropriately and send the data:
HTML:
res.setHeader('Content-Type', 'text/html');
res.writeHead(200);
res.end('<h1>Hello</h1>');
JSON:
res.setHeader('Content-Type', 'application/json');
res.writeHead(200);
res.end(JSON.stringify({ message: 'Hello' }));
The Content-Type header tells the client how to interpret the response data.
What port should I use for a local Node.js server?
Common development ports are:
- 8000 or 8080: General HTTP development
- 3000: Popular with frameworks like Express
- 5000: Also common
Any port above 1024 works for non-root users. Ports below 1024 require administrator privileges. Check availability with lsof -i :PORT (macOS/Linux) before use.
How can I handle 404 errors in a Node.js HTTP server?
Add a default case in your routing logic:
const requestListener = (req, res) => {
    if (req.url === '/') {
        res.writeHead(200);
        res.end('Home');
    } else {
        res.writeHead(404);
        res.end('Not Found');
    }
};
Always set the status code to 404 for non-existent routes to follow HTTP standards.
How do I serve static files without Express?
Use the fs module to read files and the path module for safe path resolution:
const fs = require('fs').promises;
const path = require('path');

const requestListener = async (req, res) => {
    const filePath = path.join(__dirname, 'public', req.url);
    try {
        const data = await fs.readFile(filePath);
        res.writeHead(200);
        res.end(data);
    } catch (error) {
        res.writeHead(404);
        res.end('File not found');
    }
};
Always validate paths to prevent directory traversal attacks (see Step 6 for a secure implementation).
Can I use ES Modules (import) with the HTTP module in Node.js?
Yes, Node.js supports ES Modules. Use either:
- File with
.mjsextension:
import http from 'http';
// ... rest of code
- Set
"type": "module"inpackage.json, then use.jsfiles:
{
  "type": "module"
}
Note that ES Modules don’t have __dirname—derive it from import.meta.url as shown in Step 8.
How do I parse POST request bodies with the HTTP module?
POST bodies arrive as streams. Collect chunks, then parse:
const parseBody = (req) => {
    return new Promise((resolve, reject) => {
        let body = '';
        req.on('data', chunk => body += chunk.toString());
        req.on('end', () => {
            try {
                resolve(JSON.parse(body)); // For JSON
            } catch (error) {
                reject(error);
            }
        });
        req.on('error', reject);
    });
};
This pattern works for JSON, form data, or any text-based content type.
Is the HTTP module suitable for production use?
Yes, the http module is production-ready and used by many Node.js applications. However, consider:
- Process management: Use PM2 or similar for auto-restarts
- Reverse proxy: Run behind Nginx/Apache for SSL and load balancing
- Error handling: Implement comprehensive error handling and logging
- Security: Validate inputs, sanitize paths, set size limits on requests
- Performance: Cache static files, use clustering for CPU-bound operations
Many production applications use the http module directly, especially microservices and lightweight APIs. For comprehensive production deployment guidance, see How To Set Up a Node.js Application for Production on Ubuntu 22.04.
Conclusion
In this tutorial, you’ve built production-capable Node.js HTTP servers from the ground up. You started with a basic text response, then progressed through serving multiple content types (JSON, CSV, and HTML). You implemented routing to handle different URLs, parsed POST request bodies, served static files securely, and added comprehensive error handling and logging. You’ve also explored both CommonJS and ES Module syntax, plus production deployment considerations.
You’re now equipped to create web servers that handle diverse requirements without framework dependencies. With this knowledge, you can:
- Build lightweight REST APIs for microservices
- Serve multi-page websites with proper routing
- Handle file uploads and downloads
- Implement custom middleware logic
- Make informed decisions about when frameworks add value versus unnecessary complexity
Next steps:
- Dive deeper into Node.js fundamentals: Return to the How To Code in Node.js series for comprehensive coverage
- Explore the official documentation: The Node.js HTTP module documentation contains detailed API references and advanced use cases
- When you need framework features: Consider Express.js basics for rapid development with middleware and templating support
Understanding these HTTP fundamentals makes you a more capable Node.js developer. Whether you choose to use frameworks or work directly with the http module, you now understand the underlying mechanics that power all Node.js web applications. This knowledge helps you debug issues, optimize performance, and architect systems that scale effectively.
Thanks for learning with the DigitalOcean Community. Check out our offerings for compute, storage, networking, and managed databases.
Tutorial Series: How To Code in Node.js
Node.js is a popular open-source runtime environment that can execute JavaScript outside of the browser. The Node runtime is commonly used for back-end web development, leveraging its asynchronous capabilities to create networking applications and web servers. Node also is a popular choice for building command line tools.
In this series, you will go through exercises to learn the basics of how to code in Node.js, gaining powerful tools for back-end and full stack development in the process.
Browse Series: 14 tutorials
About the author(s)
Former Senior Technical Editor at DigitalOcean, fiction writer and podcaster elsewhere, always searching for the next good nautical pun! Areas of expertise include Node.js, PostgreSQL, CSS, JavaScript.
Building future-ready infrastructure with Linux, Cloud, and DevOps. Full Stack Developer & System Administrator. Technical Writer @ DigitalOcean | GitHub Contributor | Passionate about Docker, PostgreSQL, and Open Source | Exploring NLP & AI-TensorFlow | Nailed over 50+ deployments across production environments.
Still looking for an answer?
This textbox defaults to using Markdown to format your answer.
You can type !ref in this text area to quickly search our full set of tutorials, documentation & marketplace offerings and insert the link!
Thanks very much for this article. Your explanations accompanying each step are invaluable. Really enjoyed this tutorial!
 This work is licensed under a Creative Commons Attribution-NonCommercial- ShareAlike 4.0 International License.
Become a contributor for community
Get paid to write technical tutorials and select a tech-focused charity to receive a matching donation.

DigitalOcean Documentation
Full documentation for every DigitalOcean product.

Resources for startups and AI-native businesses
The Wave has everything you need to know about building a business, from raising funding to marketing your product.
The developer cloud
Scale up as you grow — whether you're running one virtual machine or ten thousand.

Start building today
From GPU-powered inference and Kubernetes to managed databases and storage, get everything you need to build, scale, and deploy intelligent applications.
