Not using Ubuntu 16.04?
Choose a different version or distribution.
Introduction
ownCloud is a file sharing server that permits you to store your personal content, like documents and pictures, in a centralized location, much like Dropbox. The difference with ownCloud is that it is free and open-source, which allows anyone to use and examine it. It also returns the control and security of your sensitive data back to you, thus eliminating the utilization of a third-party cloud hosting service.
In this tutorial, we will install and configure an ownCloud instance on an Ubuntu 16.04 server.
Prerequisites
In order to complete the steps in this guide, you will need the following:
- A sudo user on your server: You can create a user with sudo privileges by following the Ubuntu 16.04 initial server setup guide.
- A LAMP stack: ownCloud requires a web server, a database, and PHP to function properly. Setting up a LAMP stack (Linux, Apache, MySQL, and PHP) server fulfills all of these requirements. Follow this guide to install and configure this software.
- To take full advantage of all the features that ownCloud has to offer, make sure to install the following PHP modules:
php-bz2,php-curl,php-gd,php-imagick,php-intl,php-mbstring,php-xml, andphp-zip.
- To take full advantage of all the features that ownCloud has to offer, make sure to install the following PHP modules:
- An SSL certificate: How you set this up depends on whether or not you have a domain name that resolves to your server.
- If you have a domain name… the easiest way to secure your site is with Let’s Encrypt, which provides free, trusted certificates. Follow the Let’s Encrypt guide for Apache to set this up.
- If you do not have a domain… and you are just using this configuration for testing or personal use, you can use a self-signed certificate instead. This provides the same type of encryption, but without the domain validation. Follow the self-signed SSL guide for Apache to get set up.
Step 1 – ownCloud Installation
The ownCloud server package does not exist within the default repositories for Ubuntu. However, ownCloud maintains a dedicated repository for the distro.
To begin, download their release key using the curl command and import it with the apt-key utility with the add command:
- sudo curl https://download.owncloud.org/download/repositories/stable/Ubuntu_16.04/Release.key | sudo apt-key add -
Output. . .
  % Total    % Received % Xferd  Average Speed   Time    Time     Time  Current
                                 Dload  Upload   Total   Spent    Left  Speed
100  1358  100  1358    0     0   2057      0 --:--:-- --:--:-- --:--:--  2057
OK
The ‘Release.key’ file contains a PGP (Pretty Good Privacy) public key which apt will use to verify that the ownCloud package is authentic.
In addition to importing the key, create a file called owncloud.list in the sources.list.d directory for apt. The file will contain the address to the ownCloud repository.
- echo 'deb https://download.owncloud.org/download/repositories/stable/Ubuntu_16.04/ /' | sudo tee /etc/apt/sources.list.d/owncloud.list
Outputdeb https://download.owncloud.org/download/repositories/stable/Ubuntu_16.04/ /
After adding a new source, use the apt-get utility and the update command to make apt aware of the change:
- sudo apt-get update
Output. . .
W: https://download.owncloud.org/download/repositories/stable/Ubuntu_16.04/Release.gpg: Signature by key DDA2C105C4B73A6649AD2BBD47AE7F72479BC94B uses weak digest algorithm (SHA1)
Finally, perform the installation of ownCloud using the apt-get utility and the install command:
- sudo apt-get install owncloud
When prompted with the Do you want to continue? [Y/n] message, press the ENTER key to confirm the installation.
OutputSetting up owncloud-deps-php7.0 (9.1.1-1.2) ...
Enabling conf owncloud.
To activate the new configuration, you need to run:
  service apache2 reload
apache2_invoke: Enable module rewrite
apache2_invoke owncloud: already enabled
Setting up owncloud (9.1.1-1.2) ...
Processing triggers for libc-bin (2.23-0ubuntu4) ...
Processing triggers for libapache2-mod-php7.0 (7.0.8-0ubuntu0.16.04.3) ...
As you can see by the output, the installation created a new configuration for Apache. Use the systemctl utility with the reload command to make the Apache daemon aware of the change:
- sudo systemctl reload apache2
With the ownCloud server installed, we will move on to setting up a database for it to use.
Step 2 – MySQL Database Configuration
To get started, log into MySQL with the administrative account:
- mysql -u root -p
Enter the password you set for the MySQL root user when you installed the database server.
ownCloud requires a separate database for storing administrative data. While you can call this database whatever you prefer, we decided on the name owncloud to keep things simple.
- CREATE DATABASE owncloud;
Note: Every MySQL statement must end with a semi-colon (;). Be sure to check that this is present if you are experiencing an issue.
Next, create a separate MySQL user account that will interact with the newly created database. Creating one-function databases and accounts is a good idea from a management and security standpoint. As with the naming of the database, choose a username that you prefer. We elected to go with the name owncloud in this guide.
- GRANT ALL ON owncloud.* to 'owncloud'@'localhost' IDENTIFIED BY 'set_database_password';
Warning: Be sure to put an actual password where the command states: set_database_password
With the user assigned access to the database, perform the flush-privileges operation to ensure that the running instance of MySQL knows about the recent privilege assignment:
- FLUSH PRIVILEGES;
This concludes the configuration of MySQL, therefore we will quit the session by typing:
- exit
With the ownCloud server installed and the database set up, we are ready to turn our attention to configuring the ownCloud application.
Step 3 – ownCloud Configuration
To access the ownCloud web interface, open a web browser and navigate to the following address:
https://server_domain_or_IP/owncloud
If a self-signed certificate is being used, you will likely be presented with a warning because the certificate is not signed by one of your browser’s trusted authorities. This is expected and normal. We are only interested in the encryption aspect of the certificate, not the third-party validation of our host’s authenticity. Click the appropriate button or link to proceed to the ownCloud admin page.
You should see something like this:

Create an admin account by choosing a username and a password. For security purposes it is not recommended to use something like “admin” for the username.
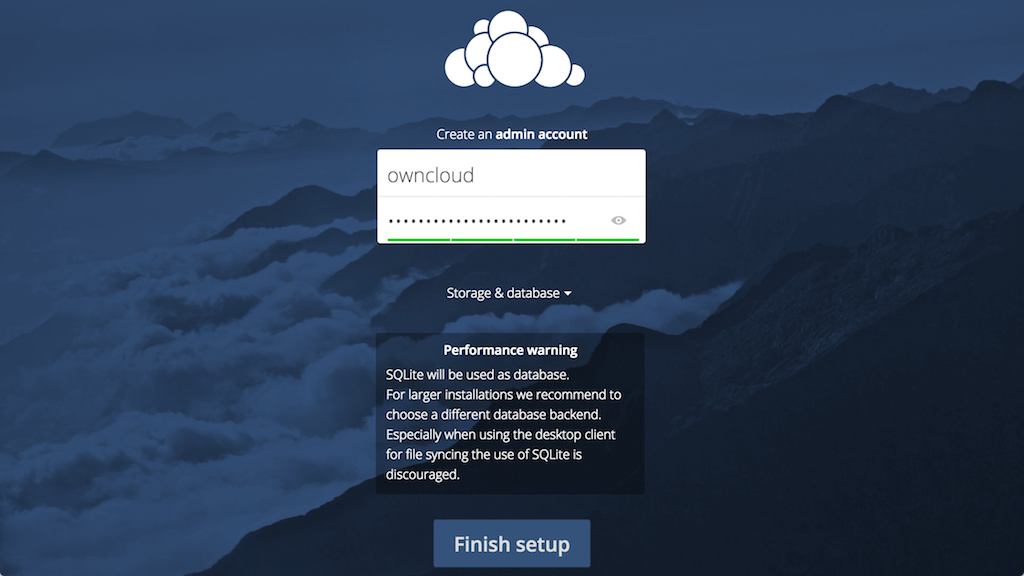
Before clicking the Finish setup button, click on the Storage & database link:
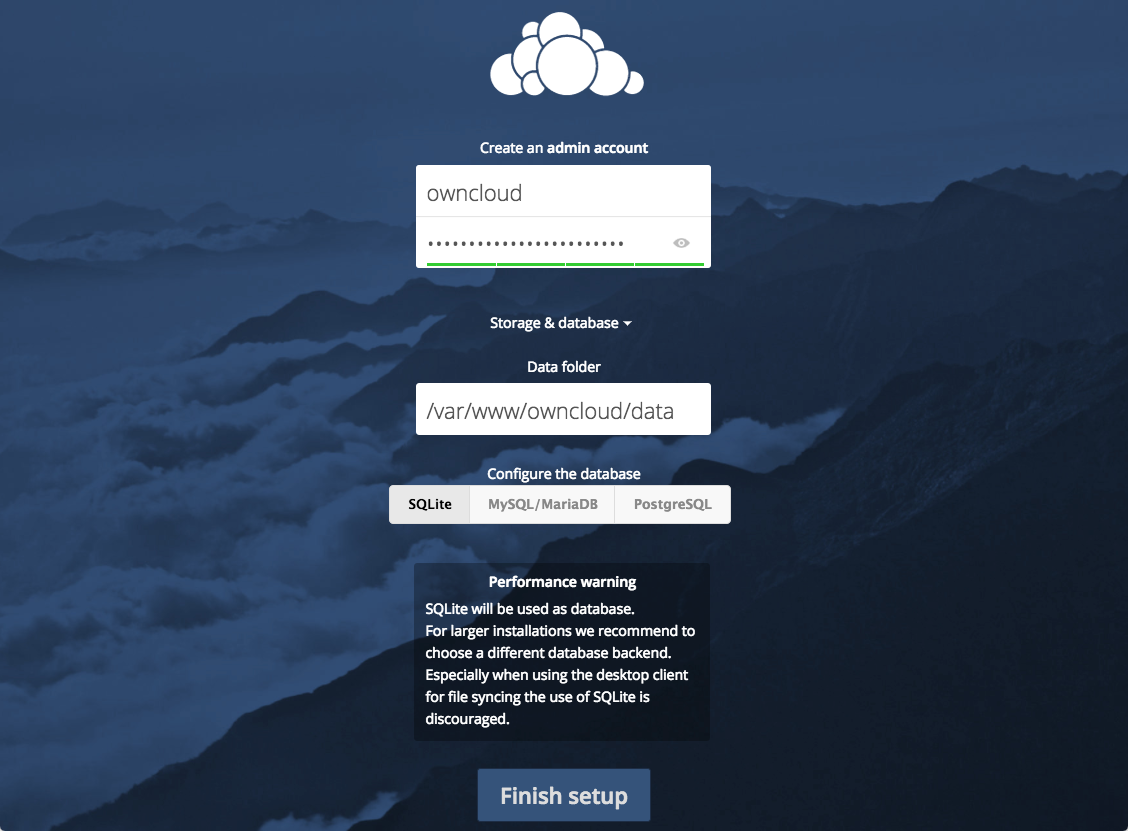
Leave the Data folder setting as-is and click the MySQL/MariaDB button in the Configure the database section.
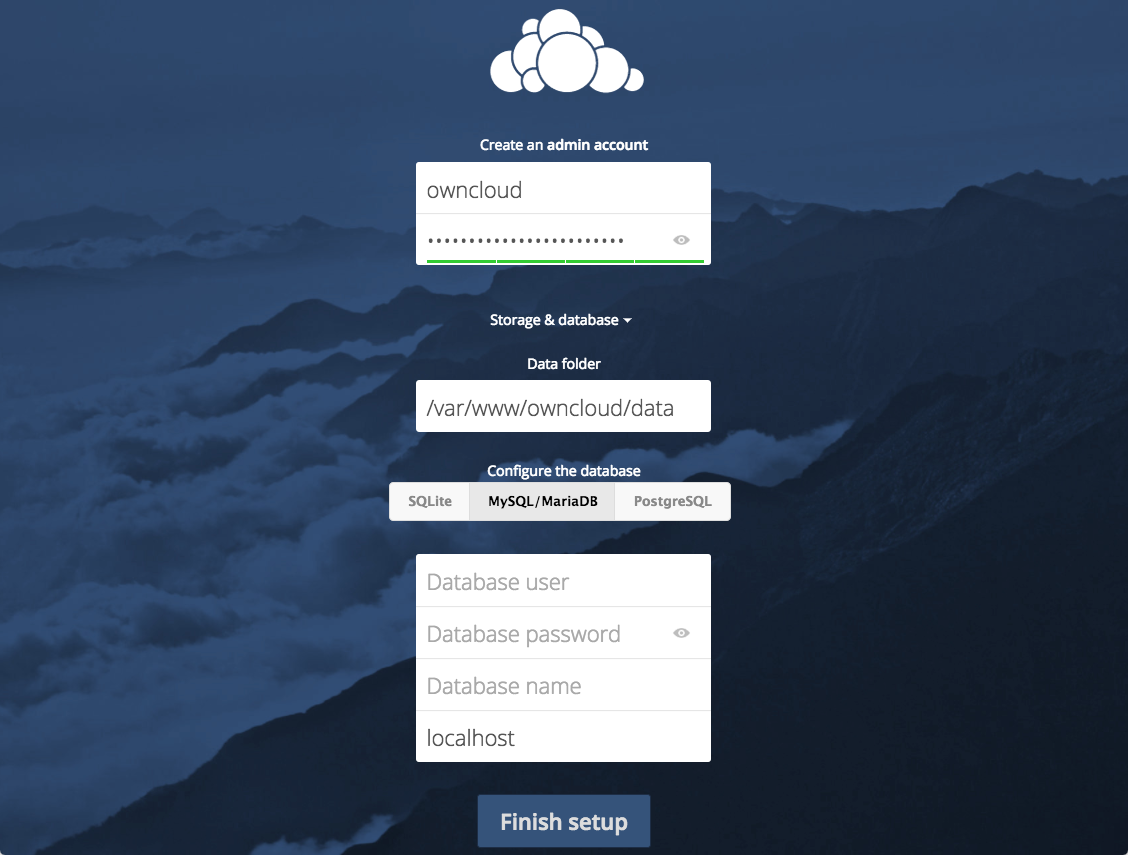
Enter the database information that you configured in the previous step. Below is an example, which matches the database credentials that we used in this guide:

Click the Finish setup button to sign into ownCloud. A safe home for all your data splash screen should appear:
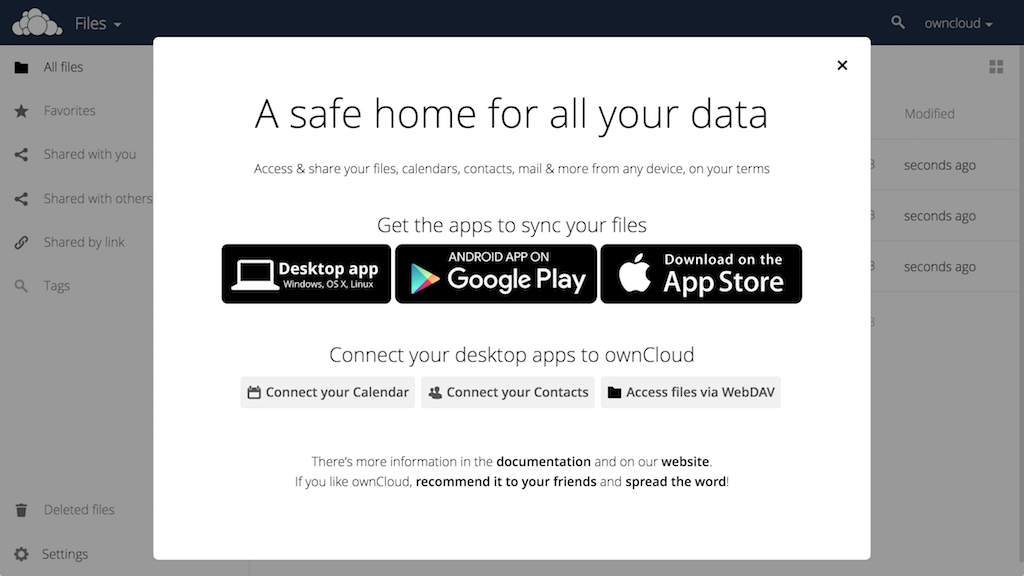
Click the x in the top-right corner of the splash screen to access the main interface:
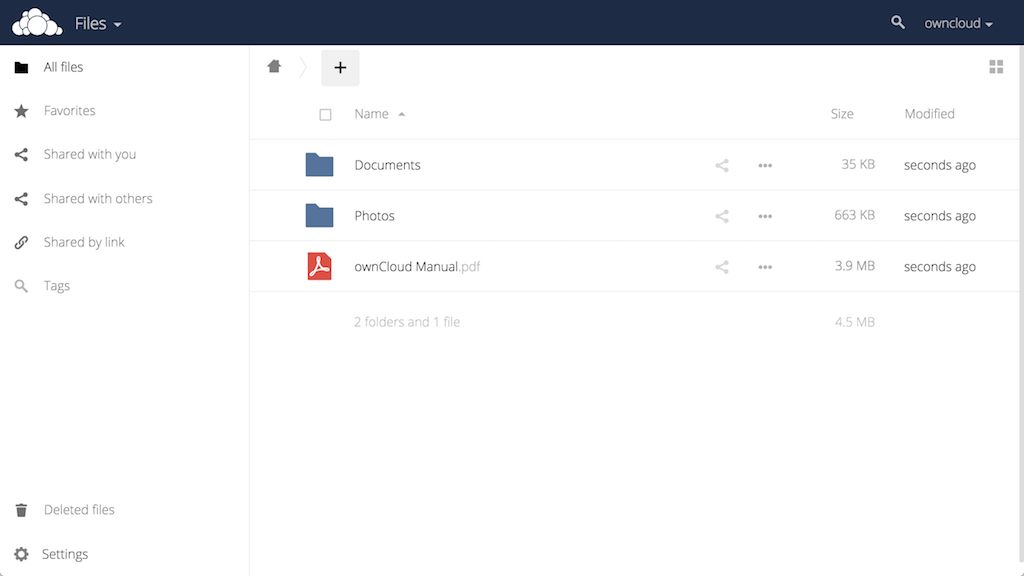
Here, you can create or upload files to your personal cloud.
Conclusion
ownCloud can replicate the capabilities of popular third-party cloud storage services. Content can be shared between users or externally with public URLs. The advantage of ownCloud is that the information is stored securely in a place that you control.
Explore the interface and for additional functionality, install plugins using ownCloud’s app store.
Thanks for learning with the DigitalOcean Community. Check out our offerings for compute, storage, networking, and managed databases.
About the author
Still looking for an answer?
This textbox defaults to using Markdown to format your answer.
You can type !ref in this text area to quickly search our full set of tutorials, documentation & marketplace offerings and insert the link!
When I run:
sudo systemctl restart apache2.service
The output is:
sudo: systemctl: command not found
Please help!
I’m very interested in trying out NextCloud – any assistance there would be much appreciated. Either way, thanks for the OneCloud manual install instructions.
I followed the directions but I cannot access my Owncloud at all. I followed the directions to make a SSL certificate and all went fine. I don’t know what I’m missing here.
I was trying to install one of those comodo certs sold by namecheap. Cause i wanted Owncloud to run on https. So, i was kind of struggling here following your instructions to install the comercial certificate, but then saw your let`s encrypt link, and gladly found out they have an automated tool called CERTBOT which made my day, by ****installing and configuring a total valid and trusted certificate in about 1 minute. ****
Now i am running OwnCloud under https with automatic redirect from port 80 to 443 and everything.
So thanks for all your clear explanations. I might learn more about this wonderful encryption tech in the future.
If you’re using ownCloud with DO’s block storage, you’ll want to check out this tutorial too:
Hi, Could you explain how to use sub.domain.com instead of domain.com/owncloud ? Thank you for all your great tutorials !
Hey there when I tried to make account in OwnCloud, it returns this error.
SQLSTATE[HY000][1045] Access denied for user 'user_test'@'localhost' (using password: yes)
I thought I input the password wrong. However, I can login via SSH to “user_test” profile in MySQL. What is the problem?
 This work is licensed under a Creative Commons Attribution-NonCommercial- ShareAlike 4.0 International License.
Become a contributor for community
Get paid to write technical tutorials and select a tech-focused charity to receive a matching donation.

DigitalOcean Documentation
Full documentation for every DigitalOcean product.

Resources for startups and AI-native businesses
The Wave has everything you need to know about building a business, from raising funding to marketing your product.
The developer cloud
Scale up as you grow — whether you're running one virtual machine or ten thousand.

Get started for free
Sign up and get $200 in credit for your first 60 days with DigitalOcean.*

*This promotional offer applies to new accounts only.