
Introduction
Drupal is a popular content management system (CMS) used to run some of the largest blogs and websites across the internet. Due to the stability of the base, the adaptability of the platform, and its active community, Drupal remains a popular choice after more than a decade on the scene.
In this guide, we will cover how to install Drupal on an Ubuntu 14.04 server. We will be using Apache to serve our site, since this is the configuration recommended by the Drupal team.
Prerequisites
Before you get started with this guide, you will need an Ubuntu 14.04 server with some basic configuration completed. Follow our Ubuntu 14.04 initial server setup guide to get a non-root user with sudo privileges set up.
You will also need to have Apache, PHP, and MySQL configured on your server. You can learn how to set this up by following our guide on getting LAMP installed on Ubuntu 14.04.
Once you have fulfilled the above requirements, continue on with this guide.
Before we get the Drupal files and install them into our web directory, we need to prepare our system. While Apache, PHP, and MySQL have already been installed, we need to make some additional changes and do some tweaks to each of these for our installation.
Configure a MySQL User and Database for Drupal
The first thing we will do is configure a MySQL user and database for our Drupal installation to use. It is important to configure a dedicated user and database for security reasons.
To begin, log into MySQL:
mysql -u root -p
You will be prompted for the MySQL root user’s password that you configured during the installation of that software.
Once you have successfully authenticated, you will be dropped into a MySQL prompt. First, create a database for your Drupal installation to use. We will call our database drupal for simplicity’s sake:
CREATE DATABASE drupal;
Next, you need to create a user that the Drupal software can use to connect to the database. In this guide, we’ll call our user drupaluser. Select a strong password to replace the one in the block below:
CREATE USER drupaluser@localhost IDENTIFIED BY 'password';
Now, we have a database and a user, but our user does not yet have permission to perform any actions on the database. We can fix that by granting the user permissions. Drupal needs a variety of permissions in order to function correctly. Below is a good selection that will allow the software to function without exposing our database unnecessarily:
GRANT SELECT,INSERT,UPDATE,DELETE,CREATE,DROP,INDEX,ALTER,CREATE TEMPORARY TABLES,LOCK TABLES ON drupal.* TO drupaluser@localhost;
Your user has now been given permission to administer the database we created. To implement these changes right now, we need to flush the privilege information to disk:
FLUSH PRIVILEGES;
Now, we can exit our interactive MySQL session:
exit
You will be dropped back into your bash session.
Install PHP Modules and Tweak the Configuration
Next, we will install a few PHP modules that will be needed by the Drupal application. Luckily, they are in Ubuntu’s default repositories.
Update your local package cache and install them by typing:
sudo apt-get update
sudo apt-get install php5-gd php5-curl libssh2-php
We will also be making a few small tweaks to our PHP configuration file. These are recommended by the Drupal developers. Open the Apache PHP configuration file with sudo privileges in your text editor:
sudo nano /etc/php5/apache2/php.ini
Search for the expose_php directive and the allow_url_fopen directive and set them both to “Off”:
. . .
expose_php = Off
. . .
allow_url_fopen = Off
. . .
Save and close the file when you are finished.
Enable Rewrite Functionality and Htaccess Files in Apache
Next, we should look at Apache. First, we want to enable rewrite functionality. This will allow our Drupal site to modify URLs to human-friendly strings.
The actual Apache mod_rewrite modules is already installed by default. However, it is not enabled. We can flip the switch to enable that module by typing:
sudo a2enmod rewrite
This will enable the module the next time Apache is restarted. Before we restart Apache, we need to adjust our virtual host configuration to allow the use of an .htaccess file. This file will contain the actual rewrite rules and is included by default in the Drupal installation.
Open the default virtualhost file now:
sudo nano /etc/apache2/sites-enabled/000-default.conf
Within the “VirtualHost” block, add a directory block that points to our web root. Within this block, set the AllowOverride directive to “All”. You may also want to add a ServerName directive to point to your domain name and change the ServerAdmin directive to reflect a valid email address:
<VirtualHost *:80>
    . . .
    ServerName  example.com
    ServerAdmin webmaster@example.com
    DocumentRoot /var/www/html

    <Directory /var/www/html>
        AllowOverride All
    </Directory>
    . . .
</VirtualHost>
Save and close the file when you are finished.
Now, we just need to restart the web server to implement our changes to Apache and PHP:
sudo service apache2 restart
Install the Drupal Files
Now that our system is ready, we can install Drupal into our web root.
Actually, we will initially unpack the files into our home directory and then copy them to the appropriate location. Doing so will give us ready access to the original files in the event that something goes wrong or in case any files are accidentally deleted later on.
Go to the Drupal download page and checkout the latest version under the “Recommended releases” section. Right click on the tar.gz link of the version you are interested and choose “copy link address” or whatever similar option your browser provides.
Back on your server, change to your home directory and use wget to download the project file using the link you copied:
cd ~
wget http://ftp.drupal.org/files/projects/drupal-7.32.tar.gz
Your link will likely have a different version number at the end. Once the file has been downloaded, extract the application directory by typing:
tar xzvf drupal*
Now, move into the newly extracted directory structure and use the rsync utility to safely copy all of the files into the web root directory of your server. We are using the dot in this command to specify the current directory. This is necessary in order to copy some hidden files that we need:
cd drupal*
sudo rsync -avz . /var/www/html
Now you have the original version of the files in a directory within your home folder in case you ever need to reference them. We will move into the web root directory to customize our installation:
cd /var/www/html
Adjusting the Drupal Files for Security and Ease of Installation
The web-based installation script requires that we make some changes to our Drupal directory in order to complete the process correctly. We should get this out of the way beforehand so that we do not have to switch back and forth between the web browser and the command line.
First, we need to make a new directory under the sub-tree sites/default called files:
mkdir /var/www/html/sites/default/files
Next, we should copy the default settings file to the filename that Drupal uses for the active configuration:
cp /var/www/html/sites/default/default.settings.php /var/www/html/sites/default/settings.php
This active settings file temporarily needs some additional permissions during the installation procedure. We need to give write permissions to the group owner for the time being (we will be assigning the group owner to the web user momentarily). We will remove this after the installation is successful:
chmod 664 /var/www/html/sites/default/settings.php
Next, we need to give group ownership of our files to the web user, which in Ubuntu is www-data. We want to give the entire Drupal installation these ownership properties:
sudo chown -R :www-data /var/www/html/*
Your server is now configured appropriately to run the web-based installation script.
Complete the Web-based Installation Procedure
The remainder of the installation will take place in your web browser. Open your browser and navigate to your server’s domain name or IP address:
http://server_domain_or_IP
You will see the Drupal installation procedure’s initial page:
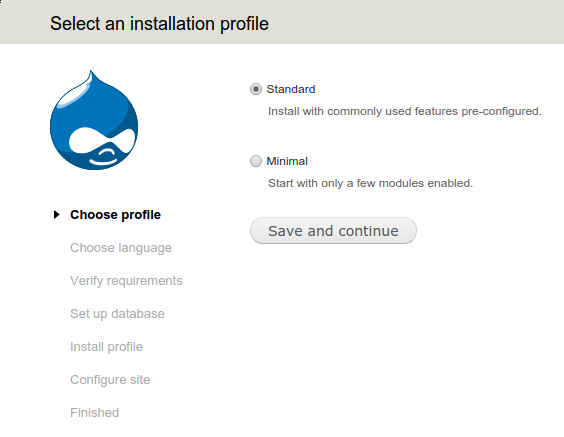
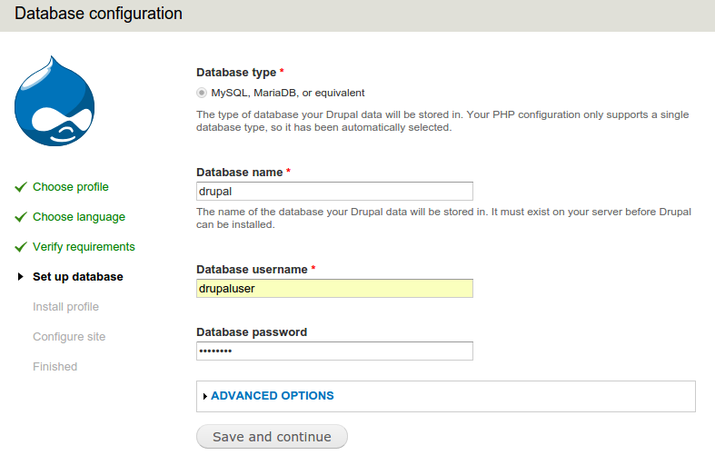
Unless you have a reason not to, select the “Standard” installation and click “Save and continue”. Click the next few continue buttons until you get to the database configuration page. Fill in the details you used when you configured your database and user.
For this guide, we used a database called drupal, a database user named drupaluser, and a password of password. You should have selected a different password during the user creation stage. Click “Save and continue” again when you have filled in your database details:
Note: When you click on “Save and continue”, there is a chance that you will be redirected back to the same database configuration page. If this happens, simply refresh the page. The database will be configured and the profile will be installed.
You will see an info box at the top of the page telling you that it is now appropriate to change the permissions of the settings file. We will do this momentarily. For now, you need to set up some basic information about your site. Fill in the fields using appropriate values for your site:
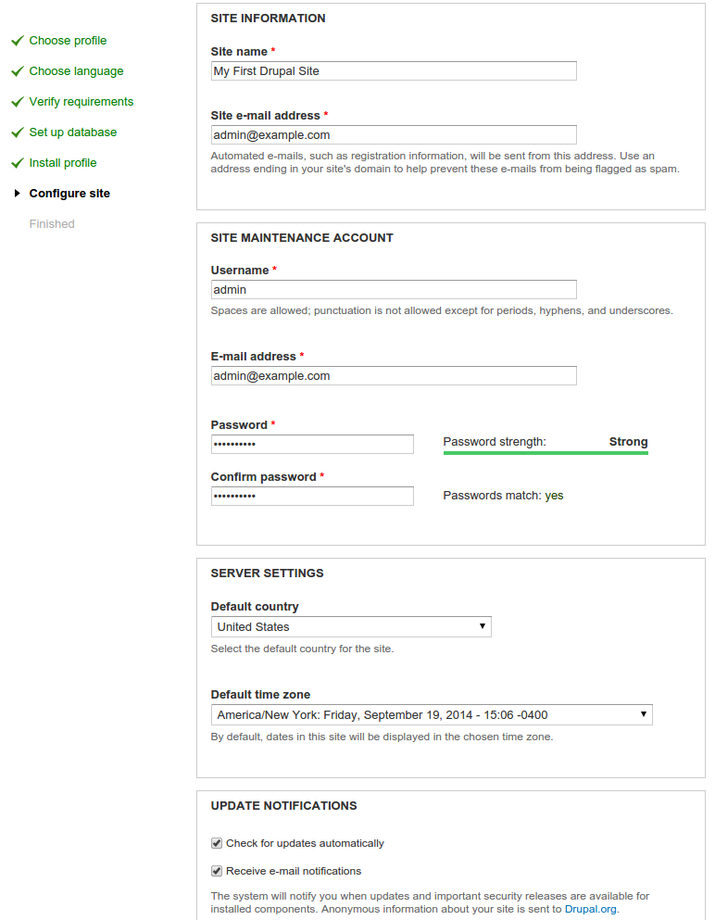
Click the “Save and Continue” button a final time to complete the installation. You can now visit your site by going to your domain name:
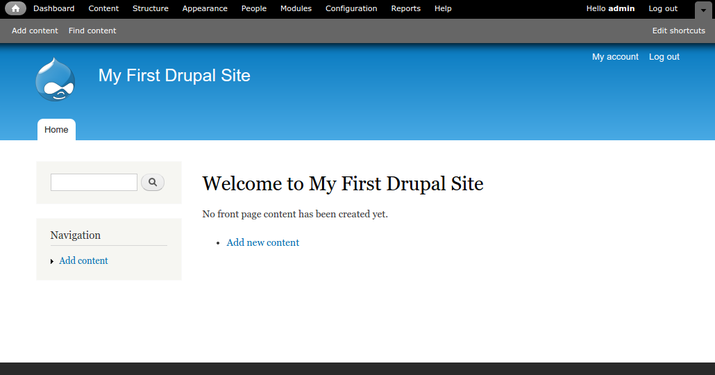
You have successfully completed the Drupal installation.
However, we still need to revert the permissions for our settings file so that unauthorized users cannot make changes. On your server, restrict write access to the file by typing:
chmod 644 /var/www/html/sites/default/settings.php
This should lock down further changes to the settings file.
Troubleshooting
If the final stage of the Drupal installation doesn’t complete, check your error logs:
sudo tail /var/log/apache2/error.log
If you see an error like this:
[Wed Nov 12 13:40:10.566144 2014] [:error] [pid 7178] [client 108.29.37.206:55238] PHP Fatal error:  Call to undefined function field_attach_load() in /var/www/html/includes/entity.inc on line 316, referer: http://12.34.56.78/install.php?profile=standard&locale=en
sh: 1: /usr/sbin/sendmail: not found
This indicates that the installation did not complete successfully. There are quite a few causes and fixes for this error documented by Drupal:
Some of the most likely fixes include editing the /etc/php5/apache2/php.ini file to raise the max_execution_time:
sudo nano /etc/php5/apache2/php.ini
File:
max_execution_time = 300
You may also want to try the browser installation in a browser other than Chrome, such as Safari. Browser cookie settings can interfere with the installation.
Regardless, once you implement your fix, you will have to remove the existing Drupal database and existing /var/www/html/sites/default/settings.php file, replace them with default copies, and start the installation over again. If you have any data or settings worth preserving, make backups.
To do this, you can log into MySQL and DROP DATABASE drupal; and then follow the previous database section again to create the database and grant the privileges on it.
You can also run cp /var/www/html/sites/default/default.settings.php /var/www/html/sites/default/settings.php again to replace the settings file. Make sure you run the chmod 664 /var/www/html/sites/default/settings.php command to set the correct permissions again as well.
Then visit your IP address again - possibly in a different browser - and attempt the final installation again.
Conclusion
You now have a solid base to build your Drupal site. Drupal is incredibly flexible, allowing you to customize the look and functionality of the site based on your needs and the needs of your users.
To get some ideas about where to go from here, visit our Drupal tags page where you can find tutorials to help you along your way. You will also find a question and answer area to get help from or contribute to the community.
Thanks for learning with the DigitalOcean Community. Check out our offerings for compute, storage, networking, and managed databases.
About the author
Former Senior Technical Writer at DigitalOcean, specializing in DevOps topics across multiple Linux distributions, including Ubuntu 18.04, 20.04, 22.04, as well as Debian 10 and 11.
Still looking for an answer?
This textbox defaults to using Markdown to format your answer.
You can type !ref in this text area to quickly search our full set of tutorials, documentation & marketplace offerings and insert the link!
I’m pretty sure best practice would set the last command to be
chmod 640 /var/www/html/sites/default/settings.php
Only the server (www-data) should be able to read the sensitive information in settings.php.
I generally use chmod 640 for the entire site, and then make only the files subdirectory readable by all and writeable by www-data.
For advanced web masters, drush is the drupal shell package that substantially improves deployment and management of drupal sites. Bit of a learning curve, however.
Can you make a tutorial for installing Drupal with Nginx on a Centos server?
I used this article on How to Install Drupal 7 on CentOS 7 with Nginx but they are using MariaDB and I want MySQL for my Centos server.
Thanks in advance.
@jellingwood Thanks for the suggestion. I will try that.
P.S. I appreciate your fast response to my question. But i couldn’t reply to your comment, so i had to post a new one. :) Have a great day.
I followed all your steps exactly. Everything appeared to install okay. When I tried to install a module Drupal gives me a blank screen and the module is never installed. I suspect it’s something to do with permissions, or my VPS settings in apache, or my .htaccess not being properly used.
Can you offer any help why i can’t install modules from the website?
This page could do with updating - mentions Drupal 7.31 but 7.32 is the latest due to a highly critical security issue so always ensure you use the latest version, check on drupal.org first to be sure!
I added a new troubleshooting section in the article for some common causes of the “Fatal error: Call to undefined function field_attach_load()” error.
Adding to the Install PHP Module and Tweak Configuration section, I had to install the php5-pdo_mysql module for my Drupal 7 site. In my case, I was not installing a new site, but was cloning the code of an existing Drupal 7.31 site. I was getting a white screen on the home page until I downloaded php5-pdo_mysql.
I am having a lot of trouble with this install.
I followed all the instructions exactly and then once I get to the database part of the install script, I enter the information and then I get the same screen again once I submit the form.
If I try to submit the form again, I just get a white screen.
The database gets about half populated, but won’t install all the way.
Anyone have any idea why this is happening?
 This work is licensed under a Creative Commons Attribution-NonCommercial- ShareAlike 4.0 International License.
Become a contributor for community
Get paid to write technical tutorials and select a tech-focused charity to receive a matching donation.

DigitalOcean Documentation
Full documentation for every DigitalOcean product.

Resources for startups and AI-native businesses
The Wave has everything you need to know about building a business, from raising funding to marketing your product.
The developer cloud
Scale up as you grow — whether you're running one virtual machine or ten thousand.

Start building today
From GPU-powered inference and Kubernetes to managed databases and storage, get everything you need to build, scale, and deploy intelligent applications.
