Not using Ubuntu 22.04?
Choose a different version or distribution.")
Introduction
Java and the JVM (Java’s virtual machine) are required for many kinds of software, including Tomcat, Jetty, Glassfish, Cassandra, and Jenkins.
In this guide, you will install various versions of the Java Runtime Environment (JRE) and the Java Developer Kit (JDK) using apt. You’ll install OpenJDK as well as the official JDK from Oracle. You’ll then select the version you wish to use for your projects. When you’re finished, you’ll be able to use the JDK to develop software or the Java Runtime to run applications.
Deploy your frontend applications from GitHub using DigitalOcean App Platform. Let DigitalOcean focus on scaling your app.
Key Takeaways:
- Ubuntu allows you to install Java easily using
apt, with OpenJDK available directly from the official repositories for both JRE and JDK use cases. - The default Java installation method uses OpenJDK, while Oracle JDK requires a manual download and a third-party installer due to Oracle’s licensing restrictions.
- Java installations can be verified and managed using standard commands such as
java -version,javac -version, andupdate-alternatives. - Multiple Java versions can coexist on the same system, and
update-alternativeslets you choose which version is used by default. - Many Java-based applications rely on the
JAVA_HOMEenvironment variable, which must point to the Java installation directory rather than the executable. - Common Java setup issues on Ubuntu, such as missing commands or unset environment variables, can usually be resolved by adjusting
PATH, settingJAVA_HOME, or reinstalling the required packages withapt.
Prerequisites
To follow this tutorial, you will need:
- One Ubuntu server set up by following the Ubuntu initial server setup guide, including a sudo non-root user and a firewall.
Step 1 — Installing Java
An installation of Java comes with two main components. The JDK provides essential software tools to develop in Java, such as a compiler and debugger. The JRE is used to actually execute Java programs. Additionally, there are two main Java installation options to choose from. OpenJDK is the open-source implementation of Java and comes packaged with Ubuntu. Oracle JDK is the original version of Java and is fully maintained by Oracle, the developers of Java.
Both of these versions are officially recognized by Oracle. Both are also developed by Oracle, but OpenJDK has the addition of community contributions due to its open-source nature. However, starting with Java 11, the two options are now functionally identical as detailed by Oracle. The choice between which to install comes down to choosing the appropriate licensing for your circumstance. Additionally, OpenJDK has the option to install the JRE separately, while Oracle JDK comes packaged with its JRE.
Option 1 — Installing the Default JRE/JDK
One option for installing Java is to use the version packaged with Ubuntu. By default, Ubuntu includes OpenJDK 11, which is an open-source variant of the JRE and JDK.
To install the OpenJDK version of Java, first update your apt package index:
- sudo apt update
Next, check if Java is already installed:
- java -version
If Java is not currently installed, you’ll get the following output:
OutputCommand 'java' not found, but can be installed with:

sudo apt install default-jre              # version 2:1.11-72build1, or
sudo apt install openjdk-11-jre-headless  # version 11.0.14+9-0ubuntu2
sudo apt install openjdk-17-jre-headless  # version 17.0.2+8-1
sudo apt install openjdk-18-jre-headless  # version 18~36ea-1
sudo apt install openjdk-8-jre-headless   # version 8u312-b07-0ubuntu1
Execute the following command to install the default OpenJDK JRE:
- sudo apt install default-jre
The JRE will allow you to run almost all Java software.
Verify the installation with:
- java -version
You’ll receive output similar to the following:
Outputopenjdk version "11.0.14" 2022-01-18
OpenJDK Runtime Environment (build 11.0.14+9-Ubuntu-0ubuntu2)
OpenJDK 64-Bit Server VM (build 11.0.14+9-Ubuntu-0ubuntu2, mixed mode, sharing)
You may need the JDK in addition to the JRE in order to compile and run some specific Java-based software. To install the JDK, execute the following command, which will also install the JRE:
- sudo apt install default-jdk
Verify that the JDK is installed by checking the version of javac, the Java compiler:
- javac -version
You’ll see the following output:
Outputjavac 11.0.14
Next, you’ll learn how to install Oracle’s official JDK and JRE.
Option 2 — Installing Oracle JDK 11
Oracle’s licensing agreement for Java doesn’t allow automatic installation through package managers. To install the Oracle JDK, which is the official version distributed by Oracle, you must create an Oracle account and manually download the JDK. You then add a new package repository for the version you’d like to use. Then you can use apt to install it with help from a third-party installation script. Oracle JDK comes with the JRE included, so you don’t need to install that separately.
The version of Oracle’s JDK you’ll need to download must match the version of the installer script. To find out which version you need, visit the oracle-java11-installer page.
Locate the package for Jammy, as shown in the following figure:
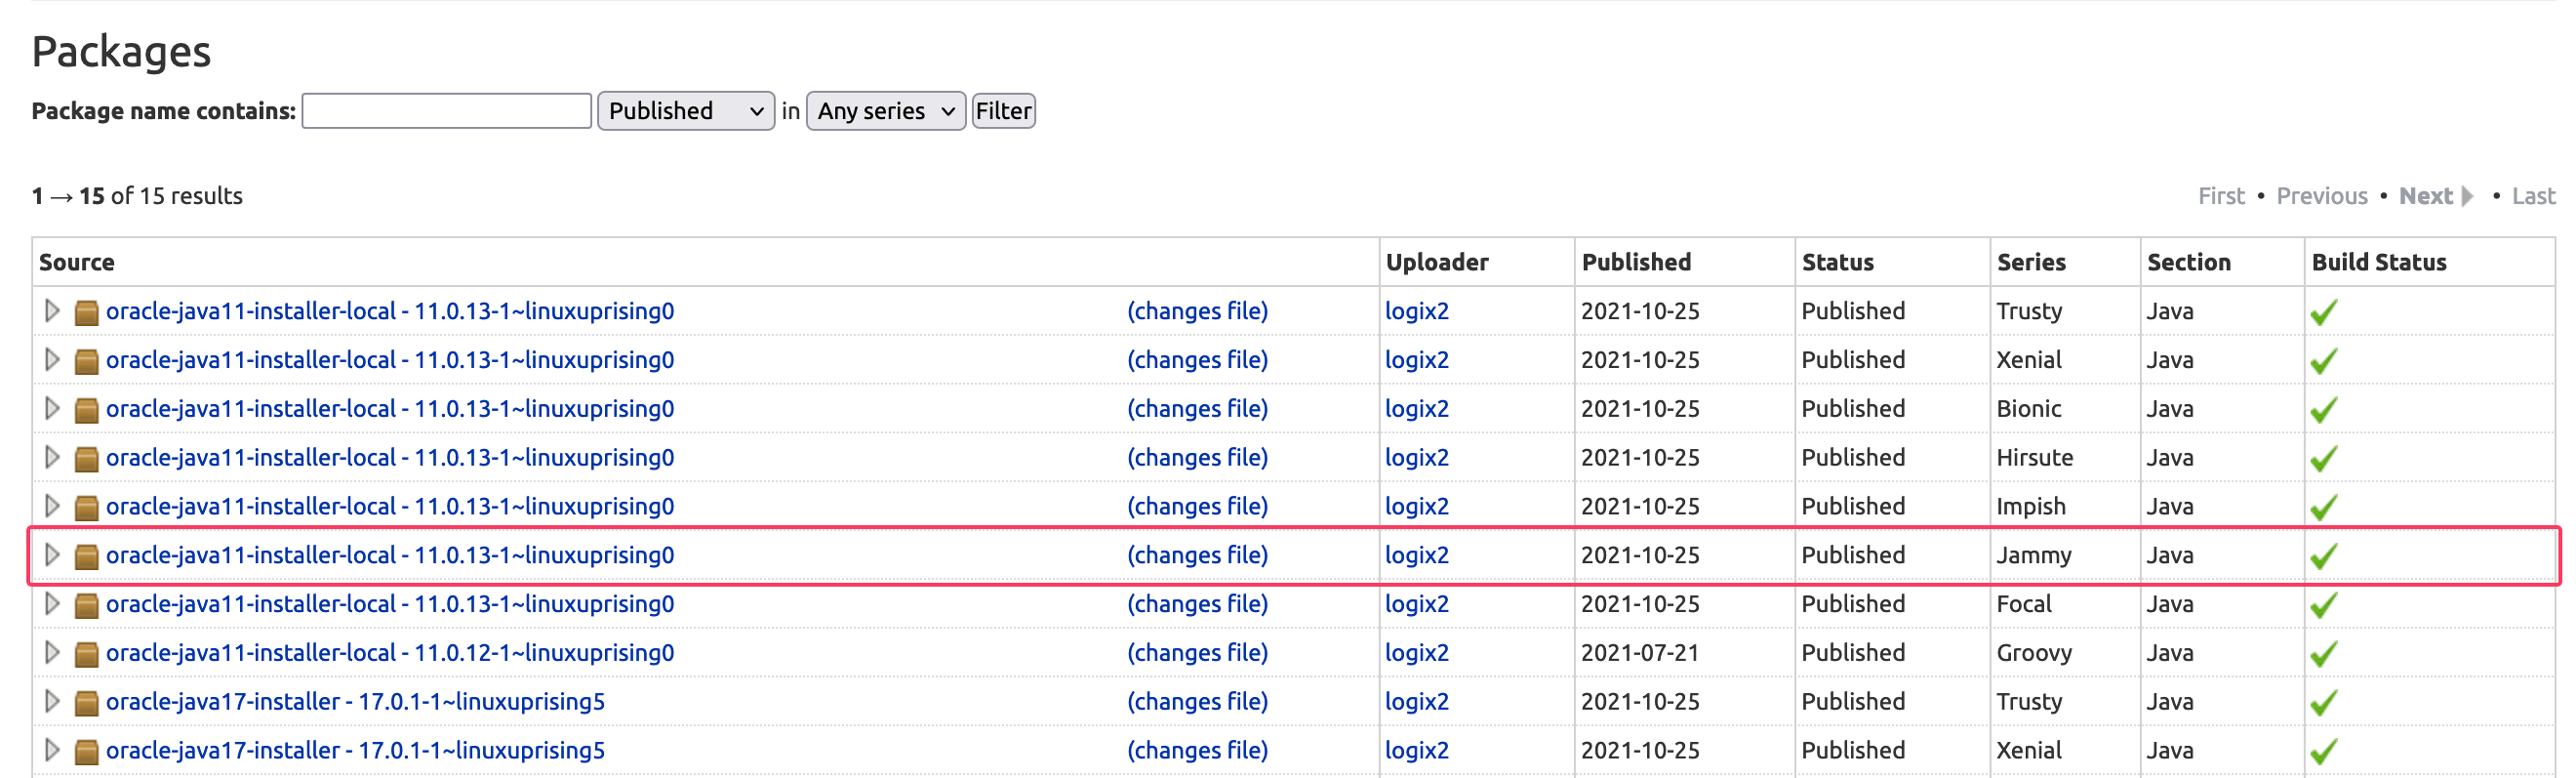
In this image, the version of the script is 11.0.13. In this case, you would need Oracle JDK 11.0.13. Your version number may vary depending on when you’re installing the software.
You don’t need to download anything from this page; you’ll download the installation script through apt shortly.
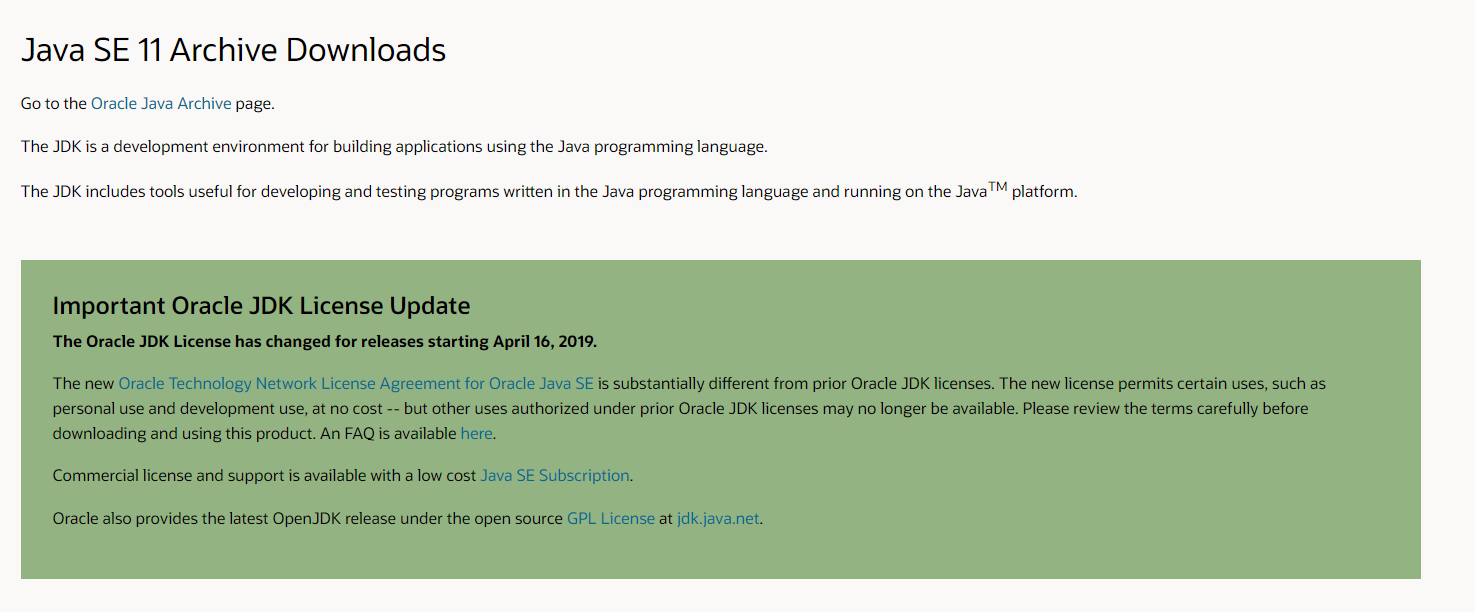
Next, visit the Archive Downloads and locate the version that matches the one you need.
From this list, choose the Linux x64 compressed archive .tar.gz package:
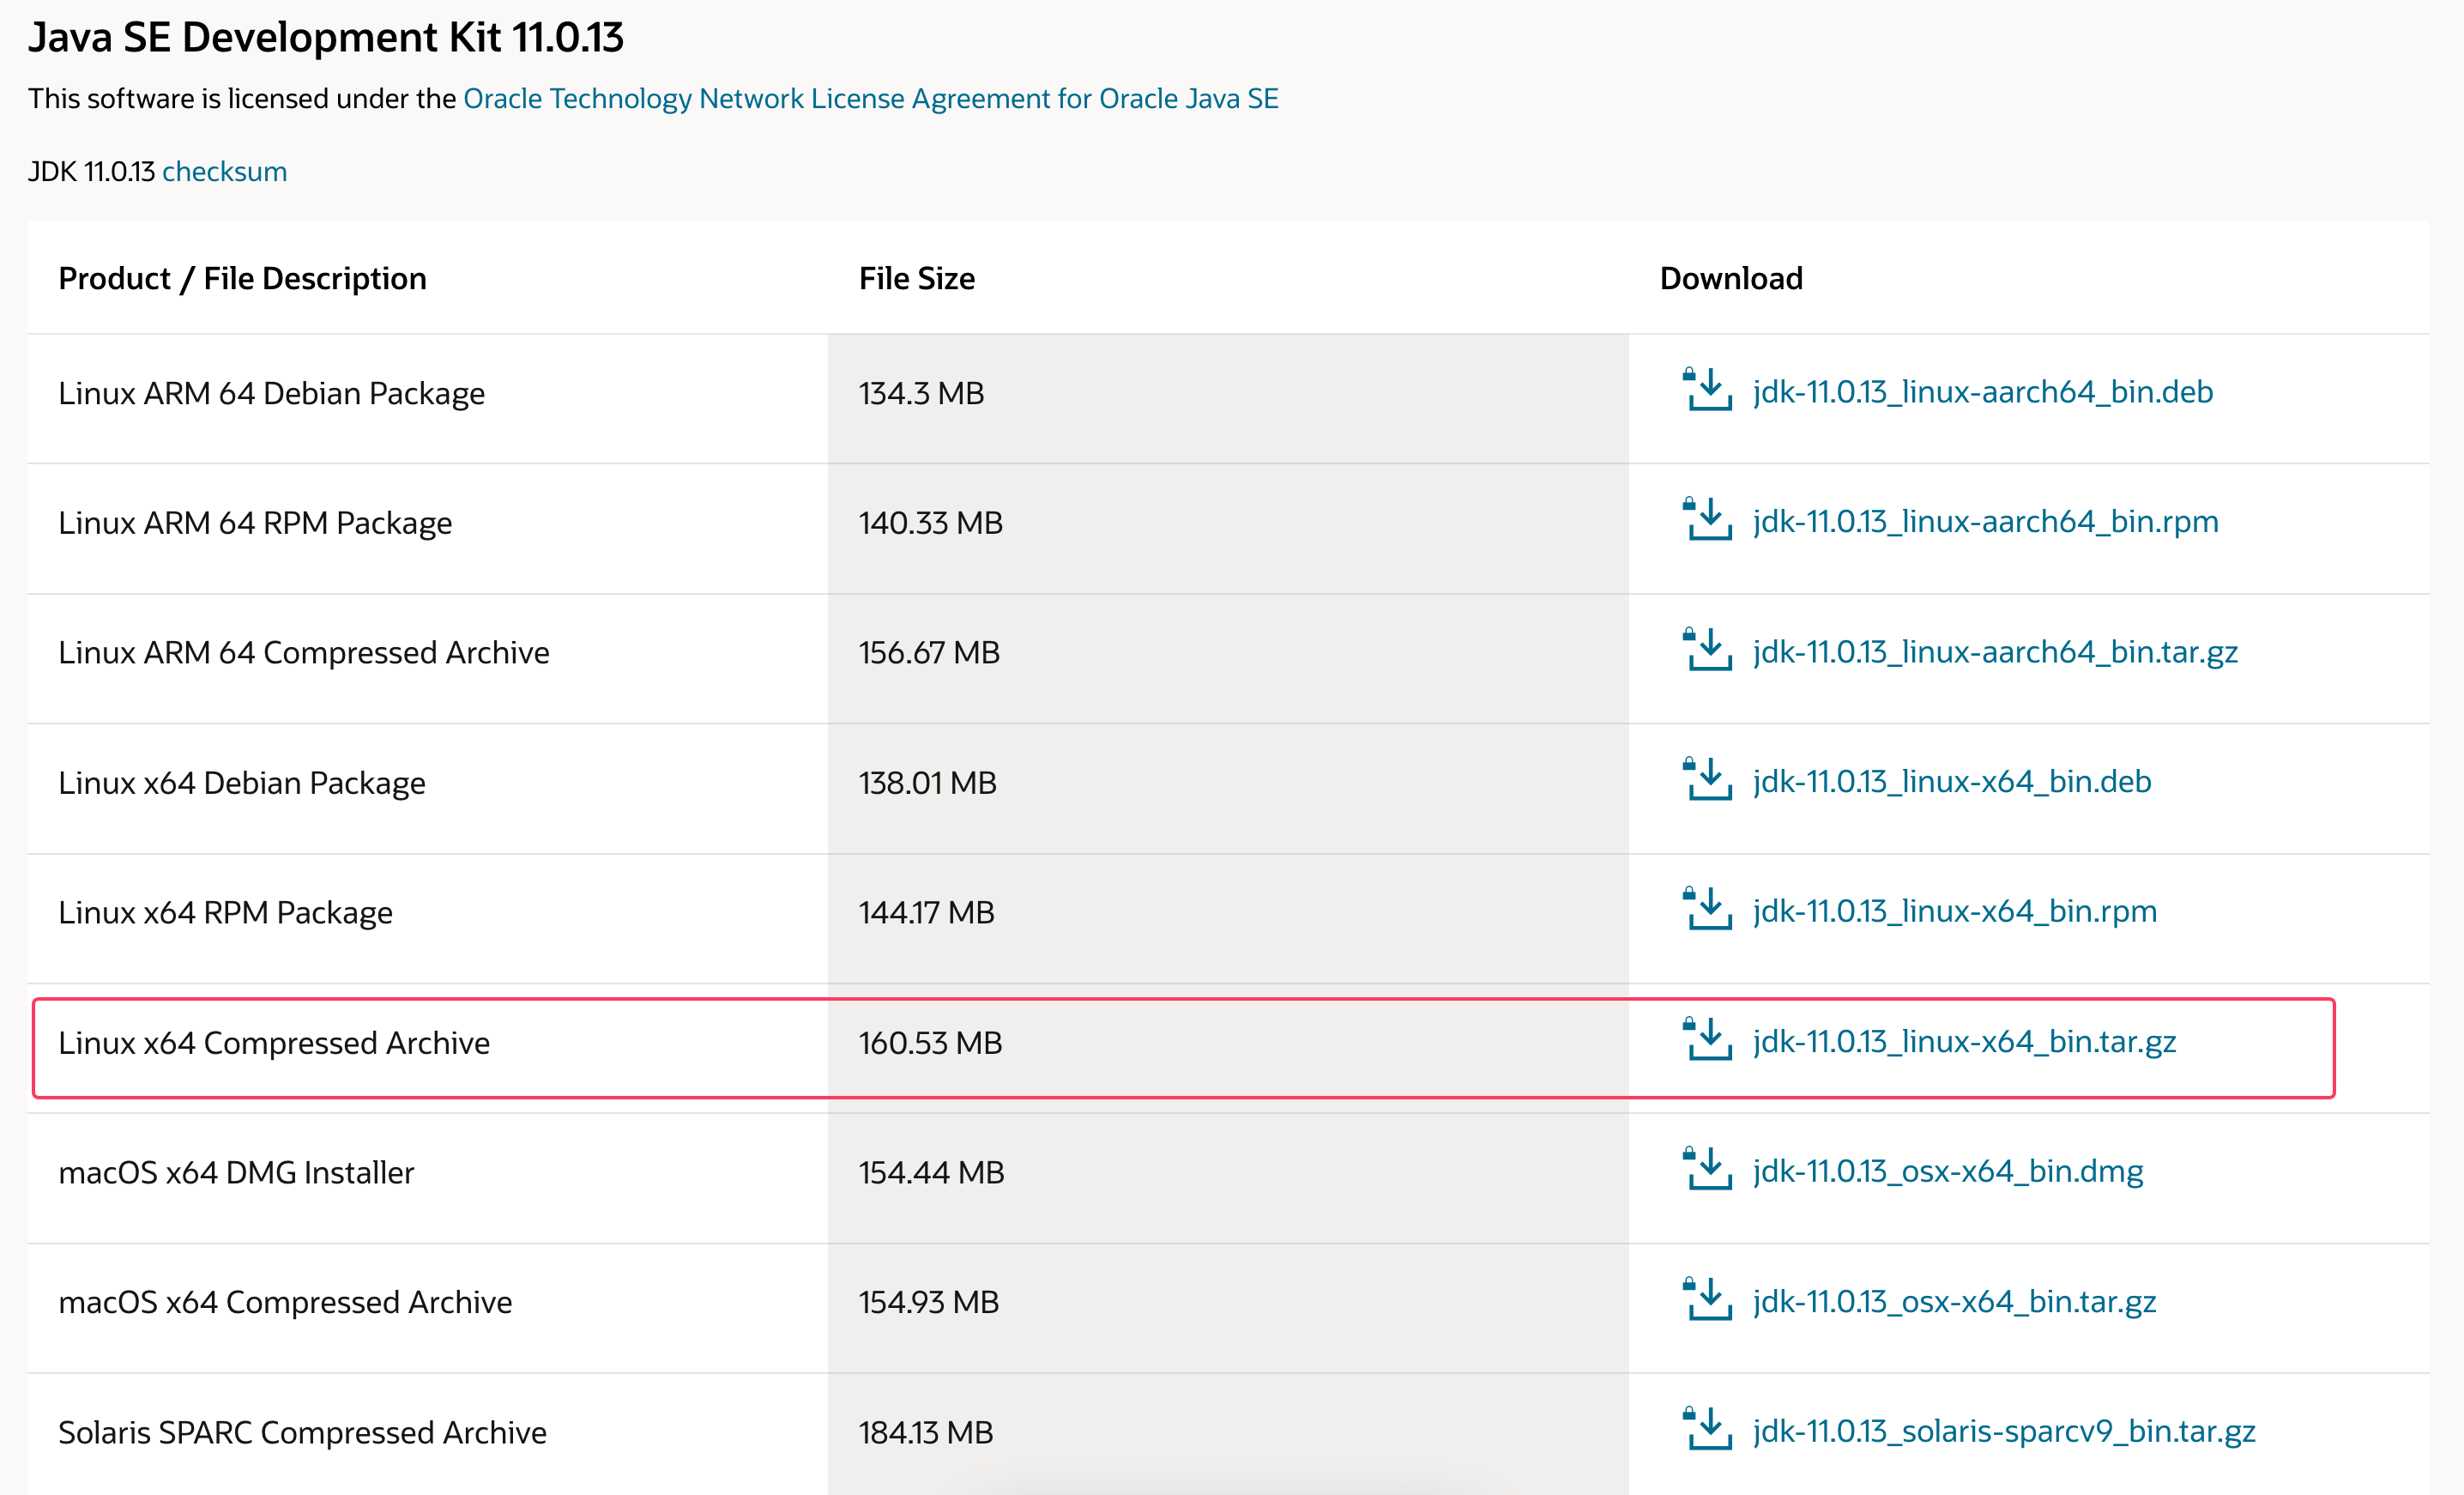
You’ll be presented with a screen asking you to accept the Oracle license agreement. Select the checkbox to accept the license agreement and press the Download button. Your download will begin. You may need to log in to your Oracle account one more time before the download starts.
Once the file has downloaded, you’ll need to transfer it to your server. On your local machine, upload the file to your server. On macOS, Linux, or Windows using the Windows Subsystem for Linux, use the scp command to transfer the file to the home directory of your sammy user. The following command assumes you’ve saved the Oracle JDK file to your local machine’s Downloads folder:
- scp Downloads/jdk-11.0.13_linux-x64_bin.tar.gz sammy@your_server_ip:~
Once the file upload has completed, return to your server and add the third-party repository that will help you install Oracle’s Java.
First, import the signing key used to verify the software you’re about to install:
- sudo gpg --homedir /tmp --no-default-keyring --keyring /usr/share/keyrings/oracle-jdk11-installer.gpg --keyserver keyserver.ubuntu.com --recv-keys EA8CACC073C3DB2A
You’ll see this output:
Outputgpg: keybox '/usr/share/keyrings/oracle-jdk11-installer.gpg' created
gpg: /tmp/trustdb.gpg: trustdb created
gpg: key EA8CACC073C3DB2A: public key "Launchpad PPA for Linux Uprising" imported
gpg: Total number processed: 1
gpg:               imported: 1
Next, add the repository to your list of package sources:
echo "deb [arch=amd64 signed-by=/usr/share/keyrings/oracle-jdk11-installer.gpg] https://ppa.launchpadcontent.net/linuxuprising/java/ubuntu jammy main" | sudo tee /etc/apt/sources.list.d/oracle-jdk11-installer.list > /dev/null
Update your package list to make the new software available for installation:
sudo apt update
The installer will look for the Oracle JDK you downloaded in /var/cache/oracle-jdk11-installer-local. Create this directory and move the Oracle JDK archive there:
sudo mkdir -p /var/cache/oracle-jdk11-installer-local/
sudo cp jdk-11.0.13_linux-x64_bin.tar.gz /var/cache/oracle-jdk11-installer-local/
Finally, install the package:
sudo apt install oracle-java11-installer-local
The installer will first ask you to accept the Oracle license agreement. Accept the agreement, then the installer will extract the Java package and install it.
Now you’ll look at how to select the version of Java you want to use.
Step 2 — Managing Java
You can have multiple Java installations on one server. You can configure which version is used by default on the command line by using the update-alternatives command.
- sudo update-alternatives --config java
This is what the output would look like if you’ve installed both versions of Java in this tutorial:
OutputThere are 2 choices for the alternative java (providing /usr/bin/java).

  Selection    Path                                         Priority   Status
------------------------------------------------------------
  0            /usr/lib/jvm/java-11-openjdk-amd64/bin/java   1111      auto mode
  1            /usr/lib/jvm/java-11-openjdk-amd64/bin/java   1111      manual mode
* 2            /usr/lib/jvm/java-11-oracle/bin/java          1091      manual mode

Press <enter> to keep the current choice[*], or type selection number:
Choose the number associated with the Java version to use it as the default, or press ENTER to leave the current settings in place.
You can do this for other Java commands, such as the compiler (javac):
- sudo update-alternatives --config javac
Other commands for which this command can be run include, but are not limited to: keytool, javadoc, and jarsigner.
Step 3 — Setting the JAVA_HOME Environment Variable
JAVA_HOME Environment VariableMany programs written using Java use the JAVA_HOME environment variable to determine the Java installation location.
To set this environment variable, first determine where Java is installed. Use the update-alternatives command:
- sudo update-alternatives --config java
This command shows each installation of Java along with its installation path:
OutputThere are 2 choices for the alternative java (providing /usr/bin/java).

  Selection    Path                                         Priority   Status
------------------------------------------------------------
  0            /usr/lib/jvm/java-11-openjdk-amd64/bin/java   1111      auto mode
  1            /usr/lib/jvm/java-11-openjdk-amd64/bin/java   1111      manual mode
* 2            /usr/lib/jvm/java-11-oracle/bin/java          1091      manual mode

Press <enter> to keep the current choice[*], or type selection number:
In this case, the installation paths are as follows:
- OpenJDK 11 is located at
/usr/lib/jvm/java-11-openjdk-amd64/bin/java. - Oracle Java is located at
/usr/lib/jvm/java-11-oracle/jre/bin/java.
Copy the path from your preferred installation. Then open /etc/environment using nano or your favorite text editor:
- sudo nano /etc/environment
At the end of this file, add the following line, making sure to replace the highlighted path with your own copied path, and to not include the bin/ portion of the path:
JAVA_HOME="/usr/lib/jvm/java-11-openjdk-amd64"
Modifying this file will set the JAVA_HOME path for all users on your system.
Save the file and exit the editor.
Now reload this file to apply the changes to your current session:
- source /etc/environment
Verify that the environment variable is set:
- echo $JAVA_HOME
You’ll see the path you just set:
Output/usr/lib/jvm/java-11-openjdk-amd64
Other users will need to execute the command source /etc/environment or log out and log back in to apply this setting.
Common Errors and Debugging
“Java not found” or “command not found”
If you encounter the error Java not found or command not found, it means that the system cannot locate the Java executable. This can be resolved by setting the PATH environment variable to include the directory where Java is installed.
export PATH=$PATH:/usr/lib/jvm/java-11-openjdk-amd64/bin
“JAVA_HOME is not set”
If you receive the error JAVA_HOME is not set, it indicates that the JAVA_HOME environment variable is not configured. This can be resolved by setting the JAVA_HOME environment variable to the directory where Java is installed.
export JAVA_HOME=/usr/lib/jvm/java-11-openjdk-amd64
“Cannot locate the installed JDK or JRE version”
If you encounter the error Cannot locate the installed JDK or JRE version, it means that the system cannot find the installed Java Development Kit (JDK) or Java Runtime Environment (JRE). This can be resolved by checking the installation path and setting the PATH environment variable to include the correct directory.
export PATH=$PATH:/usr/lib/jvm/java-11-openjdk-amd64/bin
“Permission denied” during installation
If you encounter the error Permission denied during the installation of Java, it means that the user does not have the necessary permissions to install Java. This can be resolved by running the installation command with sudo.
sudo apt install openjdk-11-jdk
FAQs
1. How do I check if Java is installed on Ubuntu?
You can check if Java is installed on your Ubuntu system by running the following command in your terminal:
java -version
If Java is installed, you will see the version of Java that is currently installed. If Java is not installed, you will see an error message.
2. What is the difference between JRE and JDK?
The Java Runtime Environment (JRE) is a software package that provides Java programs with the necessary runtime environment to execute. The Java Development Kit (JDK) is a software package that includes the JRE, as well as development tools such as a compiler and debugger.
| Feature | JRE | JDK |
|---|---|---|
| Runtime Environment | Yes | Yes |
| Development Tools | No | Yes |
| Compiler | No | Yes |
| Debugger | No | Yes |
3. How do I install a specific Java version on Ubuntu?
You can install a specific version of Java on your Ubuntu system by using the apt command. For example, to install Java 11, you can run the following command:
sudo apt install openjdk-11-jdk
4. How can I switch between multiple Java versions?
If you have multiple versions of Java installed on your system, you can use the update-alternatives command to switch between them. For example, to switch to Java 11, you can run the following command:
sudo update-alternatives --config java
5. How do I uninstall Java from Ubuntu?
You can uninstall Java from your Ubuntu system by running the following command in your terminal:
sudo apt remove openjdk-11-jdk
6. What is JAVA_HOME, and how do I set it?
JAVA_HOME is an environment variable that points to the directory where Java is installed on your system. You can set the JAVA_HOME environment variable by running the following command in your terminal:
export JAVA_HOME=/usr/lib/jvm/java-11-openjdk-amd64
Conclusion
In this tutorial, you successfully installed and managed multiple versions of Java on your Ubuntu system. For most users, OpenJDK provides full Java compatibility and long-term security updates without the complexity of manual licensing or third-party repositories. This setup enables you to install and run a wide range of Java-based applications, such as Tomcat, Jetty, Glassfish, Cassandra, or Jenkins.
For more installation-related tutorials, check out the following articles:
Thanks for learning with the DigitalOcean Community. Check out our offerings for compute, storage, networking, and managed databases.
About the author(s)
Managed the Write for DOnations program, wrote and edited community articles, and makes things on the Internet. Expertise in DevOps areas including Linux, Ubuntu, Debian, and more.
Anish is a Sr Technical Content Strategist and Team Lead at DigitalOcean with 7+ years of experience as an SRE at Nutanix and Cloud consultant at AMEX, and technical writing at DOCN, and shipping deep infra and AI inference tutorials that help developers deploy production‑ready applications on DigitalOcean.
With over 6 years of experience in tech publishing, Mani has edited and published more than 75 books covering a wide range of data science topics. Known for his strong attention to detail and technical knowledge, Mani specializes in creating clear, concise, and easy-to-understand content tailored for developers.
Still looking for an answer?
This textbox defaults to using Markdown to format your answer.
You can type !ref in this text area to quickly search our full set of tutorials, documentation & marketplace offerings and insert the link!
 This work is licensed under a Creative Commons Attribution-NonCommercial- ShareAlike 4.0 International License.
Become a contributor for community
Get paid to write technical tutorials and select a tech-focused charity to receive a matching donation.

DigitalOcean Documentation
Full documentation for every DigitalOcean product.

Resources for startups and AI-native businesses
The Wave has everything you need to know about building a business, from raising funding to marketing your product.
The developer cloud
Scale up as you grow — whether you're running one virtual machine or ten thousand.

Start building today
From GPU-powered inference and Kubernetes to managed databases and storage, get everything you need to build, scale, and deploy intelligent applications.
