WordPress is the most popular CMS (content management system) on the internet. It allows you to easily set up flexible blogs and websites on top of a MySQL backend with PHP processing. WordPress has seen incredible adoption and is a great choice for getting a website up and running quickly. After setup, almost all administration can be done through the web frontend.
In this guide, we’ll focus on getting a WordPress instance set up on a LEMP stack (Linux, Nginx, MySQL, and PHP) on an Ubuntu 16.04 server.
In order to complete this tutorial, you will need access to an Ubuntu 16.04 server.
You will need to perform the following tasks before you can start this guide:
sudo
user on your server: We will be completing the steps in this guide using a non-root user with sudo
privileges. You can create a user with sudo
privileges by following our Ubuntu 16.04 initial server setup guide.When you are finished the setup steps, log into your server as your sudo
user and continue below.
The first step that we will take is a preparatory one. WordPress uses MySQL to manage and store site and user information. We have MySQL installed already, but we need to make a database and a user for WordPress to use.
To get started, log into the MySQL root (administrative) account by issuing this command:
You will be prompted for the password you set for the MySQL root account when you installed the software.
First, we can create a separate database that WordPress can control. You can call this whatever you would like, but we will be using wordpress
in this guide to keep it simple. You can create the database for WordPress by typing:
Note
Every MySQL statement must end in a semi-colon (;). Check to make sure this is present if you are running into any issues.
Next, we are going to create a separate MySQL user account that we will use exclusively to operate on our new database. Creating one-function databases and accounts is a good idea from a management and security standpoint. We will use the name wordpressuser
in this guide. Feel free to change this if you’d like.
We are going to create this account, set a password, and grant access to the database we created. We can do this by typing the following command. Remember to choose a strong password here for your database user:
You now have a database and user account, each made specifically for WordPress. We need to flush the privileges so that the current instance of MySQL knows about the recent changes we’ve made:
Exit out of MySQL by typing:
Next, we will be making a few minor adjustments to our Nginx server block files.
Open the default server block file with sudo
privileges to begin:
Within the main server
block, we need to add a few location
blocks.
Start by creating exact-matching location blocks for requests to /favicon.ico
and /robots.txt
, both of which we do not want to log requests for.
We will use a regular expression location to match any requests for static files. We will again turn off the logging for these requests and will mark them as highly cacheable since these are typically expensive resources to serve. You can adjust this static files list to contain any other file extensions your site may use:
server {
. . .
location = /favicon.ico { log_not_found off; access_log off; }
location = /robots.txt { log_not_found off; access_log off; allow all; }
location ~* \.(css|gif|ico|jpeg|jpg|js|png)$ {
expires max;
log_not_found off;
}
. . .
}
Inside of the existing location /
block, we need to adjust the try_files
list so that instead of returning a 404 error as the default option, control is passed to the index.php
file with the request arguments.
This should look something like this:
server {
. . .
location / {
#try_files $uri $uri/ =404;
try_files $uri $uri/ /index.php$is_args$args;
}
. . .
}
When you are finished, save and close the file.
Now, we can check our configuration for syntax errors by typing:
If no errors were reported, reload Nginx by typing:
When setting up our LEMP stack, we only required a very minimal set of extensions in order to get PHP to communicate with MySQL. WordPress and many of its plugins leverage additional PHP extensions.
We can download and install some of the most popular PHP extensions for use with WordPress by typing:
Note
Each WordPress plugin has its own set of requirements. Some may require additional PHP packages to be installed. Check your plugin documentation to discover its PHP requirements. If they are available, they can be installed with apt-get
as demonstrated above.
When you are finished installing the extensions, restart the PHP-FPM process so that the running PHP processor can leverage the newly installed features:
Now that our server software is configured, we can download and set up WordPress. For security reasons in particular, it is always recommended to get the latest version of WordPress from their site.
Change into a writable directory and then download the compressed release by typing:
Extract the compressed file to create the WordPress directory structure:
We will be moving these files into our document root momentarily. Before we do that, we can copy over the sample configuration file to the filename that WordPress actually reads:
We can also create the upgrade
directory, so that WordPress won’t run into permissions issues when trying to do this on its own following an update to its software:
Now, we can copy the entire contents of the directory into our document root. We are using the -a
flag to make sure our permissions are maintained. We are using a dot at the end of our source directory to indicate that everything within the directory should be copied, including any hidden files:
Before we do the web-based WordPress setup, we need to adjust some items in our WordPress directory.
One of the big things we need to accomplish is setting up reasonable file permissions and ownership. We need to be able to write to these files as a regular user, and we need the web server to also be able to access and adjust certain files and directories in order to function correctly.
We’ll start by assigning ownership over all of the files in our document root to our username. We will use sammy
as our username in this guide, but you should change this to match whatever your sudo
user is called. We will assign group ownership to the www-data
group:
Next, we will set the setgid
bit on each of the directories within the document root. This causes new files created within these directories to inherit the group of the parent directory (which we just set to www-data
) instead of the creating user’s primary group. This just makes sure that whenever we create a file in the directory on the command line, the web server will still have group ownership over it.
We can set the setgid
bit on every directory in our WordPress installation by typing:
There are a few other fine-grained permissions we’ll adjust. First, we’ll give group write access to the wp-content
directory so that the web interface can make theme and plugin changes:
As part of this process, we will give the web server write access to all of the content in these two directories:
This should be a reasonable permissions set to start with. Some plugins and procedures might require additional tweaks.
Now, we need to make some changes to the main WordPress configuration file.
When we open the file, our first order of business will be to adjust some secret keys to provide some security for our installation. WordPress provides a secure generator for these values so that you do not have to try to come up with good values on your own. These are only used internally, so it won’t hurt usability to have complex, secure values here.
To grab secure values from the WordPress secret key generator, type:
You will get back unique values that look something like this:
Warning
It is important that you request unique values each time. Do NOT copy the values shown below!
Outputdefine('AUTH_KEY', '1jl/vqfs<XhdXoAPz9 DO NOT COPY THESE VALUES c_j{iwqD^<+c9.k<J@4H');
define('SECURE_AUTH_KEY', 'E2N-h2]Dcvp+aS/p7X DO NOT COPY THESE VALUES {Ka(f;rv?Pxf})CgLi-3');
define('LOGGED_IN_KEY', 'W(50,{W^,OPB%PB<JF DO NOT COPY THESE VALUES 2;y&,2m%3]R6DUth[;88');
define('NONCE_KEY', 'll,4UC)7ua+8<!4VM+ DO NOT COPY THESE VALUES #`DXF+[$atzM7 o^-C7g');
define('AUTH_SALT', 'koMrurzOA+|L_lG}kf DO NOT COPY THESE VALUES 07VC*Lj*lD&?3w!BT#-');
define('SECURE_AUTH_SALT', 'p32*p,]z%LZ+pAu:VY DO NOT COPY THESE VALUES C-?y+K0DK_+F|0h{!_xY');
define('LOGGED_IN_SALT', 'i^/G2W7!-1H2OQ+t$3 DO NOT COPY THESE VALUES t6**bRVFSD[Hi])-qS`|');
define('NONCE_SALT', 'Q6]U:K?j4L%Z]}h^q7 DO NOT COPY THESE VALUES 1% ^qUswWgn+6&xqHN&%');
These are configuration lines that we can paste directly in our configuration file to set secure keys. Copy the output you received now.
Now, open the WordPress configuration file:
Find the section that contains the dummy values for those settings. It will look something like this:
. . .
define('AUTH_KEY', 'put your unique phrase here');
define('SECURE_AUTH_KEY', 'put your unique phrase here');
define('LOGGED_IN_KEY', 'put your unique phrase here');
define('NONCE_KEY', 'put your unique phrase here');
define('AUTH_SALT', 'put your unique phrase here');
define('SECURE_AUTH_SALT', 'put your unique phrase here');
define('LOGGED_IN_SALT', 'put your unique phrase here');
define('NONCE_SALT', 'put your unique phrase here');
. . .
Delete those lines and paste in the values you copied from the command line:
. . .
define('AUTH_KEY', 'VALUES COPIED FROM THE COMMAND LINE');
define('SECURE_AUTH_KEY', 'VALUES COPIED FROM THE COMMAND LINE');
define('LOGGED_IN_KEY', 'VALUES COPIED FROM THE COMMAND LINE');
define('NONCE_KEY', 'VALUES COPIED FROM THE COMMAND LINE');
define('AUTH_SALT', 'VALUES COPIED FROM THE COMMAND LINE');
define('SECURE_AUTH_SALT', 'VALUES COPIED FROM THE COMMAND LINE');
define('LOGGED_IN_SALT', 'VALUES COPIED FROM THE COMMAND LINE');
define('NONCE_SALT', 'VALUES COPIED FROM THE COMMAND LINE');
. . .
Next, we need to modify some of the database connection settings at the beginning of the file. You need to adjust the database name, the database user, and the associated password that we configured within MySQL.
The other change we need to make is to set the method that WordPress should use to write to the filesystem. Since we’ve given the web server permission to write where it needs to, we can explicitly set the filesystem method to “direct”. Failure to set this with our current settings would result in WordPress prompting for FTP credentials when we perform some actions.
This setting can be added below the database connection settings, or anywhere else in the file:
. . .
define('DB_NAME', 'wordpress');
/** MySQL database username */
define('DB_USER', 'wordpressuser');
/** MySQL database password */
define('DB_PASSWORD', 'password');
. . .
define('FS_METHOD', 'direct');
Save and close the file when you are finished.
Now that the server configuration is complete, we can complete the installation through the web interface.
In your web browser, navigate to your server’s domain name or public IP address:
http://server_domain_or_IP
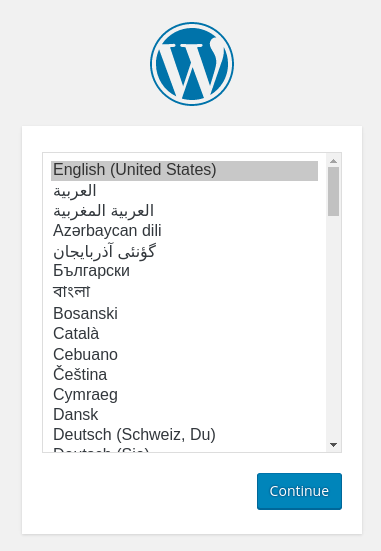
Select the language you would like to use:
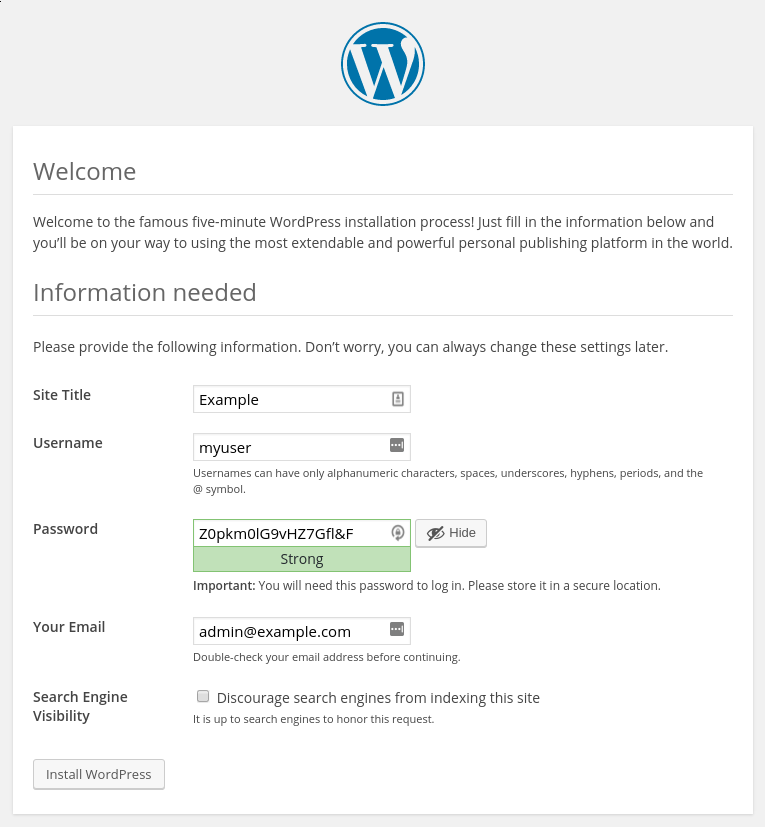
Next, you will come to the main setup page.
Select a name for your WordPress site and choose a username (it is recommended not to choose something like “admin” for security purposes). A strong password is generated automatically. Save this password or select an alternative strong password.
Enter your email address and select whether you want to discourage search engines from indexing your site:
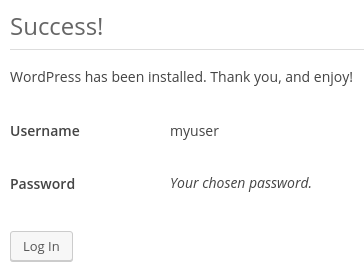
When you click ahead, you will be taken to a page that prompts you to log in:
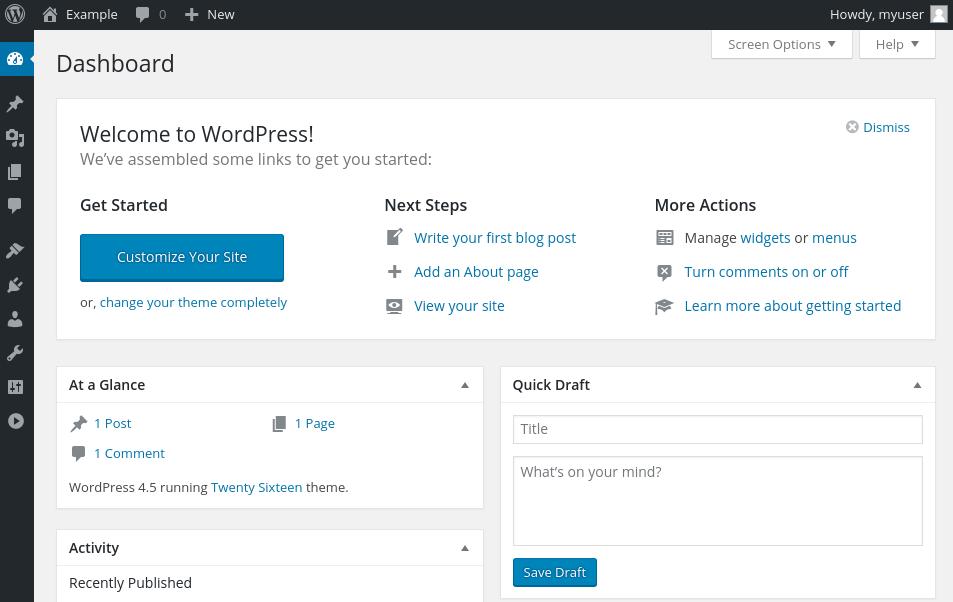
Once you log in, you will be taken to the WordPress administration dashboard:
As WordPress upgrades become available, you will be unable in install them through the interface with the current permissions.
The permissions we selected here are meant to provide a good balance between security and usability for the 99% of times between upgrading. However, they are a bit too restrictive for the software to automatically apply updates.
When an update becomes available, log back into your server as your sudo
user. Temporarily give the web server process access to the whole document root:
Now, go back the WordPress administration panel and apply the update.
When you are finished, lock the permissions down again for security:
This should only be necessary when applying upgrades to WordPress itself.
WordPress should be installed and ready to use! Some common next steps are to choose the permalinks setting for your posts (can be found in Settings > Permalinks
) or to select a new theme (in Appearance > Themes
). If this is your first time using WordPress, explore the interface a bit to get acquainted with your new CMS.
Thanks for learning with the DigitalOcean Community. Check out our offerings for compute, storage, networking, and managed databases.
This textbox defaults to using Markdown to format your answer.
You can type !ref in this text area to quickly search our full set of tutorials, documentation & marketplace offerings and insert the link!
Excellent documentation squire. The most thorough treatment of installing WordPress from scratch that I’ve seen. Adjusting ownership & permissions is crucial and is often skated over superficially – these explanations really help understand what’s needed & enable people to fix permission problems (not that they are likely to happen). One suggested amendment :
I always give an explicit character set and collation when creating the database to avoid any problems later. So :
Just a thought.
markpea
@markpea: Thanks for the feedback! Also, excellent advice. I updated the article to include your suggestion. Being explicit about the encoding is definitely a step in the right directly. Thanks!
Hello;
Do you mind giving us the FULL conf? /etc/nginx/sites-available/default
@iamkingsleyf: Hello. Your
/etc/nginx/sites-available/default
file will vary depending on how you’ve modified it in the past. In the context of this guide, this mainly means the difference between whether you followed the Let’s Encrypt prerequisite or the self-signed certificate one.If you used the Let’s Encrypt guide, it will likely look something like this when you are finished. If, on the other hand, you followed the self-signed guide, your server block would probably end up looking a bit more like this.
I’ll be working in the next week or two to standardize these two procedures so that their recommendations are more aligned. Hope that helps.
Thanks… i will try this out
I use Let’s Encrypt in my Nginx Server Blocks (Virtual Hosts). and I try to install Wordpress with this tutorial, but I got error
“nginx: [emerg] the size 52428800 of shared memory zone “SSL” conflicts with already declared size 10485760 in /etc/nginx/sites-enabled/puppymemo.com:46 nginx: configuration file /etc/nginx/nginx.conf test failed”.
when I change “ssl_session_cache shared:SSL:50m;” to “ssl_session_cache shared:SSL:10m;”, I got another error
“nginx: [emerg] BIO_new_file(”/etc/letsencrypt/live/www.puppymemo.com.com/fullchain.pem") failed (SSL: error:02001002:system library:fopen:No such file or directory:fopen(‘/etc/letsencrypt/live/www.puppymemo.com.com/fullchain.pem’,‘r’) error:2006D080:BIO routines:BIO_new_file:no such file) nginx: configuration file /etc/nginx/nginx.conf test failed"
How can I solve it? T^T
Good, Thanks
I assume this is the php 7 installation of your series with LEMP stack? If so, how much faster is it compared to the DO 1-click install of 14.04 worpdress package?
Any recommendations on further tweaking for speed, cache, etc?
Thank you for a great series on how to do things!
For WordPress some additional packages for PHP7 are needed, not covered in LEMP tutorial. At least php7-xml and GD or Imagick. Possibly all of these ‘apt-get install php7.0-fpm php7.0-mysql php7.0-curl php7.0-gd php7.0-json php7.0-mcrypt php7.0-opcache php7.0-xml’? Copied from another tutorial.
@arijuki: Thanks for the heads up!
WordPress as an organization is very evasive in answering the question of which PHP extensions should be installed. The general answer is that they don’t strictly need any of them, but can leverage some of them if they are available. That makes the decision of which to install a bit tricky. The plugin question further complicates this.
That being said, I’ve edited the article to include a step that includes some of the more common ones. Thanks for pointing that out!
It appears that the tutorial says:
sudo apt-get install php-curl php-gd php-mbstring php-mcrypt php-xml php-xmlrpc
When the proper command would be:
sudo apt-get install php7.0-curl php7.0-gd php7.0-mbstring php7.0-mcrypt php7.0-xml php7.0-xmlrpc
Just pointing it out. Thank you!
@pkopalek Hey there. The generic packages (without the 7.0) pulls in the version specific packages. You can see this by typing:
As you can see from the first highlighted section,
php7.0-curl
is being pulled in when thephp-curl
package is installed. As the second highlighted section shows, this generic package is tied to the default PHP version, so it should work even if the default PHP version changes.While the default PHP version won’t change during Ubuntu 16.04’s lifetime, the more generic command means it’s more likely that you can use that command as-is if you need to port this guide to another version of Ubuntu down the road. At least that was my thought process in including the generic package in this guide. It will result in the same thing, but is a more portable command.
hey which version of lemp should i use? 16.04 or 14.04 ? i am gonna install wordpress on it.
I migrated my Drupal7 sites from centos7 to ubuntu16 with the help of this guide. Now Drupal sites don’t send emails after registration or in the other events. I tried to setup postfix with different options yet no result. Will you please advice what are the modifications or settings to be done? There was no additional setup required when it was in CentOS.
I solved the issue by reinstalling postfix with the help of this. Now it works as expected.
You can use this stack script for one click lemp + wordpress installation :
https://github.com/mirzazeyrek/lemp-wordpress-stack
This comment has been deleted
@jellingwood So what is your recommendation if I DO want automatic updates and don’t want to manually keep chown-ing the document root?
WP permission issues always seem to crop up when a non www-data user owns the WordPress files and I haven’t yet found a good tutorial that strikes the balance that I actually want, which is having it owned by a non-priviledged user but still able to auto update wordpress core.
@riolowry - Did you ever find a nice way to accomplish this?
None of these tutorials work for me.
Hmm, got to the end of step 5, and when I browse to my server’s IP, I’m still seeing the Nginx welcome page. Am I supposed to move some files from /etc/nginx/sites-available/ to /etc/nginx/sites-enabled ?
I reviewed my steps, and my issue was in my /etc/nginx/sites-available/default file. Thanks for posting above what you ended up with the file, as I was able to tell that I had put lines in the incorrect blocks. All is good now :)
Thanks for this awesome tutorial. At first time, It was complete failure at this point “Nginx default server block file” while editing. I failed to identify the error, after that completely destroyed that droplet and started with fresh droplet. I took almost like seven hours for me to get live. PS: A complete newbie here . Thank you :)
Thank you for putting this tutorial together.
I am currently attempting to install wordpress on my default LEMP Droplet and it’s giving is issues.
Then I had issues with “apt-get install php-curl php-gd php-mbstring php-mcrypt php-xml php-xmlrpc”
This command came back with:
" Reading package lists… Done Building dependency tree Reading state information… Done E: Unable to locate package php-curl E: Unable to locate package php-gd E: Unable to locate package php-mbstring E: Unable to locate package php-mcrypt E: Unable to locate package php-xml E: Unable to locate package php-xmlrpc "
This is how far I got with the installation and have no idea what is giving me these errors on the one click LEMP Droplet.
Follow up - I just noticed that the default one click LEMP Droplet is 14.04 and this tutorial is for 16.04.
Thank you anyway.
I get this error (http://imgur.com/hDUiJch) when I run the command:
Any ideas?? I followed the tutorial exactly to this point. Curl is installed.
Answer pointed out here
wget https://wordpress.org/latest.tar.gz worked for me
It’s probably a good idea to disable xmlrpc.php to protect against DDOS attacks. More at https://www.digitalocean.com/community/tutorials/how-to-protect-wordpress-from-xml-rpc-attacks-on-ubuntu-14-04
Hi! Great tutorial, really enjoyed it -
I am having getting a ‘404 not found’ error from nginx.
I’m running Ubuntu 16.04 LEMP server, was working fine - tested phpinfo and was OK until I edited …/sites-available/default I deleted modified default file and restored a backup and now it still doesn’t work (phpinfo file showing 404 error as well).
Any ideas what might have happened?
Thanks! -Avery
Step 6: Complete the Installation Through the Web Interface
I have gotten to Step 6 with no errors and no omissions yet when I visit my site I only see the “Welcome to niginx!” page. What’s going on?
It seems the
GRANT
statement in the mysql command below is deprecated and no longer works.Here’s the error I’m getting:
Can someone please provide me with the new way to do this.
It should be GRANT ALL PRIVILEGES on wordpress.* etc.
I find multiple references that say to do the following, is it not important to do that?
The wp-config.php is an important file as it contains your database connection settings, table prefix, security keys, and other sensitive information.
To deny public access to
wp-config.php
, go in the file/etc/nginx/sites-available/default
and add the following code inside theserver { }
block:None of these tutorials work for me.
Hmm, got to the end of step 5, and when I browse to my server’s IP, I’m still seeing the Nginx welcome page. Am I supposed to move some files from /etc/nginx/sites-available/ to /etc/nginx/sites-enabled ?
I reviewed my steps, and my issue was in my /etc/nginx/sites-available/default file. Thanks for posting above what you ended up with the file, as I was able to tell that I had put lines in the incorrect blocks. All is good now :)
Thanks for this awesome tutorial. At first time, It was complete failure at this point “Nginx default server block file” while editing. I failed to identify the error, after that completely destroyed that droplet and started with fresh droplet. I took almost like seven hours for me to get live. PS: A complete newbie here . Thank you :)
Thank you for putting this tutorial together.
I am currently attempting to install wordpress on my default LEMP Droplet and it’s giving is issues.
Then I had issues with “apt-get install php-curl php-gd php-mbstring php-mcrypt php-xml php-xmlrpc”
This command came back with:
" Reading package lists… Done Building dependency tree Reading state information… Done E: Unable to locate package php-curl E: Unable to locate package php-gd E: Unable to locate package php-mbstring E: Unable to locate package php-mcrypt E: Unable to locate package php-xml E: Unable to locate package php-xmlrpc "
This is how far I got with the installation and have no idea what is giving me these errors on the one click LEMP Droplet.
Follow up - I just noticed that the default one click LEMP Droplet is 14.04 and this tutorial is for 16.04.
Thank you anyway.
I get this error (http://imgur.com/hDUiJch) when I run the command:
Any ideas?? I followed the tutorial exactly to this point. Curl is installed.
Answer pointed out here
wget https://wordpress.org/latest.tar.gz worked for me
It’s probably a good idea to disable xmlrpc.php to protect against DDOS attacks. More at https://www.digitalocean.com/community/tutorials/how-to-protect-wordpress-from-xml-rpc-attacks-on-ubuntu-14-04
Hi! Great tutorial, really enjoyed it -
I am having getting a ‘404 not found’ error from nginx.
I’m running Ubuntu 16.04 LEMP server, was working fine - tested phpinfo and was OK until I edited …/sites-available/default I deleted modified default file and restored a backup and now it still doesn’t work (phpinfo file showing 404 error as well).
Any ideas what might have happened?
Thanks! -Avery
Step 6: Complete the Installation Through the Web Interface
I have gotten to Step 6 with no errors and no omissions yet when I visit my site I only see the “Welcome to niginx!” page. What’s going on?
It seems the
GRANT
statement in the mysql command below is deprecated and no longer works.Here’s the error I’m getting:
Can someone please provide me with the new way to do this.
It should be GRANT ALL PRIVILEGES on wordpress.* etc.
I find multiple references that say to do the following, is it not important to do that?
The wp-config.php is an important file as it contains your database connection settings, table prefix, security keys, and other sensitive information.
To deny public access to
wp-config.php
, go in the file/etc/nginx/sites-available/default
and add the following code inside theserver { }
block:This was an amazing tutorial. yeah, I have setup WordPress on a vps for the first time in my life :) **Thank you very much Justing **
Great tutorial as always Justin. One thing that seems to be missing is any mention of the need for the following line to be added in your nginx sites-available file:
I guess that is already included in the default file?
@Brinman Thanks for the comment.
Uncommenting the
fastcgi_pass
line is something that the prerequisite guide on installing LEMP covers. If you follow the prerequisite tutorials, you should start this tutorial with a working LEMP server with that line in the configuration file. Hope that helps.Great tutorial.
I followed these tutorials step by step and got it all working initial server setup guide Install a LEMP stack Install ssl with LetsEncrypt.
In none of these was any mail client installed to be used by wordpress. Is this no longer necessary with the latest wordpress and ubuntu 16.04?
Cheers,
Ramiro
@rejkpp You’re right. These steps don’t include installing and configuring an MTA. We do have a guide on how to set up Postfix as a send-only SMTP server which sounds like what you’re looking for. Hope that helps.
I have seen that one as well. Thanks for clarifying. That would work, however I have nginx server blocks setup in order to run multiple wordpress websites.
That guide wouldn’t be ideal, since only one mail server name is chosen for the machine, whilst there are actually other sites hosted on there as well with other domain names. Any suggestions?
Could I request a full server block example from someone?
I continue to download index.php. Mine is as follows:
Thanks in advance for any help!
@ScriptMyJob Were you able to successfully execute the
info.php
script in the prereq LEMP guide? It’s unclear to me when the problem starts to develop.The two things I’d check right away would be: Double check that you restarted Nginx after making your changes and double check that the
server_name
directive in the file is pointed at your actual IP address or domain name (if it isn’t, nothing in the entire server block will actually be matched).That being said, the file looks pretty similar to the one in this guide (looks like you skipped the TLS/SSL, but that shouldn’t affect the server’s ability to execute PHP. I just ran through the guide again w/o SSL to verify and this is what my
/etc/nginx/sites-enabled/default
file looks like (PHP is executing correctly):Hope that helps. Good luck!
How would I modify this so that wordpress was actually running at the /blog path? While keeping the root path on the nginx welcome page for example.
Hi, I had the same issue and lost a lot of time battling it. The solution is very simple, well at least in my case. All the server configuration should go in the second block in the nginx config file. I followed the self-signed certificate tutorial. I had all my config in the server block witch was there just to redirect to 443. When I moved everything to the 443 block everything worked. Here is my config file.:
server { listen 80 default_server; listen [::]:80 default_server; server_name my_ip; return 301 https://$server_name$request_uri; }
server {
}
This comment has been deleted
I was not able to install any plugins after completing this tutorial and I couldn’t figure it out for a while. Turns out, you need to add the write permission for the ‘www-data’ group on the wp-content/upgrade folder for installing plugins as well. I think you may have missed that above.
EDIT : I’m refering to installing the plugins from Wordpress’s admin dashboard, not manually.
Noticed I couldn’t install/update plugins via the WordPress admin.
While not mentioned in the article, adding write access to the upgrade folder solves this: sudo chmod g+w /var/www/html/wp-content/upgrade
Please update how the final nginx page should look like, under the sites-available/default page
I followed this tutorial and at the end of it I get the 404 page. I had
in but that was giving the generic 404 - so I went back to
and I get a custom 404 I built. HOWEVER I am not getting the Wordpress index.php (gives the 404) but I can get the default DigitalOcean index.html
NM - I am an idiot. I had commented out the root and index lines for the main server…
Thank you for this tutorial.
I’m facing a strange issue and I don’t know how to solve it. I already have my own server with 4 services on it (website, plex …) everything running smoothly with nginx and a SSL certificat thank to Let’s Encrypt.
I follow this documentation and change juste what I needed (like
wp.mydomain.com
for nginx).I keep listening on 80 for this subdomain. And I didn’t add a certifical for this url.
But when I’m trying to access
wp.mydomain.com
all my browser told me that my connection is not private with the error :NET::ERR_CERT_COMMON_NAME_INVALID
Any idea why ?
After editing the file /etc/nginx/nginx.conf to add the location block about the robots.txt and favicon I got the following error:
[emerg] location “/favicon.ico” is outside location “/.well-known” in /etc/nginx/sites-enabled/default:27
sudo nginx -t will return the above
This comment has been deleted
When I attempt to login to mysql as root using the root password I set up following the instructions, How To Install Linux, Nginx, MySQL, PHP (LEMP stack) in Ubuntu 16.04 I get a login error,
Any suggestions?
I actually just trashed the droplet and started over again.
This time I didn’t use
sudo mysql_secure_installation
from the above tutorial and the install went smoothly. No, it wasn’t because I forgot the password or entered it incorrectly.Any recommendations about how to install into a subdirectory? I have an application where the website is in php and where the blog uses wordpress.
Assume the subdirectory is called
blog
, then installing wordpress to/var/www/html/blog
works but when I try to complete the installation athttps://ip_address/blog
I’m missing css, etc.Checking the wordpress page source shows that wordpress loads external files from
https://ip_address
nothttps://ip_address/blog
.The examples on the web to install wordpress to a subdirectory are for apache, not LEMP.
Following the advice in the question Nginx - Wordpress in a Sub-directory also did not work.
@rshpeley I would try combining the Nginx configuration from this tutorial with the one @asb shared in that question.
Start with the Nginx config that this guide gives you, then change the
location /
block to the one from the question you linked to. Add thelocation /wordpress
block shown in the question as well. Hopefully that works.For future reference, “_____ did not work” is very difficult to troubleshoot, so providing additional details about what is going wrong or what you are seeing is helpful.
Hi, I find I cannot install the wordpress plugin and it displays cannot create directory. I have tried to using chown -R and modified 775, but it did not work.
Has someone faced this error: “Error establishing a database connection”?
Great tutorial!
But permalinks didn’t work with post names (eg, example.com/my-first-post) unless I changed the nginx setting from:
try_files $uri $uri/ /index.php$is_args$args;
to:
try_files $uri $uri/ /index.php?$args;
Hope this helps!
Can you tell me how to setup multiple WordPress installations on the same host?
Also, after following the guide I’ve got a blank wordpress installed at http://{my IP} but it doesn’t work on sub.mydomain.com that I assigned to the server. Can you explain how to set / fix that?
This seems to be out of date. When I follow these instructions I get 404 on every page except the root and also the caching does not work according to every website speed tester I’ve found. Is there an update?
I know I am so irritated, I keep getting a 502 error. idk wtf is going on.
I’ve installed my server with this tutorial series.
I’m using WooCommerce. And Using Iyzico payment system for credit cards. Web site working fine.
When I want to pay with İyzico, the payment process happens but I get 403 Forbidden error instead of thanks page.
I found these error logs in /var/log/nginx/error.log
2017/05/23 10:49:13 [error] 1513#1513: *2694 FastCGI sent in stderr: "PHP message: PHP Warning: Declaration of Iyzipay\Client\Ecom\Payment\Response\Mapper\EcomPaymen$ 2017/05/23 10:49:39 [error] 1513#1513: *2694 FastCGI sent in stderr: "PHP message: PHP Warning: Declaration of Iyzipay\Client\Ecom\Payment\Response\Mapper\EcomPaymen$ PHP message: PHP Warning: Declaration of Iyzipay\Client\Ecom\Payment\Response\Mapper\EcomPaymentAuthResponseMapper::mapResponse(Iyzipay\Client\Ecom\Payment\Response$ PHP message: PHP Warning: Declaration of Iyzipay\Client\Ecom\Payment\Response\Mapper\EcomRetrievePaymentCheckoutFormAuthResponseMapper::mapResponse(Iyzipay\Client\Ec$
I’ve realized now. When I want to empty trash, getting same error.
Has anyone tried to upload a large JPEG or PNG? My Wordpress gives HTTP error sometimes. Also, the images are not cropped to the sizes set in Media settings.
Make sure that your php settings for max_file_upload_size is larger than the size of images you are uploading. I don’t think this is an error related to wordpress but php settings.
this have to be with SUDO.
sudo mysql -u root -p
otherwise it prints: ERROR 1045 (28000): Access denied for user ‘root’@‘localhost’ (using password: NO)
@tsotne The
(using password: NO)
seems to indicate that there’s a problem here (did you set up a password when you installed MySQL? This tutorials assumes that you did). If you are providing the-p
flag, the MySQL client should be prompting you for a password which will allow you to authenticate regardless of your system user’s permissions.If you are required to use
sudo
, it’s usually an indication that you did not set up a password on installation, which causes MySQL to configure theroot
account using theauth_socket
plugin. If you want to be able to access the account from a non-root
system user, you can set a password and change the MySQLroot
account to use password authentication by specifying themysql_native_password
plugin once logged in by typing:That should allow you to log in using a password without using
sudo
. The Ubuntu package configures this automatically if you select a password during the original MySQL installation. Hope that helps!I set it up from provided ‘user-data’ scripts. its possible I missed something.
i successfully built the wordpress and it was working. then i decided to play with subdomains and successfully created some subdomains. and tried to move my wordpress from tsotnep.com to blog.tsotnep.com, but it didnt work. when I try to visit webpage blog.tsotnep.com instead of wordpress, it downloads a file with this content: https://pastebin.com/758Vw2vY
why it does not work?
/etc/nginx/sites-available/blog.tsotnep.com https://pastebin.com/rW1c5tTM
/etc/nginx/sites-available/default https://pastebin.com/9cGrTzY2
p.s. I created symlinks to sites-enabled p.s. i only renamed folder html to blog.tsotnep.com, didn’t changed any content in it. p.s. i did the permissions similarly p.s. CNAME and A records are done from dropblet side. p.s. other subdomains are working well. p.s. in /var/www/html/index.html i put default content and it works as well.
@tsotne It’s a bit hard to tell what you were attempting to do with your changes.
Here is what is currently happening:
You request
blog.tsotnep.com
in your web browser using HTTP (port 80).Nginx checks the
listen
directive in each of its server blocks to find candidates that can serve content on port 80. It finds two candidates: the one defined in/etc/nginx/sites-available/blog.tsotnep.com
and the first server block defined in teh/etc/nginx/sites-available/default
file.To determine which of these should be used to serve the request, Nginx then looks at the
server_name
in each of the candidates. In thedefaults
file, theserver_name
s aretsotnep.com
andwww.tsotnep.com
, which don’t match the request. In theblog.tsotnep.com
server block, theserver_name
is set toblog.tsotnep.com
andwww.blog.tsotnep.com
. This does match the request, so Nginx selects this server block to serve the request.Nginx then looks at the requested URI (the part after the domain name). In this case, since you’re requesting the base domain, the URI is
/
.It looks at the
location
blocks to see which one matches best using a specific algorithm (you can find out more details here). The onlylocation
that matches the request is the general one defined aslocation /
.Looking at the configuration of that location, Nginx finds the
try_files
directive, which attempts a sequence of steps to try to serve the content. Since the URI in the request is/
, this matches the$uri/
item, which means that the request matches if you interpret it as a directory.When Nginx is asked to serve a directory, it looks at the value of the
index
directive in the current scope. Theindex
set in theserver
block is inherited by the location block, so Nginx looks at that.It checks the directory in question (the
root
directory with the request URI appended, which in this case is just a slash, meaning that the/var/www/blog.tsotnep.com
is checked) for the first file listed in theindex
directive, which isindex.php
. It finds this file, so it delivers it to the file. That is what you are seeing in your browser.If you want requests to PHP files to be proxied to your PHP-FPM process, you will need to tell Nginx to do so. Currently the configuration necessary to pass PHP requests to PHP-FPM is living in the second server block in the
default
file, which is configured to listen on port 443 to HTTPS requests.If you just want to move your WordPress installation to a new domain, the easiest route is to just modify the
default
file and change theserver_name
directives of both of your server blocks to respond toblog.tsotnep.com
. Make sure you remove the link at/etc/nginx/sites-enabled/blog.tsotnep.com
to avoid conflicts. After you make the changes within Nginx, you’ll probably also have to make a change within WordPress to change the URL that it expects to answer requests for. You can find out how to do that here.If you want to use the base
tsotnep.com
domain for something else, you can create a new server block for that which doesn’t need the PHP proxying configuration. I hope that helps get you on the right track.If you’re running MySQL 5.5.3 or higher (or MariaDB 10.x), then the default character set should be set to
utf8mb4
. This can store 4 byte characters, thus can handle any Unicode character. As for collation, go forutf8mb4_unicode_520_ci
, as it sorts characters in the “most correct” way. So, following @markpea 's comment, I ran:CREATE DATABASE wordpress DEFAULT CHARACTER SET utf8mb4 COLLATE utf8mb4_unicode_520_ci;
For more info, see this article for character set and this article for collation choices.
can you please explain how to copy and then paste into nano through putty ? i tried shift+ctrl+v i tried shift+ctrl+c i tried shift+ctrl+b plus other variations with and without shift as well as every mouse button.
I think this article should be expanded to show people how to set permissions correctly for the /wp-content/uploads and upgrade folders. Otherwise people just go off and set things to 777 (as the WordPress.org forums so often suggest) and that’s no good for anyone.
What’s the difference in following this tutorial vs. using the WordPress one-click app?
Hi @jellingwood
Great tutorial!!! I need one help from your side. After following all the steps, finally when I am loading the site, blank page is appearing. index.html it is loading while index.php it is showing blank page, can you dig a bit and put some light to solve this issue. I have installed more then 3 times from the scratch with a sudo user.
Can this tutorial be used with nginx instead of Apache? I Just followed the LEMP installation guide with nginx.
I’m experiencing some unexpected behavior on my WordPress install. I followed this guide and have a working multisite install with subdomains. However…
If you go to a page that doesn’t exist on the main network domain you are redirected to the home page instead of the 404 page.
If you go to a page that doesn’t exist on an existing subdomain install, the url does not change but the home page is rendered instead of the 404 page.
Is this expected or am I missing something in my server/wordpress config? Everything else seems fine, it’s really just these two url issues. I just want my 404 page to show up as expected. Any help would be much appreciated.
Amazing article.
Thank you for this fantastic guide! Very informative and worked like a charm!
I can’t update plugins from admin. I get this error: Update Failed: Could not create directory.
Why?
Nginx doesnt use same path for www anymore it seems. The correct path i found was /usr/share/nginx/html/ Then i made a directory for /wordpress
Please double-check my information and correct me if i’ve been doing it wrong, please =)
Hi Justin thanks for this great tutorial. On Step 4: Download WordPress this command did not work for me:
$ curl -O https://wordpress.org/latest.tar.gz
but this command downloaded the wordpress
$ wget http://wordpress.org/latest.tar.gz
Made it all the way through the tutorial. “sudo nginx -t” without any errors. Restarted Nginx, Then when I go to my url, Im still getting the same “Success! The example.com server block is working!” - From the previous successful server block setup… cannot access any part of WordPress. FTP’d and verified they are there.
Hello, thanks for this guide, it’s useful. I have a question.
When I created my LEMP droplet from a one-click app, I realized the default files permissions is setup 775 for directories and 664 for files. I wonder if keeping those permissions is secure/ok according the steps on this tutorial I mean the owner user setup etc… OR those permissions need to be changed to 755 for directories and 644 for files.
Thanks in advance for your reply!
Great manual! Unfortunately, after I followed it, my shiny apps stopped working as they used to. They can still be loaded by going to https://<server_name>/shiny/<app_name> but they became unusable as the standard shiny user interface disappeared, and https://<server_name>/rstudio does not load at all. Is it possible to host a WordPress website and run shiny and rstudio servers at the same time?
Dear Author of this article,
Thank you for a great article, however it seems that you missed couple of steps. The nginx config did not work for me as I was getting 403. I think everyone reading this article should acknowledge that nginx config needs more than what you show. Here is the nginx config that I ended up using to get wordpress working.
LEMP > Cert > Wordpress http://cryptosanctum.com forwards to https… which brings up the default server block page of html.
Any reason why its not forwarding correctly?
I’m getting error !
[error] 23258#23258: *237 FastCGI sent in stderr: "PHP message: PHP Parse error: syntax error, unexpected ‘define’ (T_STRING) in /var/www/example.com/html/example/wp-config.php on line 32" while reading response header from upstream, client: 141.101.76.187, server: localhost, request: “GET /example/index.php HTTP/1.1”, upstream: “fastcgi://unix:/var/run/php/php7.2-fpm.sock:”, host: “www.example.com”
do we have to add the try_files and cache (Step 2) to every server block or just the default? I ask because I followed the steps to do the server blocks before this step.
Need help How to redirect my ip to domain? thank you
Excellent work. After Installing when I am trying to install plugins or themes, the message showing **Installations failed: could not create directory" Please help me … thanks…